
Note: HITS is limited to four base tax codes. Supplemental Tax allows users to apply additional tax layers (such as city, county, and state) as needed.
IMPORTANT: Please note that HITS Support is unable to provide guidance on tax rates. For assistance with city, county, and state tax percentages, we recommend contacting your CPA or local tax authority.
This document covers four (4) steps involved in setting up and applying Supplemental Tax:
1.) Adding Supplemental Tax Inventory Item(s)
2.) Creating The Supplemental Tax Package
3.) (Optional) Assigning a Customer a Specific Supplemental Tax Package
4.) Adjusting the Global Default Supplemental Tax Code (View/Edit Default Setting)
Step 1 – Adding Supplemental Tax Inventory Item(s)
Before creating a Supplemental Tax Package, you’ll first need to set up inventory items representing each individual tax rate (e.g., city, county, and state). These items are what make up the package that applies combined taxes during transactions.
✅ Prerequisites:
Before proceeding, gather the following:
-
- Each applicable tax rate percentage
- The preferred HITS department where these items should be listed for reporting reasons
🔧 To create supplemental tax inventory items:
Once you’ve gathered this information, follow these steps in HITS:
1.) Click Views > Administration & Utilities
2.) Inventory > Inventory Add/Edit/Delete
3.) Enter the Product# you wish to use (i.e., England City)
4.) Fill out the required fields:
-
-
-
- Select the appropriate Department,
- Enter a MFG SKU, Size, Description, and Raw Size
-
-
5.) Set the following options:
-
-
-
- For Tax select NO
- For Stock select NO
- For Goods/Service select SERVICE
- For UT1 select TAX (SUPPLEMENTAL)
-
-
6.) Click the Cost/Price Tab
7.) Enter the Tax Rate into Price 1 and all Factor Fields (Factor 1, 2, 3, and 4)
8.) Click Save
Example: If your city tax is 1.5%, create an item named “England City Tax” and assign 1.5 to all price fields. Repeat this process for other components such as county and state taxes.💡 If your county or state tax inventory items already exist, there’s no need to create duplicates. Check your inventory list before creating new items.
I.e., England City Tax (1 of 3 codes example)

Step 2 – Creating The Supplemental Tax Package
Once you’ve created the necessary supplemental tax inventory items (e.g., for city, county, and state), you can group them into a single Supplemental Tax Package. This package allows HITS to apply multiple tax rates together during transactions.
🔧 To create a new Supplemental Tax Package:
1.) Click Views > Administration & Utilities
2.) Corporate > Package Add/Edit
3.) Click OK
4.) Scroll down the list until you find the last Supplemental Tax Package (i.e., Supplemental Tax Package names usually have the city, county, or state tax name)

5.) Review the list and determine the next available Ticket# (i.e., In the example above, the next available Ticket# is -463)
6.) Right-Click anywhere on the table and select Create New Ticket
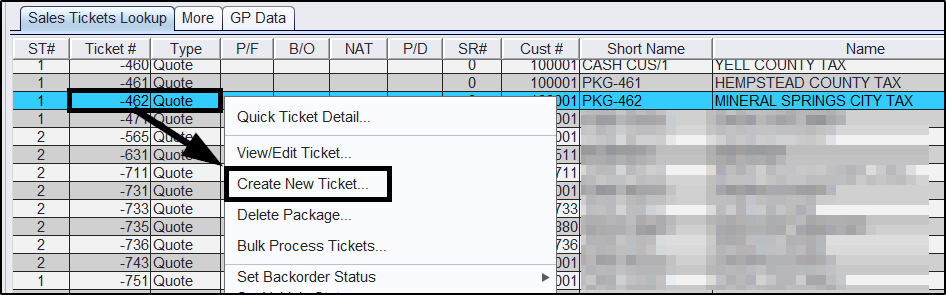
7.) Enter the next available number into the Ticket # field (i.e., From the example above, we would enter -463 [negative four hundred and sixty three])
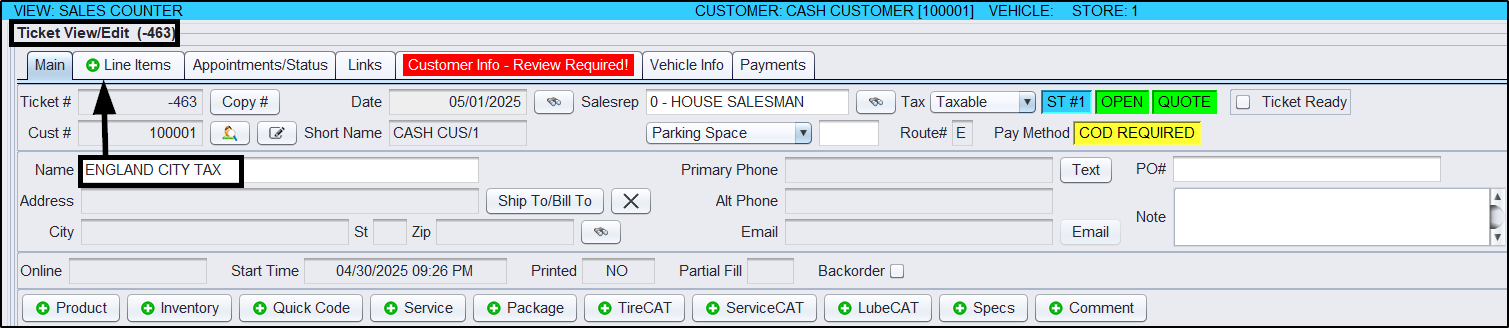
8.) Click the New Package button

9.) Type in the new Supplemental Tax Package Name (i.e., England City Tax) and click the Line Items tab
10.) Add the Supplemental Tax Inventory Items created from the FIRST Step to the ticket by entering in each Product# and clicking the Save Item button

11.) Once you have completed adding all items to the Package, click the Save & Return or Return button(s) to exit back to the Package Add/Edit screen

💡 Use a consistent naming convention for packages (e.g., “England City Tax Package”) to make them easier to locate in future.
Step 3 (Optional) – Assigning Customer’s Specific Supplemental Taxes
If certain customers require a specific combination of tax rates (e.g., based on their city or local jurisdiction), you can assign a Supplemental Tax Package directly to their account. Once assigned, all future transactions for that customer will automatically apply the defined supplemental taxes. 🔹 This step is optional and only needed when a unique tax package should be tied to a particular customer profile.
🔧 To assign a Supplemental Tax Package to a customer:
1.) Click Views > Sales Counter
2.) Customers > Account – View/Edit
3.) Enter the Customer# and press ENTER or use the binoculars to lookup and select the customer
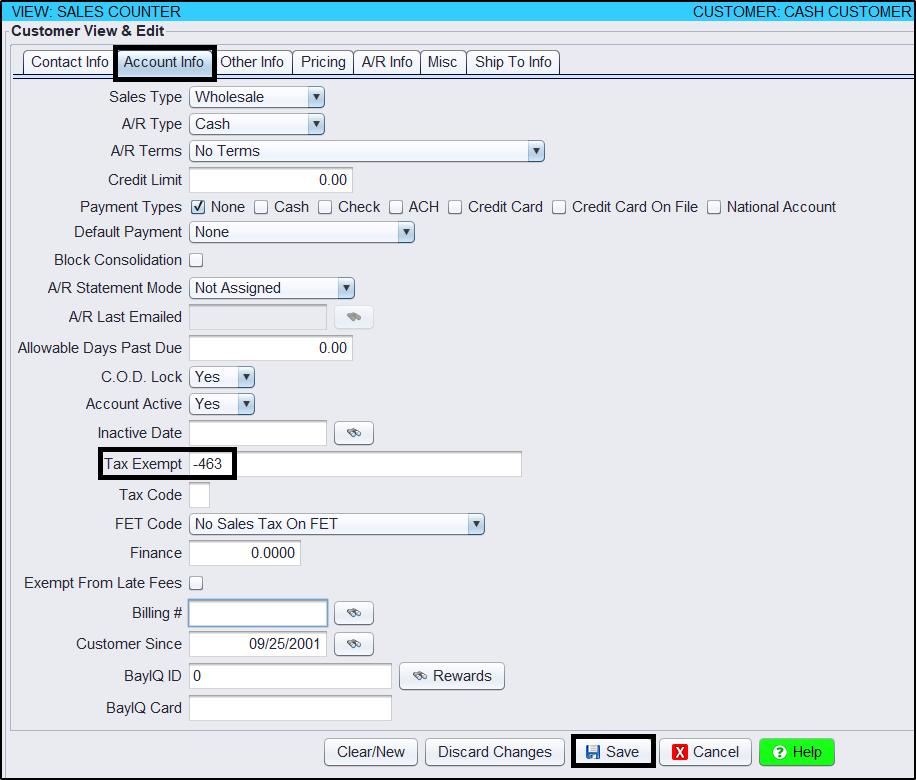
4.) Click the Account Info tab
5.) Enter the Package # into the “Tax Exempt” field (i.e., -463)
6.) Click Save before exiting this screen
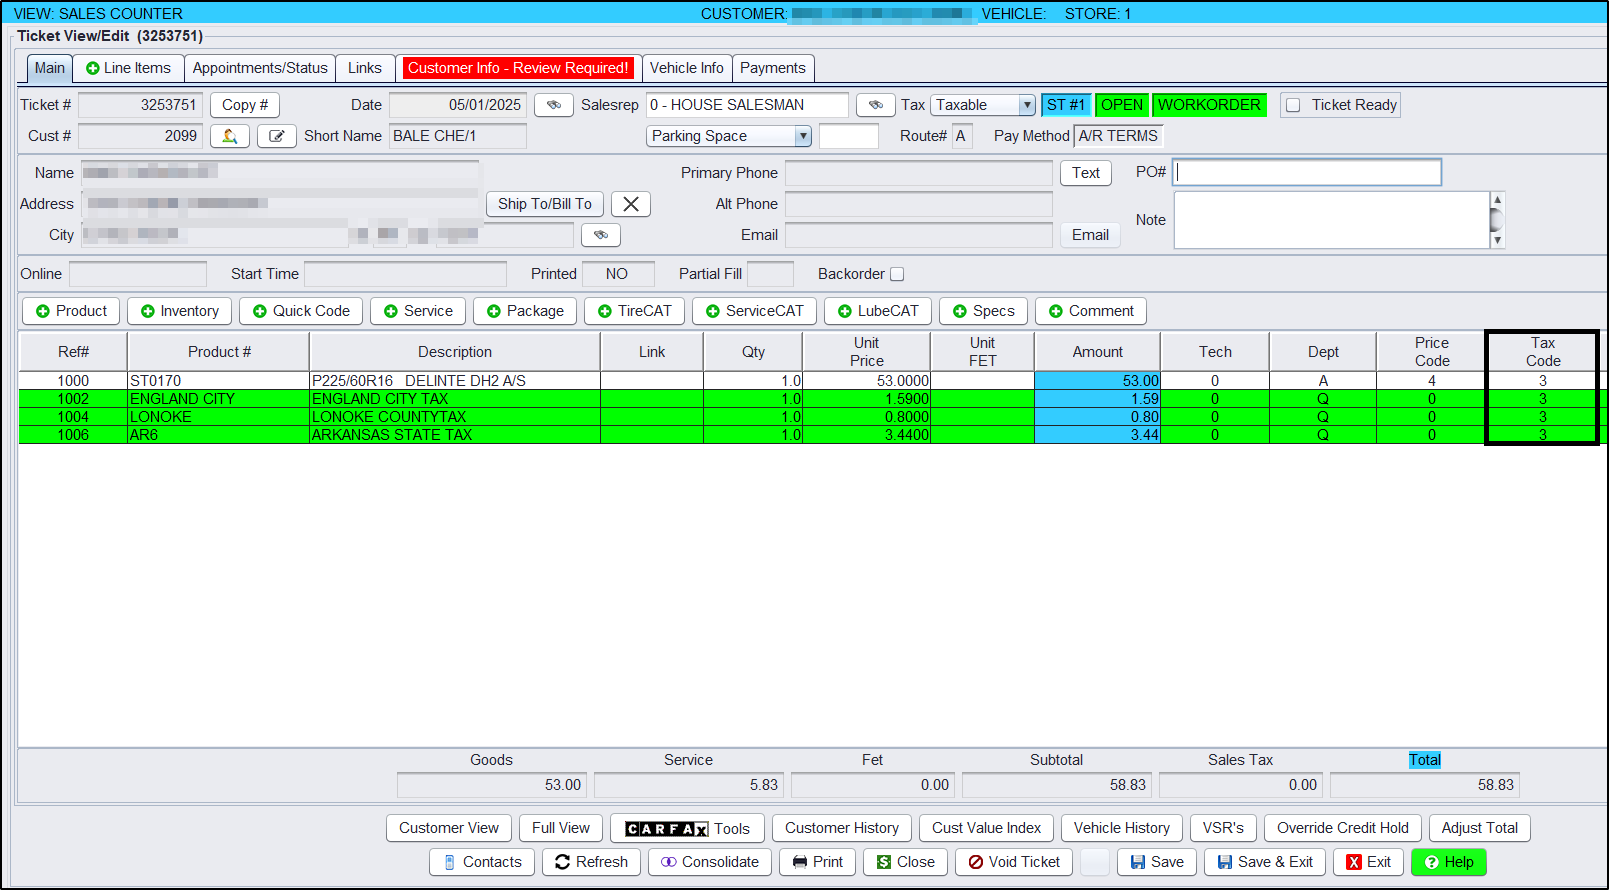
Once assigned, all future transactions for that customer will automatically include the taxes defined in the Supplemental Tax Package.
Example: If a customer is assigned Package -463 (which includes city, county, and state taxes), those rates will be automatically included on all future transactions tied to that customer. 💡 You can verify the taxes applied to a transaction by viewing the breakdown on the workorder or invoice after customer assignment.
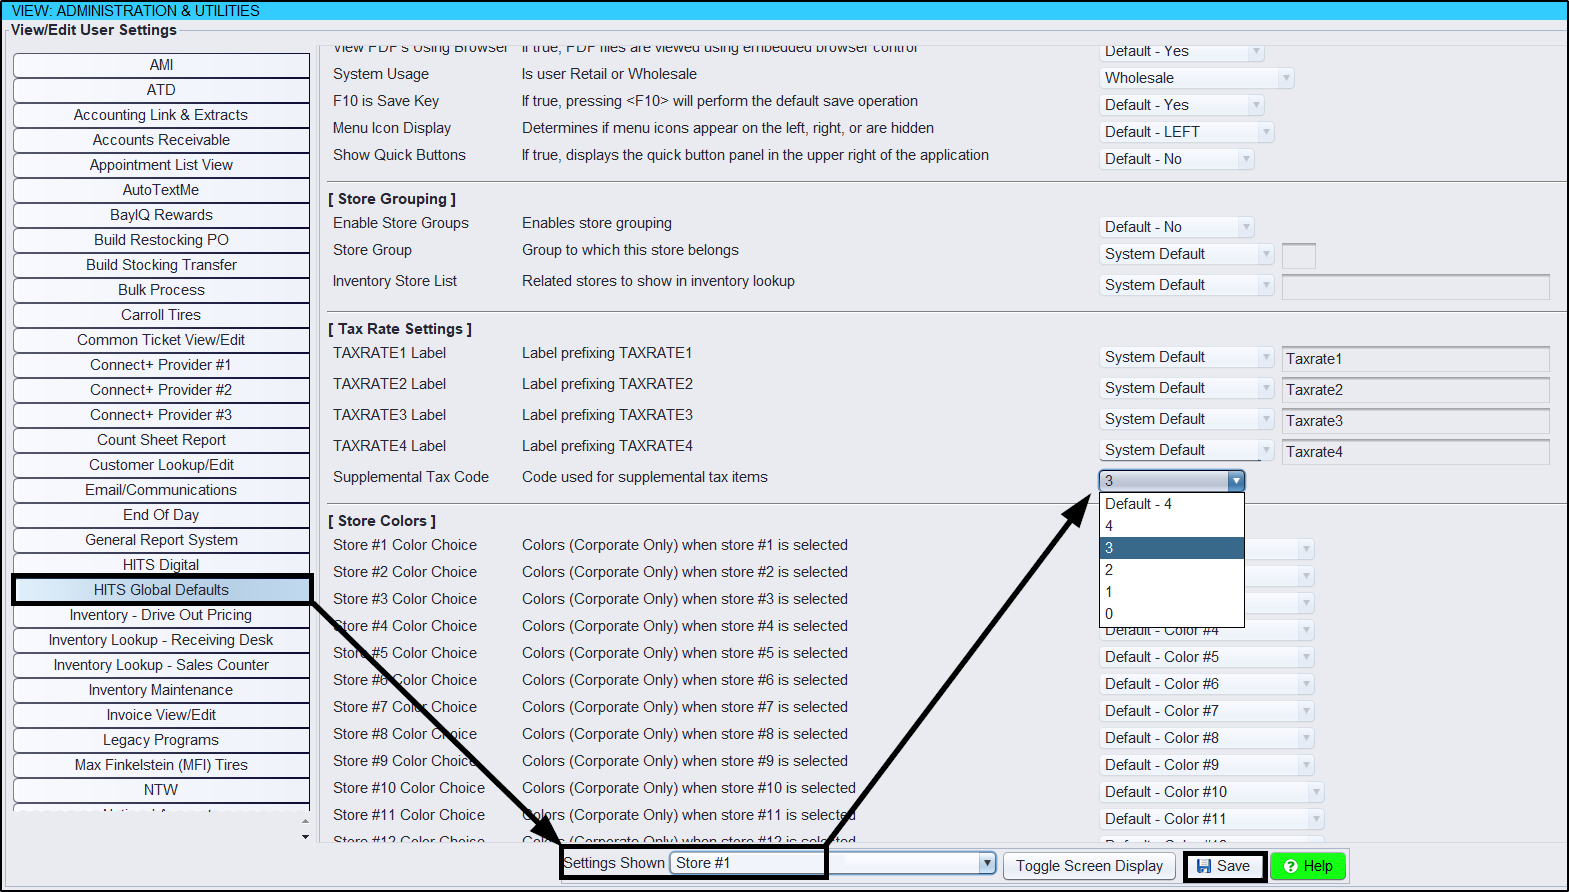
Step 4 – Adjusting the Default Supplemental Tax Code (HITS Global Default Setting)
By default, all Supplemental Tax transactions in HITS are billed under Tax Code 4. However, you can change this default if your reporting or accounting processes require the use of Tax Code 2, 3, or another available option.🔹 This step is typically performed by an administrator and only needs to be completed if your organization wants to use a different tax code for supplemental tax billing.
🔧 To view or edit the default Supplemental Tax Code:
1.) Click Views > Administration & Utilities
2.) Store > View/Edit Default Settings
3.) Select the HITS Global Defaults option from the left-hand menu
4.) Select the appropriate Store from the Settings Shown drop-down menu
5.) Select the appropriate Supplemental Tax Code option from the drop-down menu
6.) Click Save before exiting this screen
7.) Have all users Log Out and Back Into HITS to accept this change
💡 This setting ensures all supplemental tax activity is grouped under the correct tax code for reporting or exporting purposes. Always coordinate with your accounting team before making changes to default codes.