
At times, a product may require different pricing at a specific store. For example, a labor price may be $65 at one store and $110 at another. To implement store-specific pricing for a product, you will need to create an EPP (Extended Pricing Profile) rule for that product as a customer and configure it to be store-specific.
Follow the steps below to complete this process:
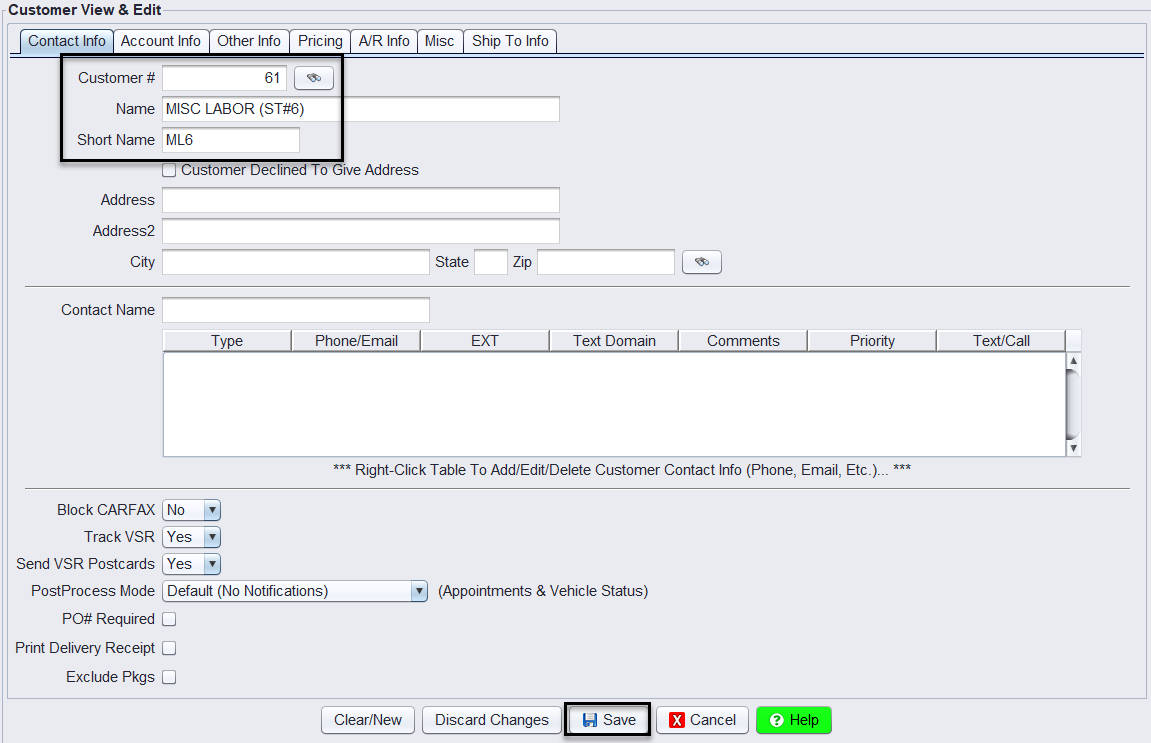
Step 1: Create a New Customer for the Product
1.) Navigate to the Customer Management section.
2.) Create a new customer in the desired store.
3.) Name the customer after the product you wish to set specific pricing for.
4.) Manually assign a unique customer number out of sequence (do not let the system generate the next number automatically).
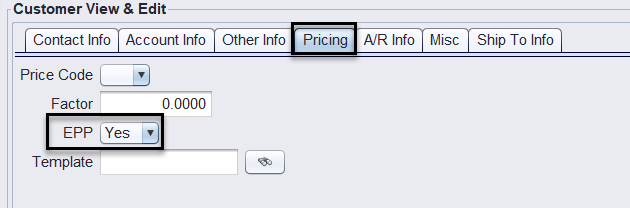
5.) Set the EPP field to YES.
6.) Click SAVE to create the customer.
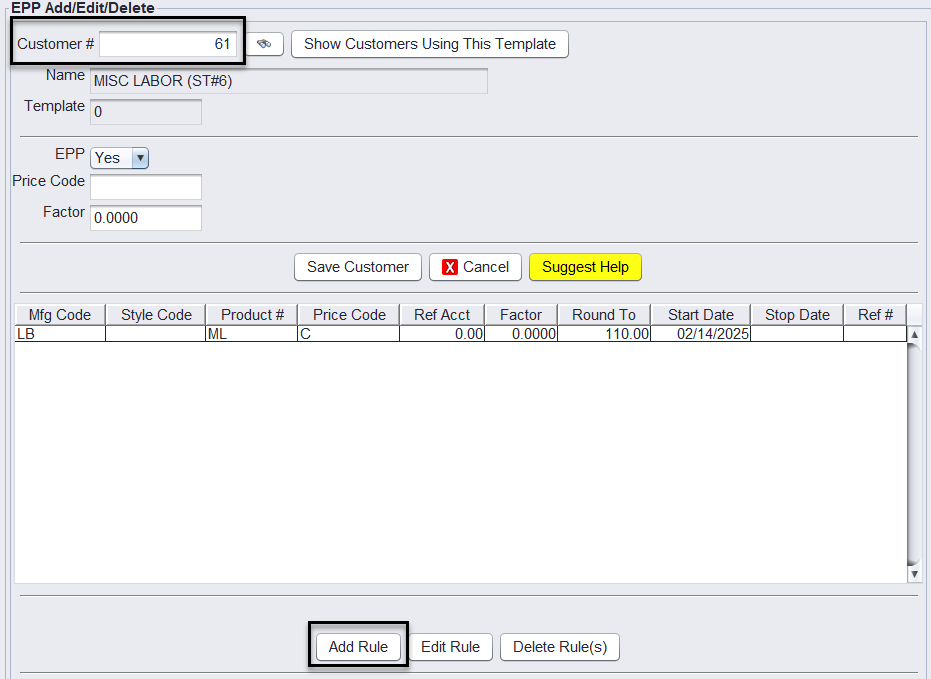
Step 2: Add an EPP Rule for the Product
1.) Navigate to: Views > Administration & Utilities > Pricing > EPP Add/Edit/Delete.
2.) Select the newly created customer from Step 1.
3.) Click Add Rule to create a new EPP rule.
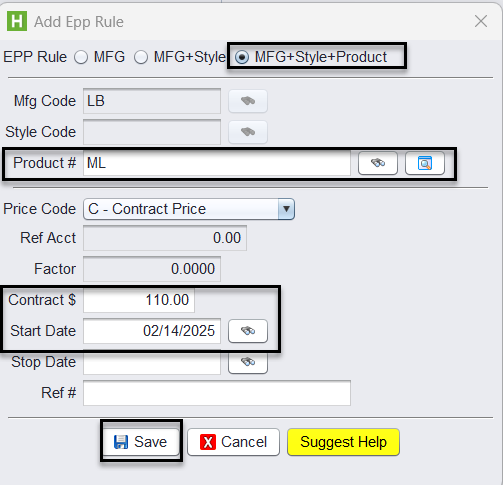
4.) Filter by MFG + Style + Product and click the binoculars to lookup and select the desired product #.
5.) Select and enter the Price Code = Contract Price (the specific price for this store).
6.) Click SAVE. The Price Start Date will default to the date the rule is created.

Step 3: Configure Store-Specific Settings
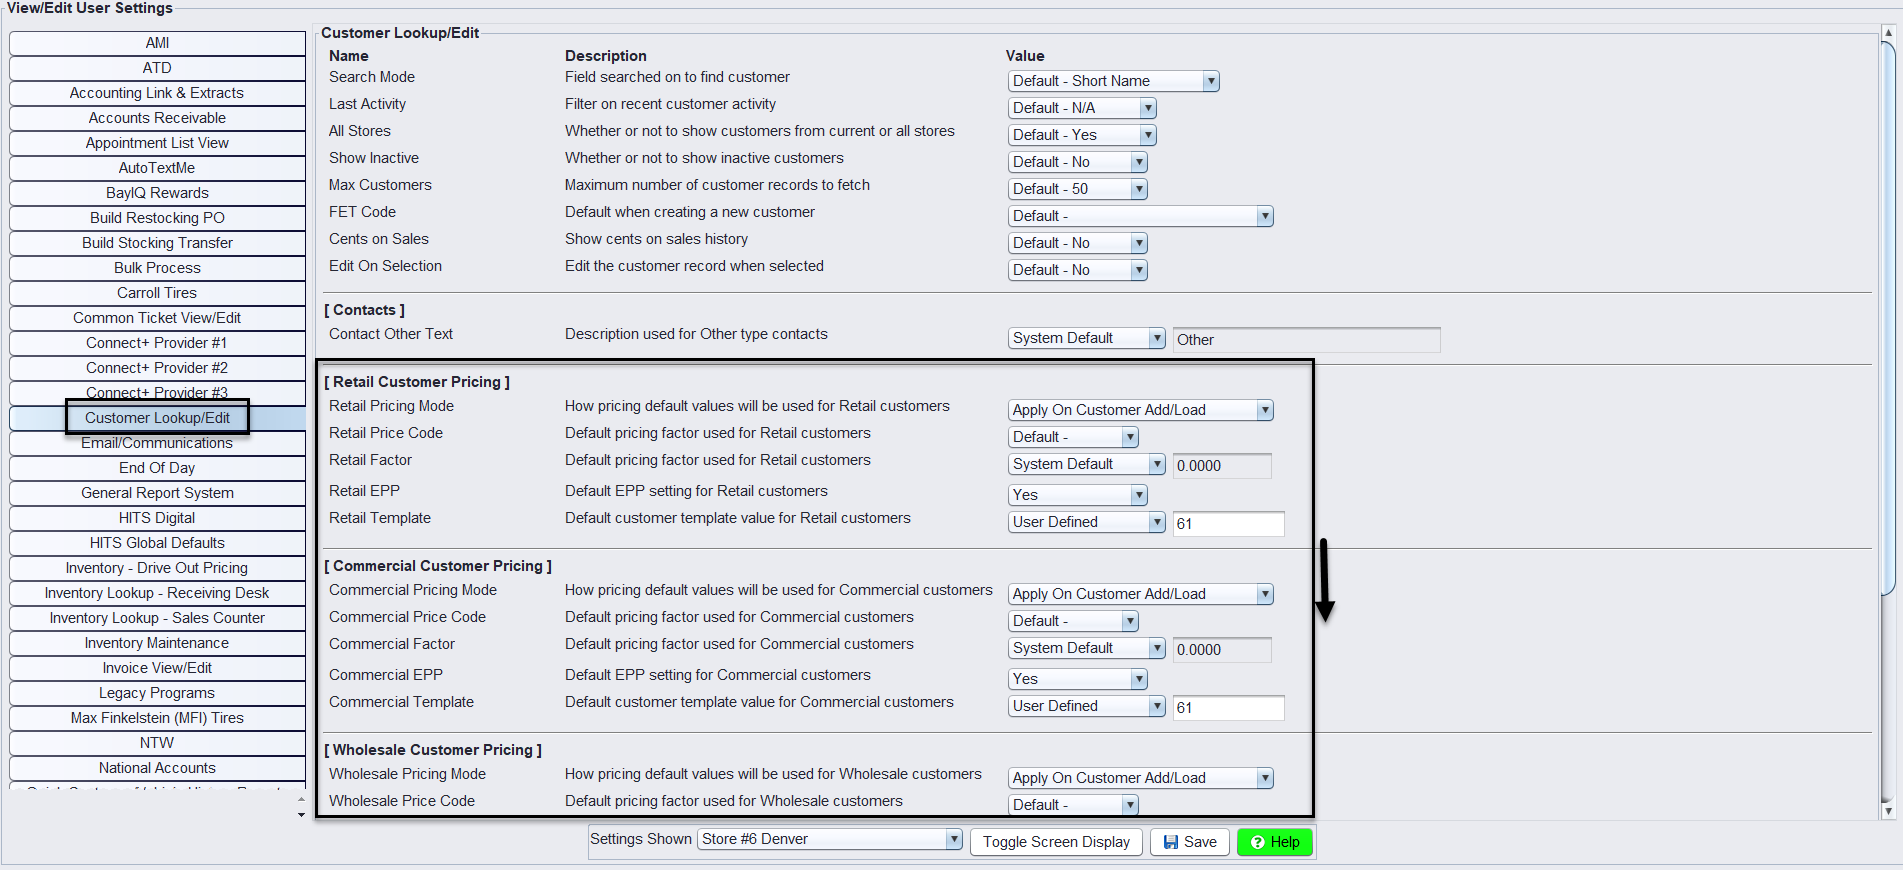
1.) Navigate to: Store > View/Edit Default Settings > Customer Lookup/Edit for the specific store.
2.) Under Retail/Commercial/Wholesale/Other, update the following settings:
3.) Pricing Mode = Apply on Customer Add/Load
4.) Retail EPP = Yes
5.) Retail Template = User Defined (set to the Customer # from the EPP rule)
6.) Click SAVE.
Step 4: Verify the Changes
1.) Log out and log back in to apply the changes.
2.) Test the setup:
-
- Add the product to an existing work order in the specified store.
- Verify that the price matches the Contract Price set in the EPP rule.
- Check that pricing in other stores remains unchanged by testing in another location.