
Follow the steps below to add a new vendor in HITS Receiving View:
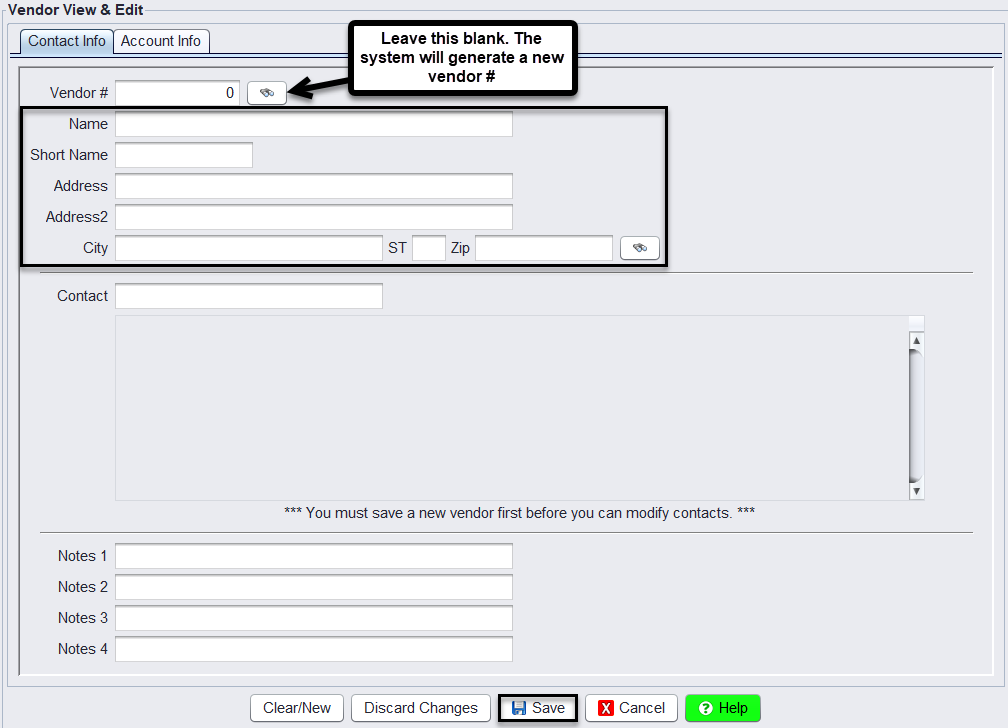
1.) Go to Views > Receiving
2.) Click Vendor > Add
3.) Leave the Vendor # field untouched— the system will auto-generate the next available vendor number.
4.) Enter the vendor’s Name, Address, and other relevant details.
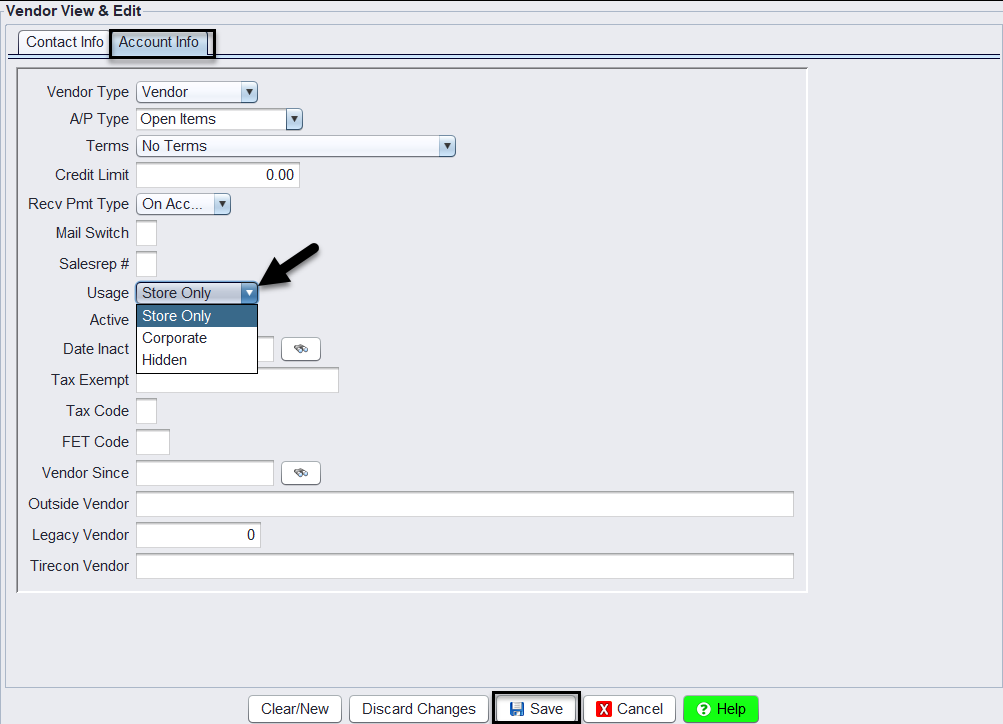
5.) Navigate to the Account Info tab to configure store visibility (see details below).
6.) Click Save to create the vendor record.
7.) (Optional) After saving, right-click in the white Contacts box to add the vendor’s phone number, email, or other contact details.
8.) If you are adding multiple vendors, click the Clear/New button to reset the screen for the next entry.
In the Account Info tab of the Vendor View screen, you’ll find the Usage dropdown:
-
Store Only – Limits visibility of the vendor to the current store only. This is ideal when each store manages its own vendors and payments.
-
Corporate – Makes the vendor accessible across all stores in the system. Use this only when a single account is shared company-wide.
Selecting the correct usage ensures accurate vendor assignment, reporting, and visibility across the organization.
Adding Vendor for ServiceCAT/LubeCAT/TireCAT module
To add or activate a parts vendor for use with the ServiceCAT, LubeCAT, or TireCAT modules, your store must complete the Epicor Vendor Order Form. This form collects the required store and vendor details needed to configure live catalog access, pricing, and parts lookup within HITS.
Each store location must submit its own form and include:
-
Store information and contact details
-
Go-live date and default labor rate
-
Vendor delivery address and account number for each parts supplier
⚠️ Please note: Epicor licensing can take up to two weeks to activate once the form is submitted.
Complete the Epicor Vendor Order Form here:
Epicor Order Form – Parts & Labor Integration
Be sure all information is accurate before submitting to avoid delays in setup.