
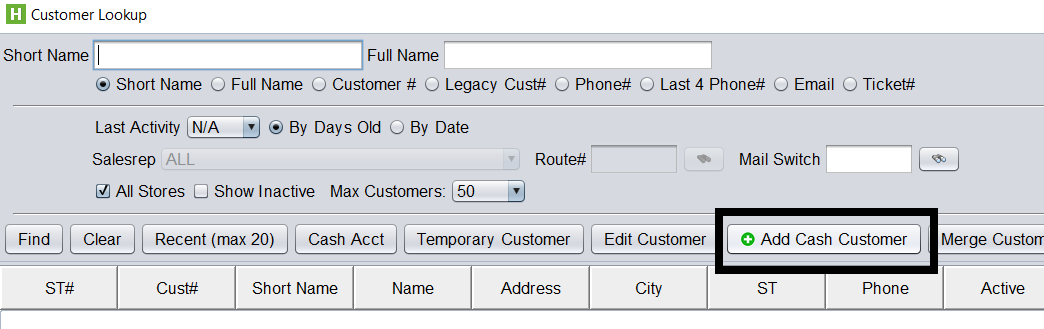
To add a new customer to the system, select the Customer Lookup button from the toolbar…

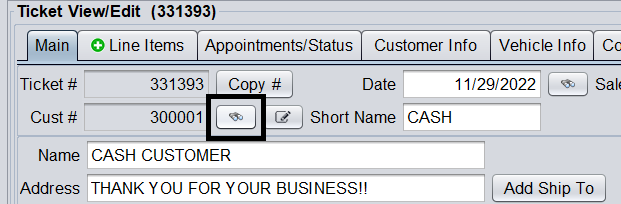
(Or if you are on a ticket, select the Customer Lookup button next to the customer number) …
… and then click the Add Cash Customer button.
This will allow you to add a customer to the system with the customer’s basic information including name, address, and contact information. After adding needed information, click Save to save the customer into the system.
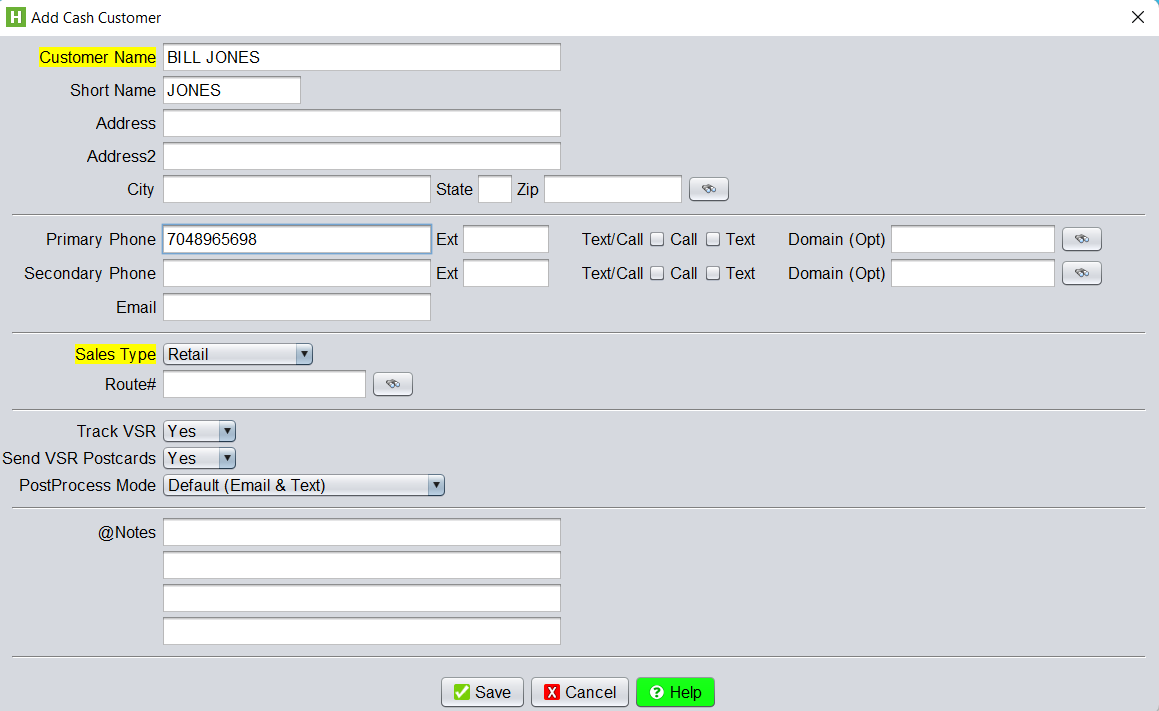
Saving this customer will assign a customer number to the newly added customer as every customer added into the system is assigned a unique customer number, allowing you to track their account and history.
To later edit this customer, you can either go to Customer > View/ Edit…
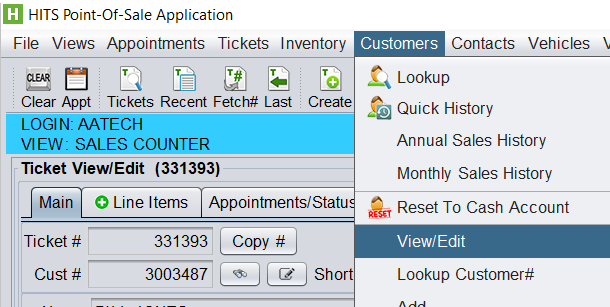
(Or click the Edit Customer icon if on a ticket for the customer).
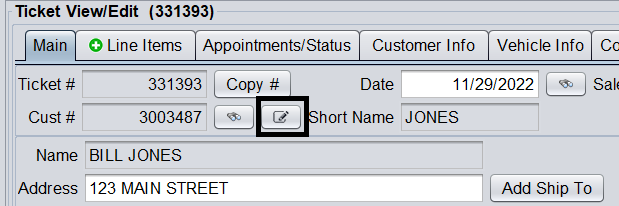
Depending on your permission settings, you will either be able to edit the basic information, or the extended information which includes whether if this customer is an Open Items charge account with a credit limit, or Tax Exempt status. To be able to edit this extended information, your username will need permission P87= !
See more information on editing the extended customer information here: Adding/ Editing Customer Accounts With Extended Information