To block specific product numbers from appearing on Tirelink for a specific customer (e.g., Customer #100001), follow the steps below using the EPP feature and customer template update process.
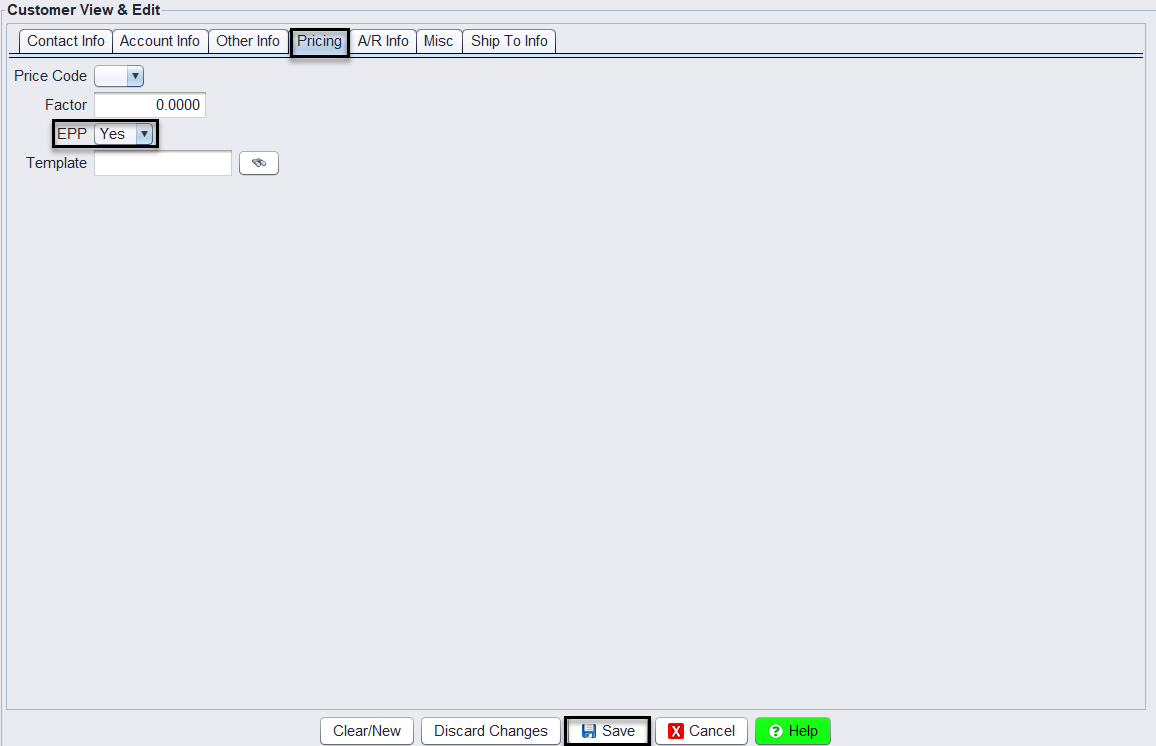
Step 1: Setting the Customer to EPP=Yes
1.) Select a customer you want to configure.
2.) Navigate to Customers > Account – View/Edit > Pricing tab
3.) Set EPP = YES
4.) Select Save
Step 2: Assign the Product Numbers with price code X
Go to Views > Administration & Utilities > Pricing > Epp Add/Edit/Delete
1.) Input the Customer # that you’ve assigned the code EPP = YES, then click Save Customer

2.) Click the Add Rule button, then select the MFG + Style + Product radio option, enter the product number using the binocular to search the item, then double-click the product # so that it populates on the product # field, in the price code field select X – Block item and then click Save.
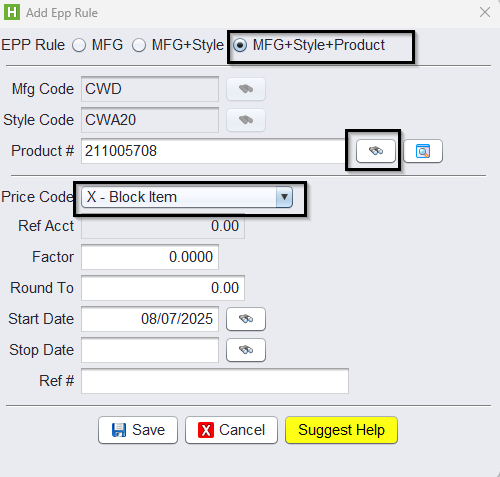
Note: You can also block products for specific MFG codes (MFG) or MFG + STYLE codes (MFG + STYLE).
Step 3: Verify Tirelink Visibility
Log into Tirelink using any customer with their new template and confirm that the product numbers are no longer visible to the customer on the website.
For any questions or further assistance, please reach out to the HITS Technical Support Team!
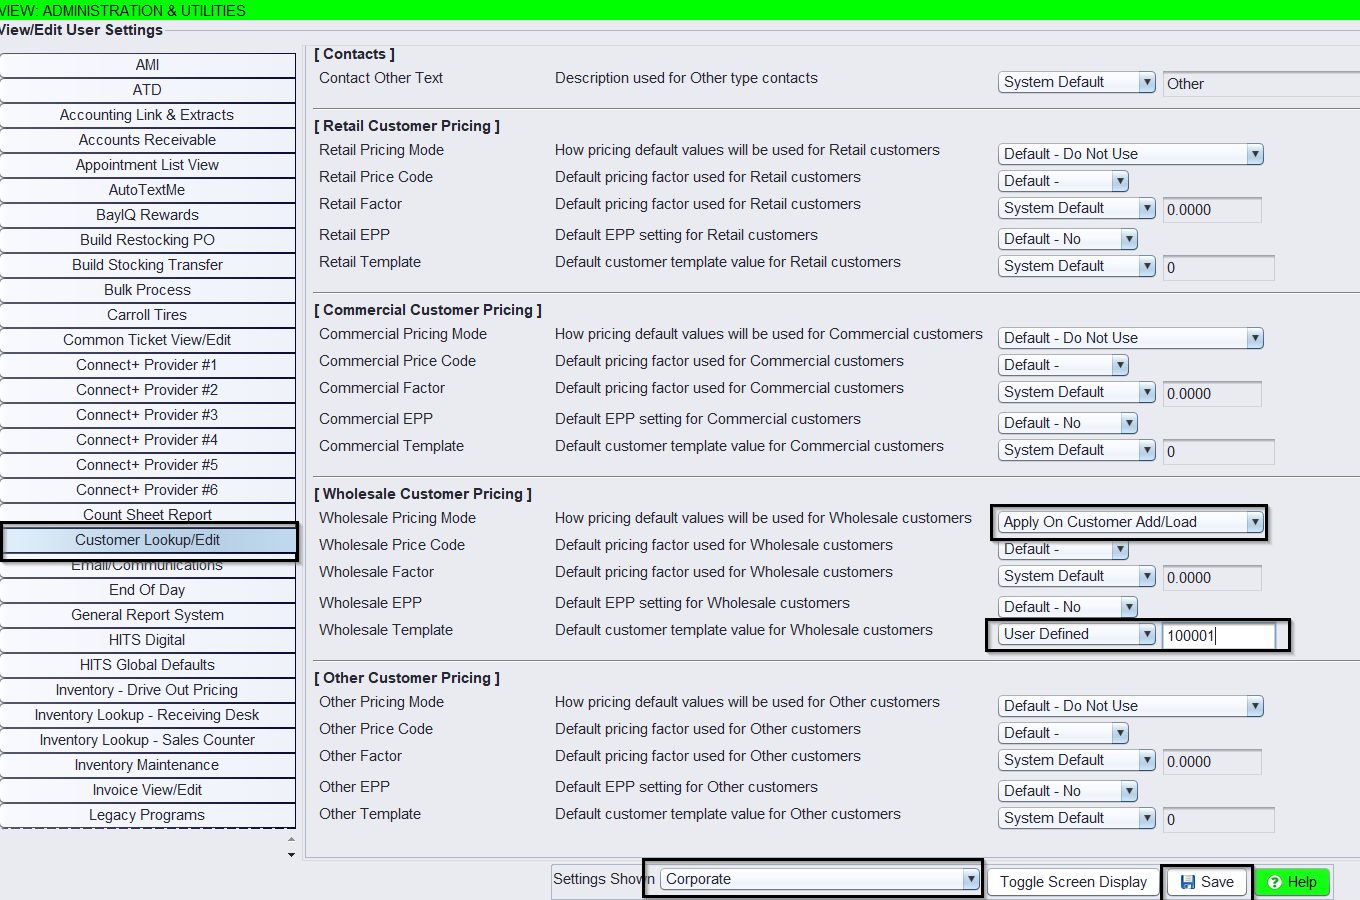
Optional Step: Update all commercial, retail, wholesale, or other customer types with the new EPP Template to ensure product numbers are hidden on Tirelink.
Note: Please consult with a HITS Technical Support agent before proceeding, as these changes will impact customer records and should be confirmed to meet your needs.
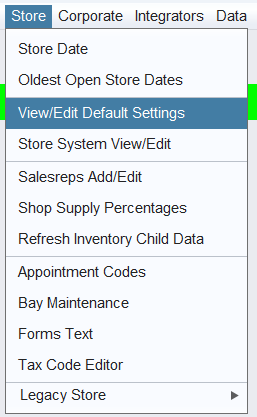
Go to Views > Administration & Utilities > Store > View/Edit Default Settings
1.) Select the Customer Lookup/Edit settings
2.) In The settings Shown field select the store you wish to make the changes for or just select Corporate to update all stores.
3.) In the Wholesale Customer Pricing section, update the Wholesale Pricing mode to Apply On Customer Add/Load and update the Wholesale Template field with the customer # who has the newly created EPP record.
Note: Choosing the Add option will only update customers being added to the system for the first time. Choosing the Add/Load will backload all existing customers and new customers going forward.
4.) Click Save and Log out and log back into your account for the change to take effect.