
This document will explain:
- Credit Management & Overriding Credit Holds
- Setting Up Customers for Allowable Days Past Due (ADPD) & Credit Limit
- Setting Customers To Be Exempt from Credit Holds
- The Correct System & Password Switches that Need to be Set
About:
Employees often make sales to past-due customers, either because they are unaware of the customer’s overdue status or because, as sales representatives, their focus is typically on closing the sale rather than assessing the customer’s payment history.
Implementing Credit Management can address this issue by flagging customers who are past due or over their credit limit. More importantly, it can require a management-level credit override before allowing the sale to proceed, ensuring greater control and oversight.
Turning on ADPD:
Determine if you want a default Allowable Days Past Due for all customers. If so, System Switch 64 should be set to your desired default number of days. This is a STORE-level setting and must be configured for each location individually. Keep in mind that even if you establish a default, you can always adjust it for specific customers as needed.
If you want all customers to share the same default allowable days past due, ensure that System Switch 64 reflects your preferred default value.
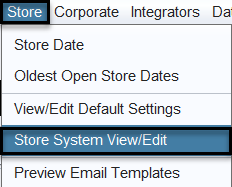
1.) Views→ Administration & Utilities→ Store→ Store System View/Edit→ Switches #64 – Maximum Allowable Days Past Due
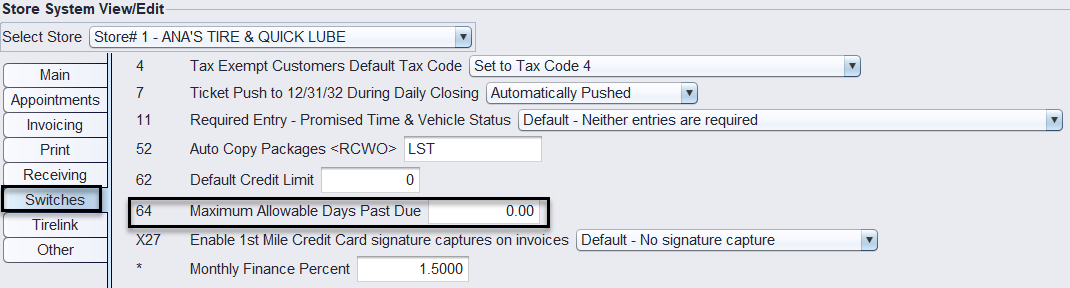
2.) Key in your default Maximum Allowable Days Past Due number (ex. 45) and select SAVE at the bottom to save your changes. Please note: You will be required to log out/in for the changes to take affect.
Optional Ticket Control:
Determine the level of flexibility you want to provide your sales representatives when creating and printing work orders. Your system can be configured to either block the printing of work orders entirely for past-due customers or allow the printing of invoices while preventing their closure. This is a Corporate-Level setting and applies to all locations once enabled. To configure this setting:
- Default – None Selected – Credit Management not activated
- Allowed Print/No Close – Allows Printing but blocks the closing of invoices
- No Print/No Close – Blocks both printing and closing of invoices
1.) Views→ Administration & Utilities→ Corporate→ Corporate System View/Edit→ Options #15 – Credit Management
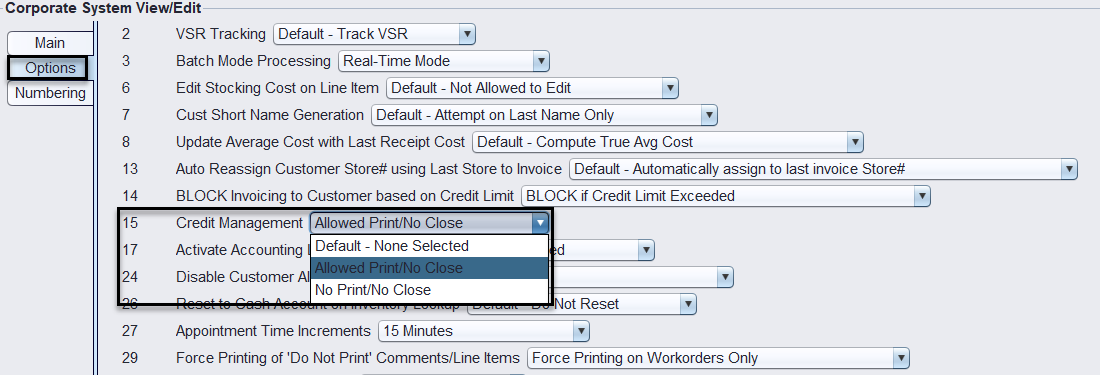
2.) Choose the Credit management option that best aligns with your operational needs. Please note: You will be required to log out/in for the changes to take affect.
ADPD Customer Specific Setup:
Set the customer to be flagged when they are past due and/or over their credit limit OR set them to be EXEMPT from Credit Management.
1.) Views→ Sales Counter→ Customer→ Account – View/Edit

2.) Click on the binoculars beside Customer # and find your customer. Double-click on them to make them the active customer.
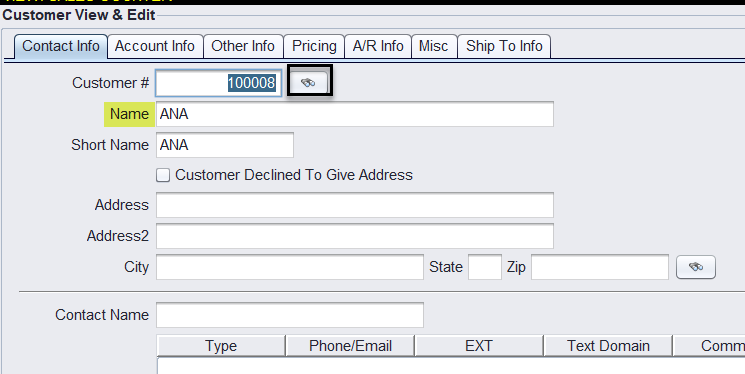
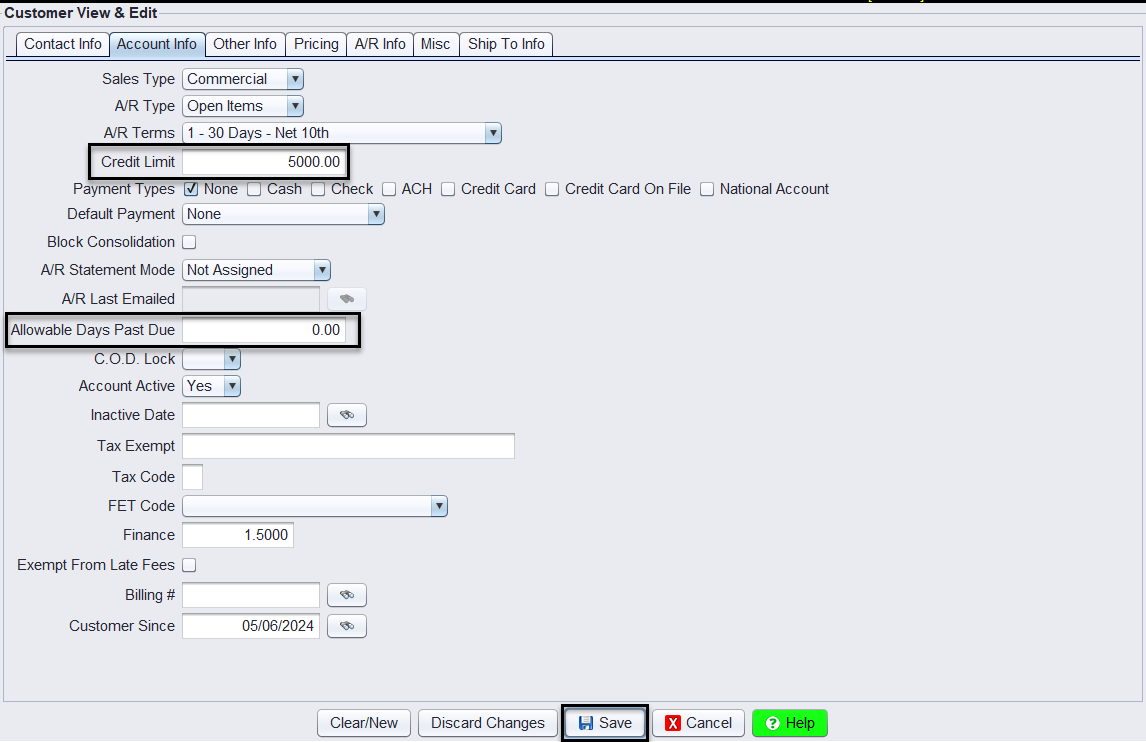
3.) Click on the Account Info Tab and set the customers Credit Limit and/or their Allowable Days Past Due. To make a customer always EXEMPT from Credit Management, key in a negative 99 (-99) into the Allowable Days Past Due field. Click SAVE at the bottom to save the customers changes.
Performing a Credit Hold Override
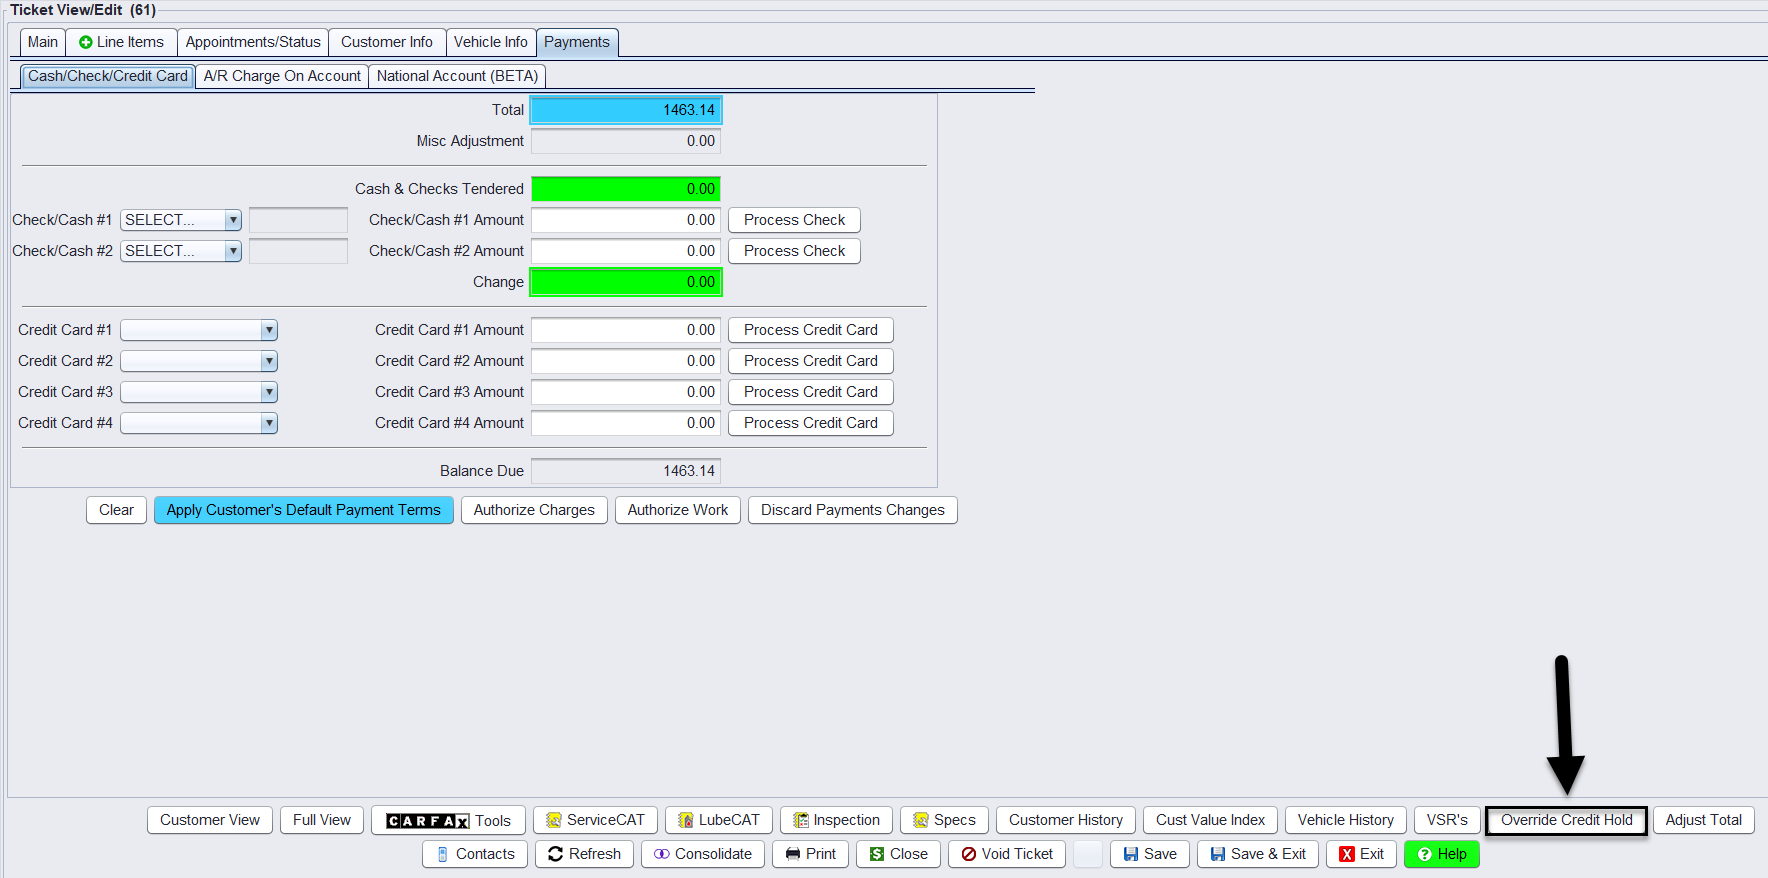
1.) Override Credit Hold: Click the Override Credit Hold button located at the bottom of the screen to allow the transaction to move forward. Note: This is a password protected permission see below.
2.) Enter the Allowable Purchase Amount: Input the new amount the customer will be allowed to purchase in the Apply Credit Override window. The amount entered specifies that the invoice is not subject to credit hold restrictions, allowing it to be processed up to the indicated dollar amount. For example, entering a value of $900 means the invoice can proceed but only for an amount up to $900.
Please note: This override applies only to the current transaction and does NOT update the customer’s file permanently.
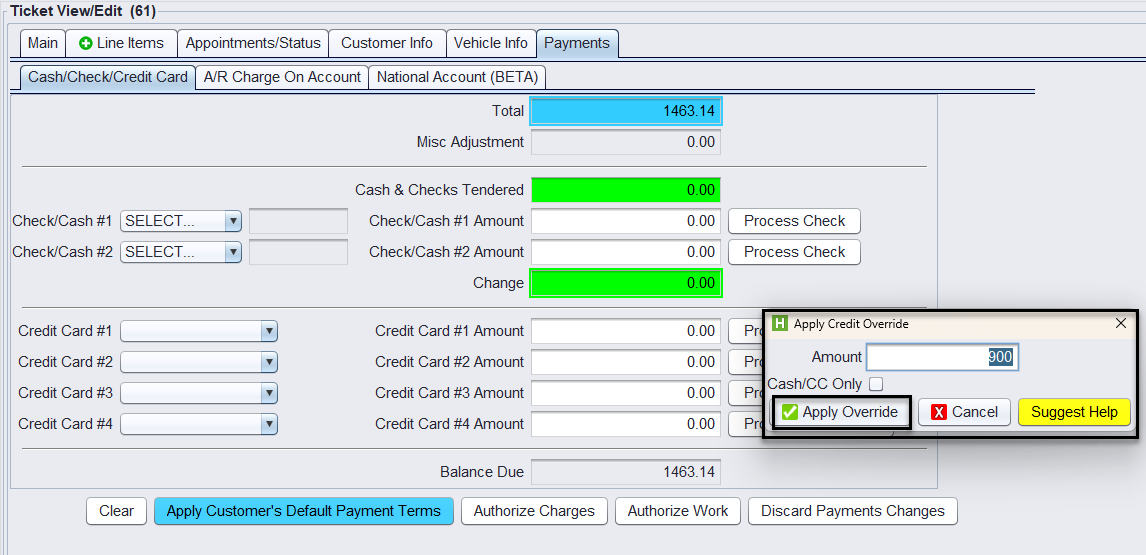
3.) Require Cash or Credit Card Payment (Optional checkbox): if you want the customer to pay for this transaction using cash or credit card, check the box labeled Cash/CC Only.
4.) Apply the Override: Click the Apply Override button to confirm the changes.
5.) Proceed with the Sale: At this point, the transaction will be allowed to proceed as normal.
Important: Users must have password permissions to set credit limits or override credit holds.
- P55=1: Allows the user to set Allowable Days Past Due (ADPD).
- P55=2: Allows the user to override a credit hold.
- P55=3: Grants both permissions
- P55=blank: Blocks access to these functions.
If a user requires permissions to perform these tasks, please contact your system administrator.