
Check-In
A Faster, Smarter Way to Welcome Customers
The new Check-In feature gives your shop two powerful tools in one:
- A customer-facing kiosk experience for your waiting area
- An advisor’s view for faster service at the counter or curbside
Together, these tools reduce front-counter bottlenecks, improve data accuracy, and help your team start tickets faster.
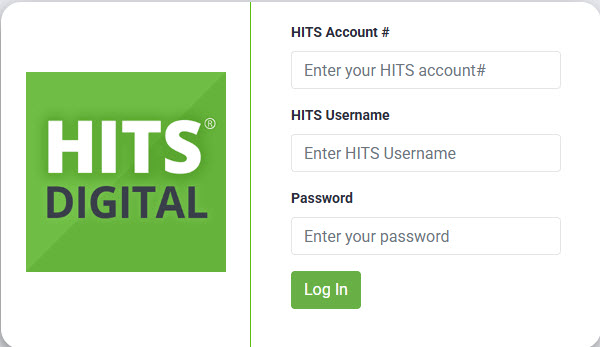
Access Customer Check-In in HITS Digital
1.) Open HITS Digital in your browser: https://gohitsdigital.com
2.) Log in with your assigned HITS credentials.
3.) From the left action panel, select Customer Care.
4.) Click Check-In from the top menu, then click +Check In from the right menu to access the check-in screen.

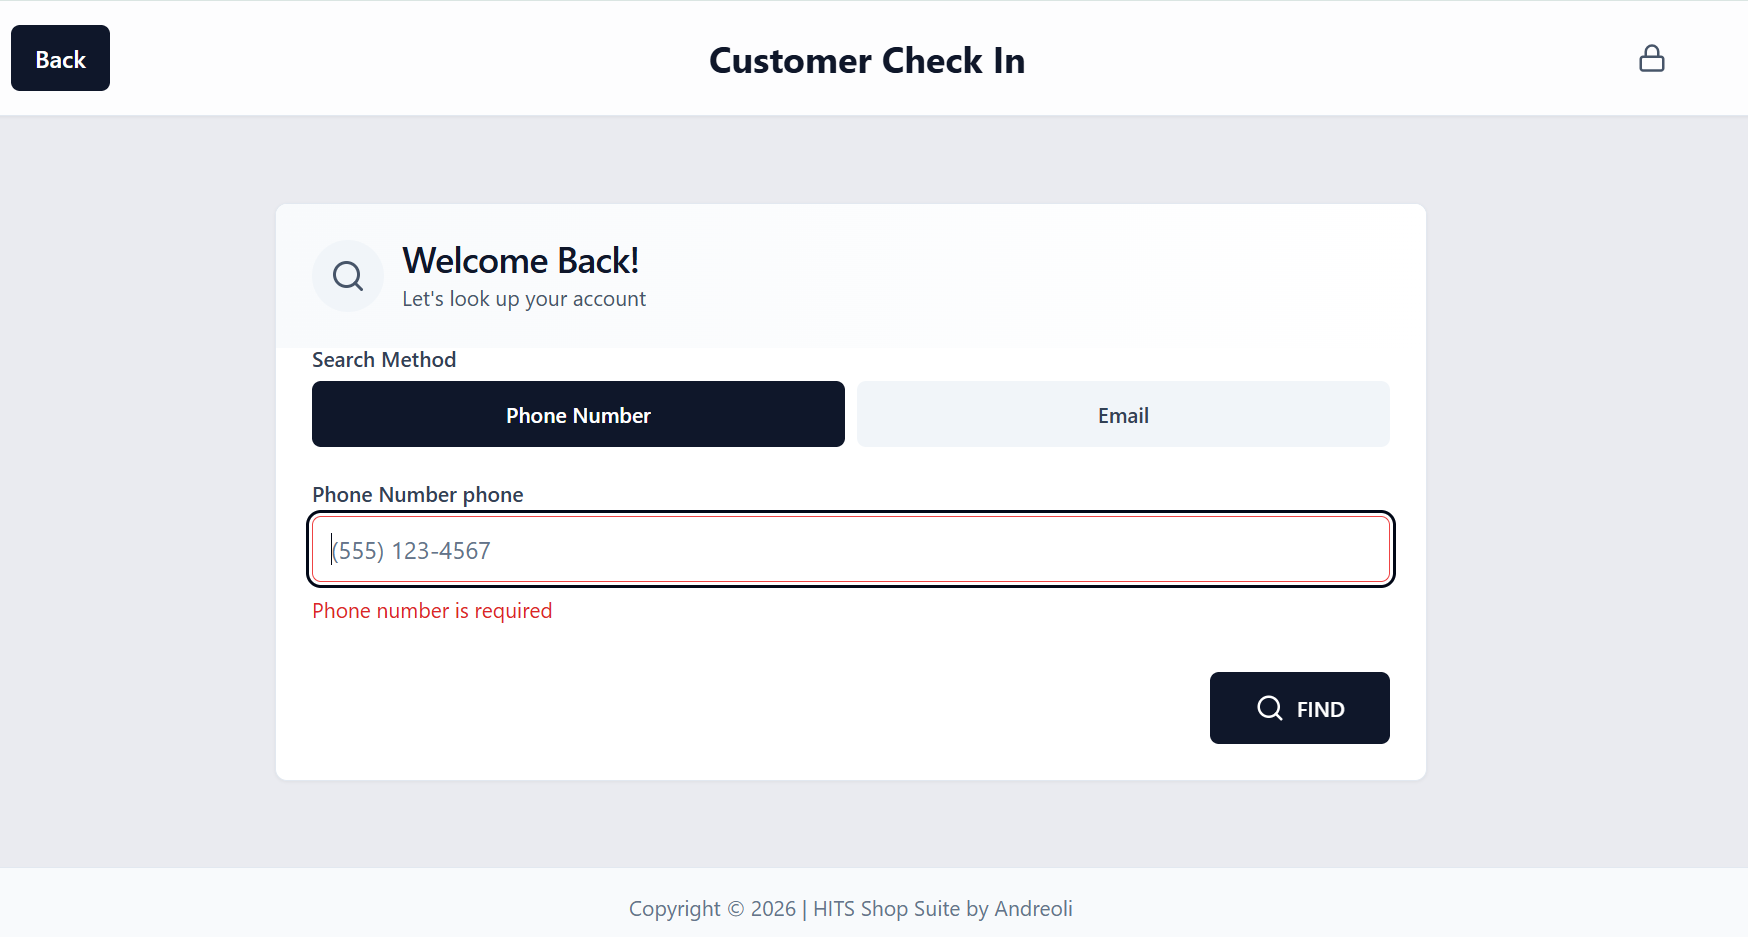
1. Customer Self Check-In (Kiosk or Tablet Mode)
Place a tablet or kiosk in your waiting area and let customers check themselves in.
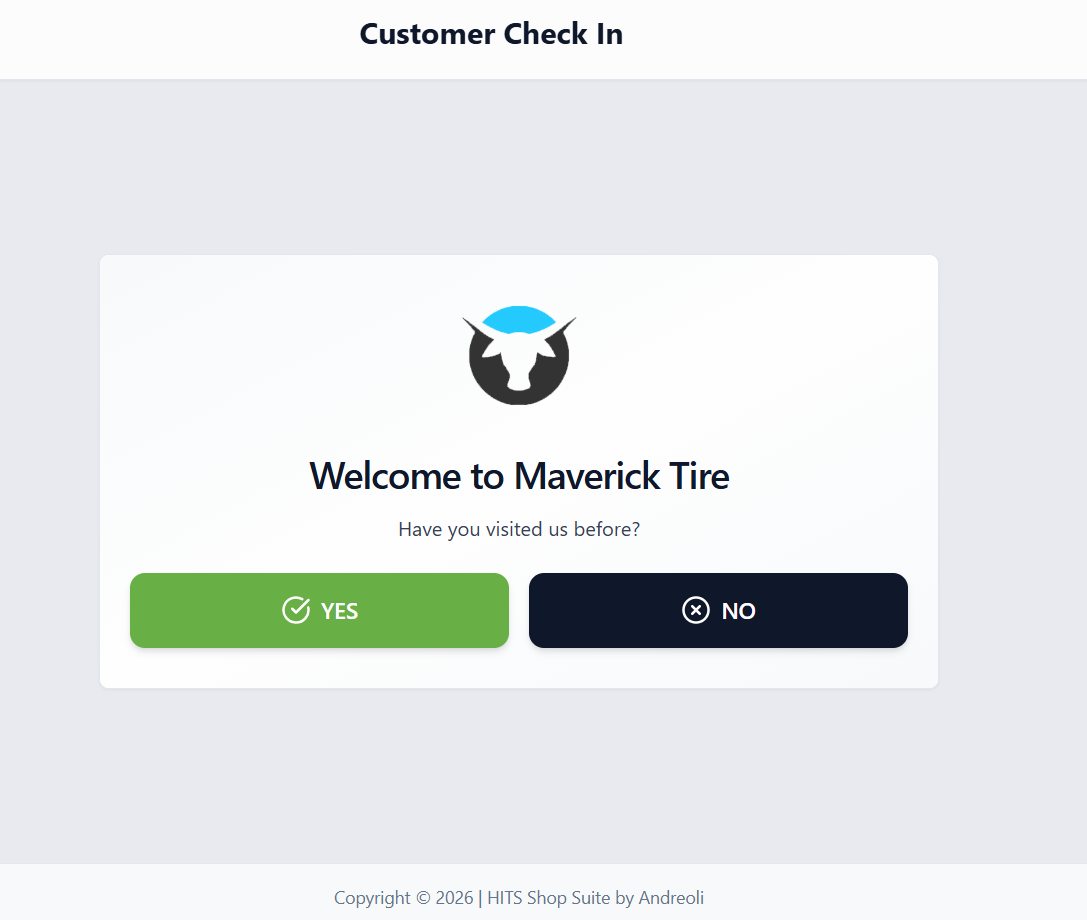
How It Works
- Customer searches by phone number or email
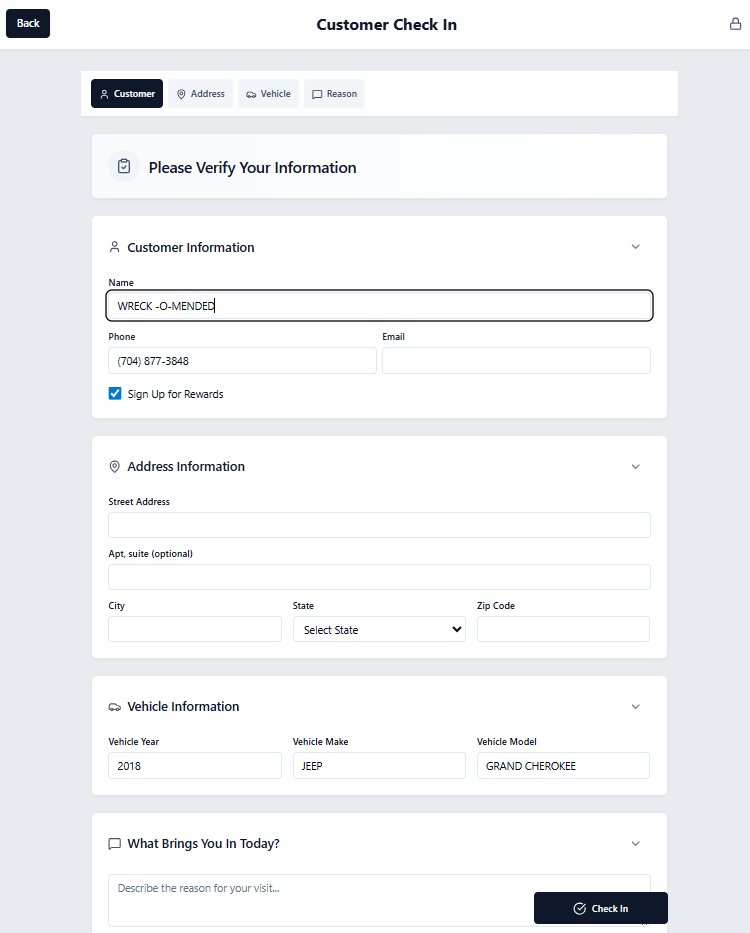
- They verify their information
- They press Check-In
- A notification is sent to HITS
- The notification is processed and creates a ticket
If the customer is new:
- They select No on the welcome screen
- Enter their contact and vehicle information
- Submit their check-in
- Their information flows directly into HITS

Required Information
By default, Check-In requires:
- Customer name
- Phone number
- Vehicle year, make, and model
Optional (configurable):
- Email address
- Address
- Reason for visit
- Rewards program opt-in
These can be managed in the HITS Digital Settings for users with HDN1=1 permissions.
Benefits to Your Shop
- Reduces front counter congestion
- Minimizes manual data entry
- Improves the accuracy of customer information
- Speeds up ticket creation
- Captures rewards sign-ups automatically
This is especially helpful during peak hours when your team is juggling phone calls, walk-ins, and existing tickets.
2. Advisor View (Internal Shop Use)
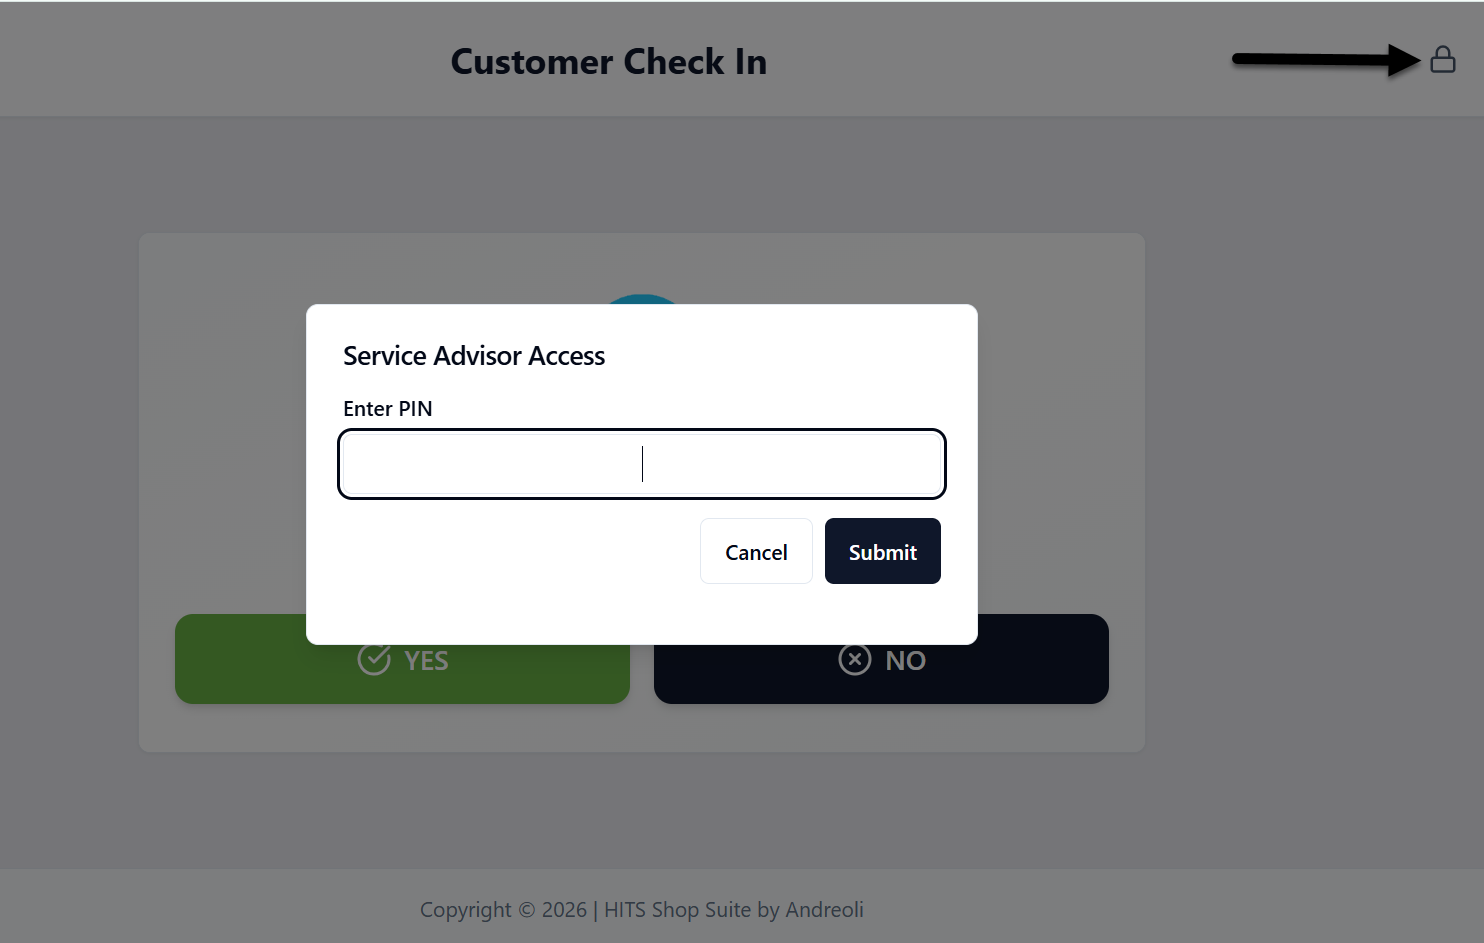
Advisor View turns any mobile device into a powerful service tool. Click on the lock icon in the upper-right-hand corner to activate Advisor View. Enter your account # PIN and click Submit to access this view.
Advisors can search for customers by:
- Phone number
- Name
- License plate
- VIN

Once found, advisors can:
- View full shop history
- Access Carfax history
- Decode VIN or license plate
- Scan the license plate using a camera
- Scan the VIN barcode using a camera

For new customers, Advisor View also includes:
- License plate entry
- VIN entry
- Mileage field
- Save for Later
These fields are intentionally not included in Customer View to keep the kiosk experience simple.

Benefits to Your Shop
- Faster customer lookup
- Fewer keying errors
- Instant vehicle decoding
- Better service history visibility
- Mobile-friendly workflow
This supports both traditional counter service and curbside check-in workflows.
Carfax Integration & Decoding
Advisor View supports integrated CARFAX decoding and camera-based scanning to streamline vehicle entry:
- License plate decoding
- VIN decoding
- Camera-based license plate scanning
- Camera-based VIN scanning

These tools automatically populate vehicle details, helping reduce manual entry, minimize typing errors, and speed up vehicle setup at check-in.
History
Advisor View includes two historical views, providing access to up to five (5) years of invoice history so your team has clear visibility in to a vehicle service background. 
Shop History
Shop History displays previous invoices for the vehicle across your locations, giving advisors quick access to past visits and service details.
For each invoice, you can view:
- Invoice number and store location
- Service date
- Recorded mileage
- Invoice total
- Completed services

Declined Services
Invoices that include declined work are clearly labeled Declined Services. Advisors can:
- Click View Declined Services to see all previously declined recommendations
- Expand any invoice to review the declined line items
- Use this information to follow up on prior recommendations and create new opportunities during the current visit
This helps your team maintain continuity of care, improve service recommendations, and avoid re-entering previously quoted work.

CARFAX History
Provides available vehicle history information through CARFAX, including:
- Reported service records
- Ownership history
- Accident or damage reports (if available)
- Mileage reporting

This helps advisors better understand the vehicle’s background and identify potential maintenance opportunities.
Rewards Program Integration (BayIQ)
You can optionally prompt customers to:
- Sign up for rewards during check-in
This creates a natural opportunity to grow your loyalty program without additional staff effort. If they are an existing Rewards customer, the sign-up will display green, indicating rewards are already assigned.
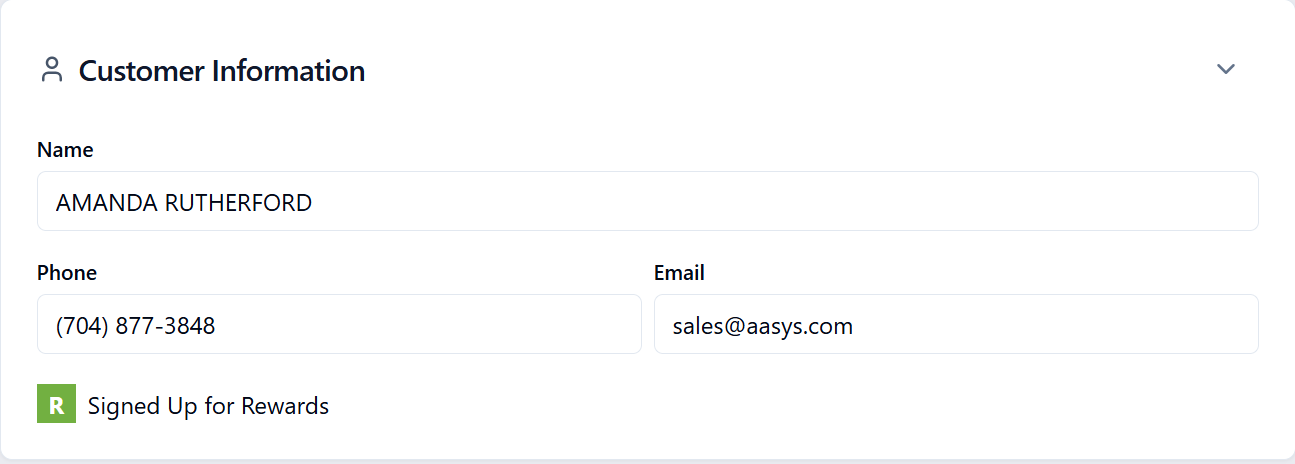
Advisor View
- If the customer is already enrolled, a green Signed Up for Rewards indicator appears in Customer Information.
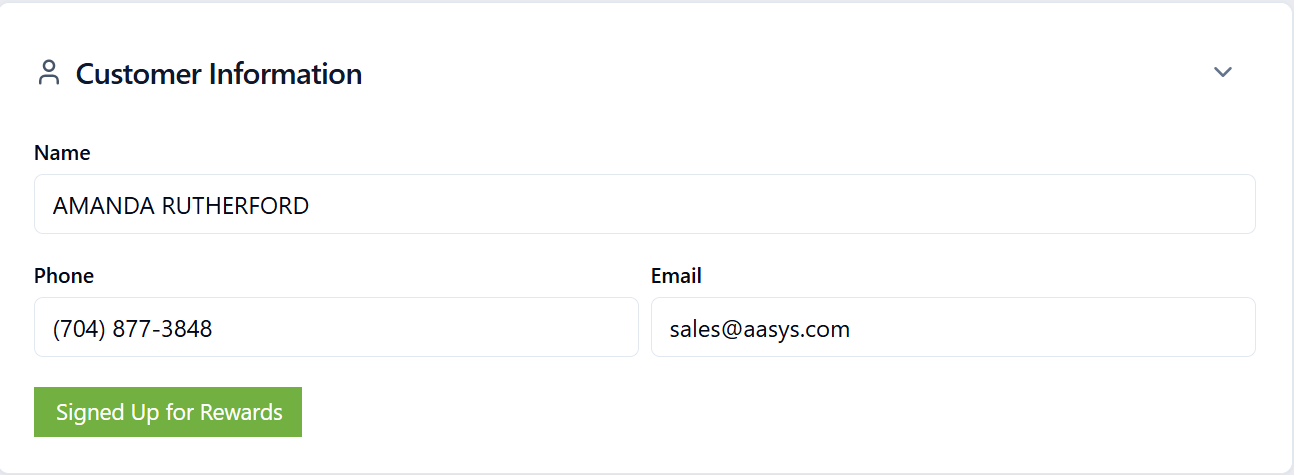
Customer Check-In
- Customers who are already enrolled will see their Rewards status displayed as Signed Up for Rewards.
After Check-In Is Submitted
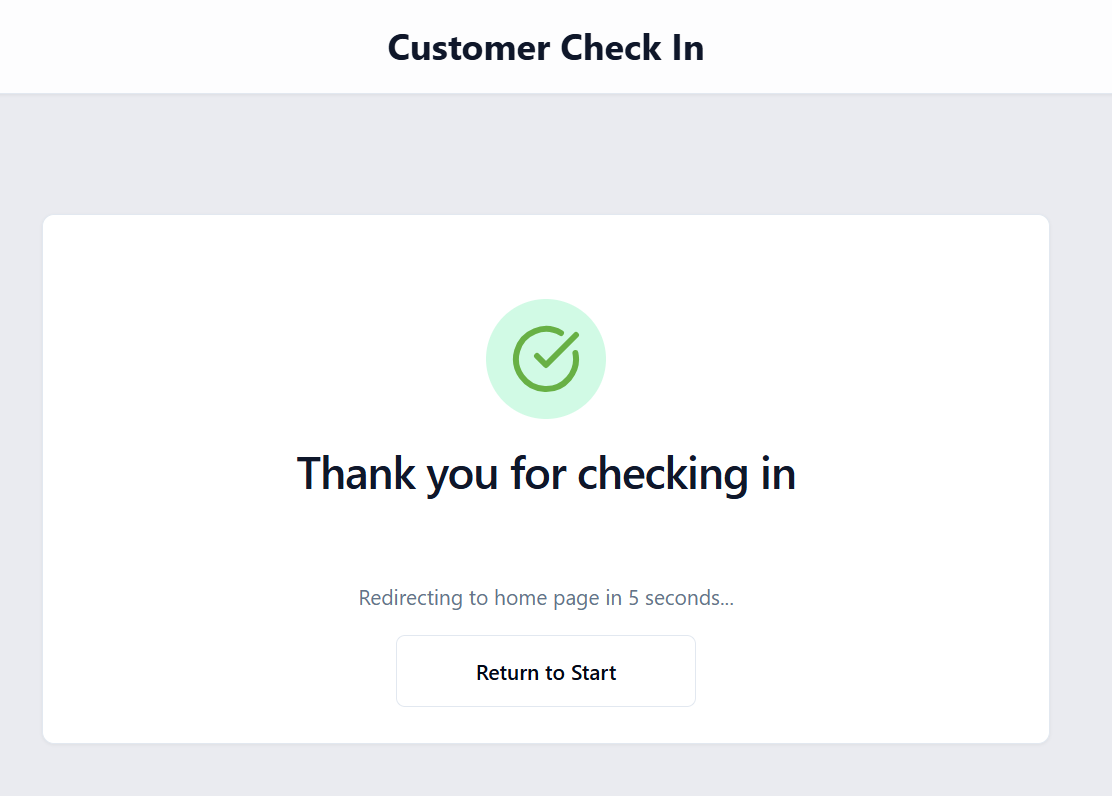
Once Check In is selected, the system displays a confirmation message and automatically returns to the start of a new check-in within approximately 8 seconds. This allows the next customer to begin the process immediately.
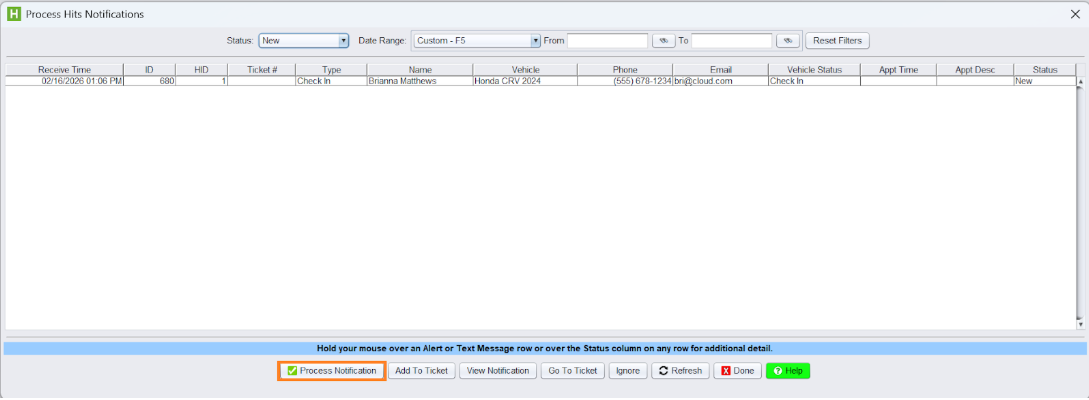
Processing the Check-In in HITS (NOTIFICATIONS)
After a check-in is completed, a notification is sent to HITS.
Front counter staff will:
1.) Open HITS and navigate to Notifications (CTRL+Z).
2.) Locate the entry with Type = Check In for the selected customer.
3.) Select the notification and click Process Notification.
This will also work with AutoOps/AutoFlow integrations.

Auto Create Customer and Vehicle for New Customers
After a check-in is completed, a notification is sent to HITS.
Front counter staff will:
- Open HITS and navigate to Notifications (CTRL+Z).
- Locate the entry with Type=Check In for the selected customer
- Select the notification and click Process Notification.
Creating or Updating the Ticket
At this point, staff can choose to:
- Add to a selected ticket, or
- Create a new ticket (Quote)
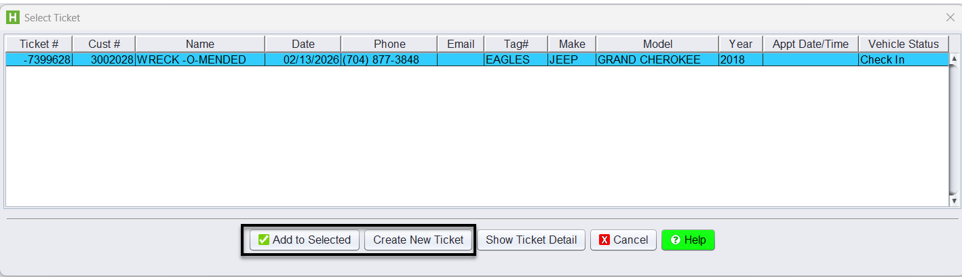
When a new ticket (quote) is created:
- The customer account and vehicle information are automatically applied if they already exist
- If the customer does not exist, you will be prompted to Add Customer
- Once the customer is created, you will then be prompted to Add Vehicle if needed
- For existing customers, check-in details are added as comments, and updates must be made manually in the customer or vehicle record
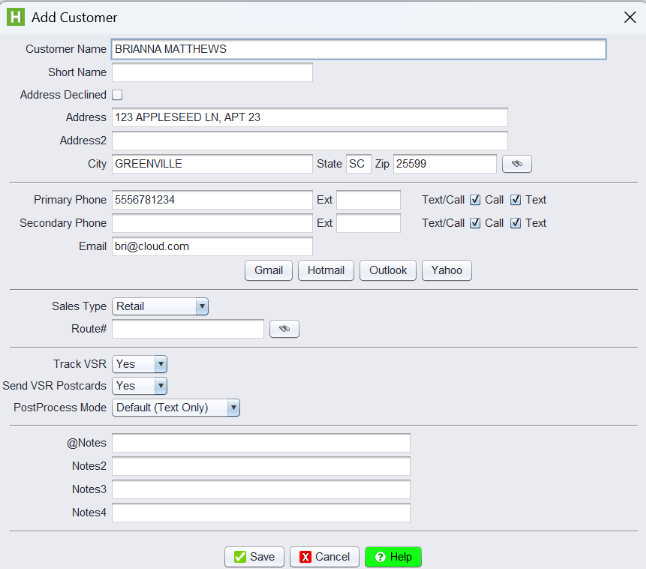

Additional details such as phone, email, and rewards selections are added to the ticket as comments.
From the quote:
- Select Edit from the customer to add or update any additional account information if needed.
- Add line-item product numbers and services to complete the estimate.
- Click Convert to convert the ticket to a workorder.

Common Missed Steps & Helpful Tips
Check-In is designed to improve intake efficiency without changing your core ticket workflow. Before finalizing any Customer Check-In, be sure to complete the following:
- Process the Check-In notification promptly in HITS to avoid missed arrivals or duplicate tickets.
- Review the Comments section, which contains the automatically recorded reason for the visit and any customer notes.
- Add all required products and services to the ticket.
- Advisor View supports both counter service and curbside workflows.
- Once line items are added, click Convert to change the quote into a work order before taking payment.
Shops with high walk-in volume may see reduced waiting times during peak periods.