
HITS allows you to create Special Pricing for inventory items or highlight items using the Force Special option. These tools help promote specific products, move inventory, and guide sales staff during ticket creation.
Special pricing can be configured for different customer types and can optionally be scheduled using start and end dates.
Important: Special pricing follows the HITS Pricing Hierarchy and has the highest priority when the special price is lower than the customer’s calculated price. If pricing does not appear as expected, other pricing rules may still apply. For more details, see the HITS Pricing Hierarchy Rules documentation.
Creating a Special Price for an Inventory Item
1.) Navigate to: Views → Administration & Utilities → Inventory → Inventory Add/Edit/Delete
2.) Enter the Product Number of the item you want to modify.
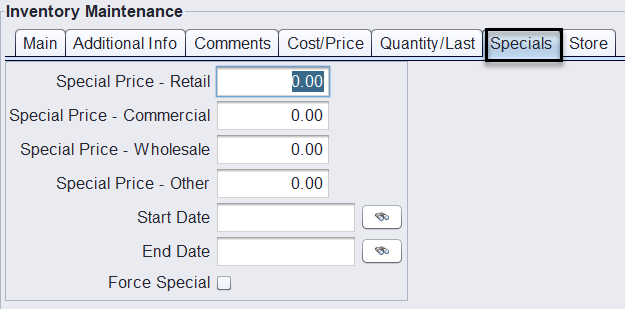
3.) Select the Specials tab.
4.) Enter the applicable special price:
-
- Special Price – Retail
- Special Price – Commercial
- Special Price – Wholesale
- Special Price – Other
5.) (Optional) Enter a Start Date and End Date to control when the special is active.
6.) Click Save to apply the changes.
When a special is active, the system will apply the special price instead of the calculated price when the item is added to a ticket.
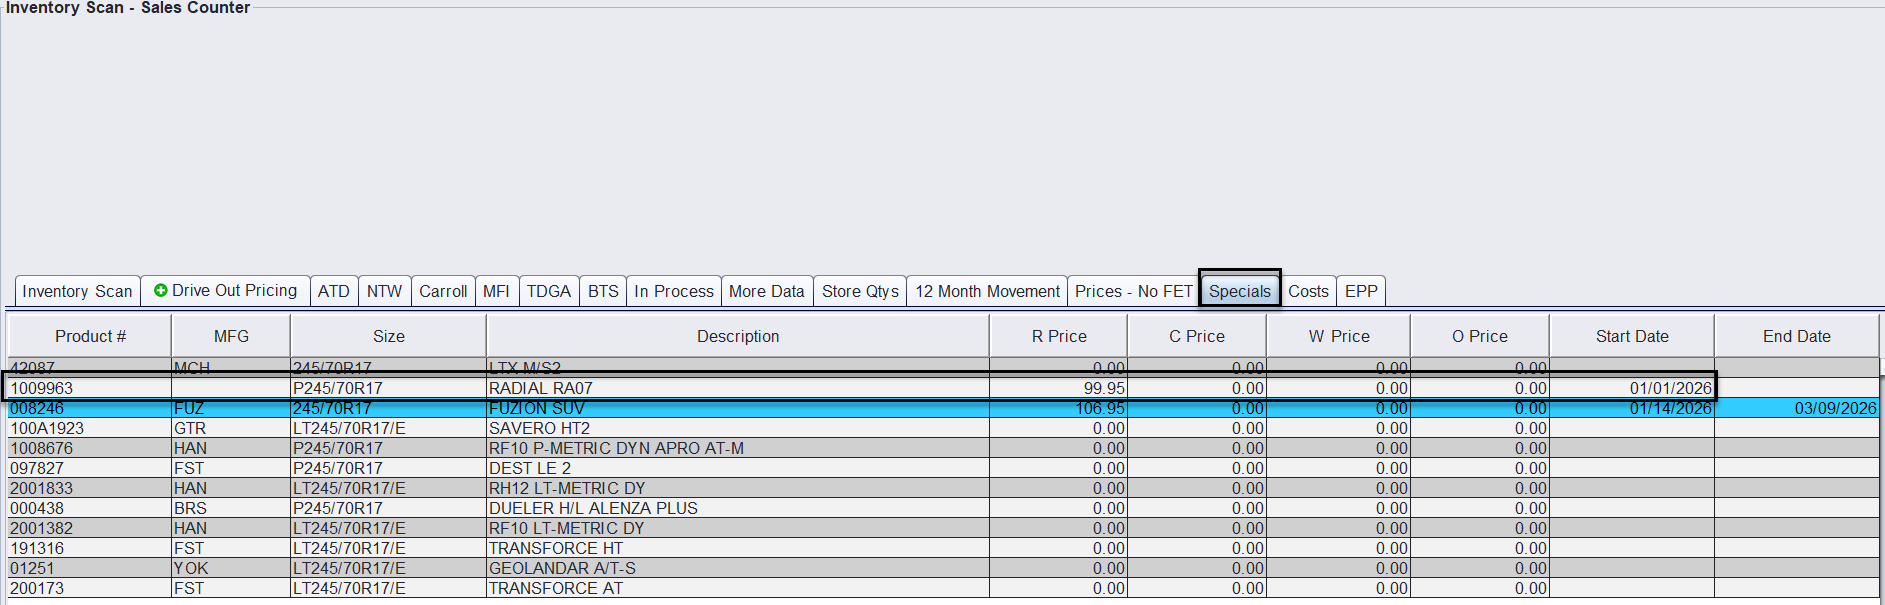
If a special price exists for an item, it can be viewed directly from the Inventory Lookup screen on the Specials tab.
Using Force Special
The Force Special option allows you to highlight inventory items in the inventory lookup screen without changing the selling price.
When enabled, the item will appear highlighted in yellow with red text during inventory lookup and ticket creation. This provides a clear visual cue to sales staff and helps draw attention to specific items.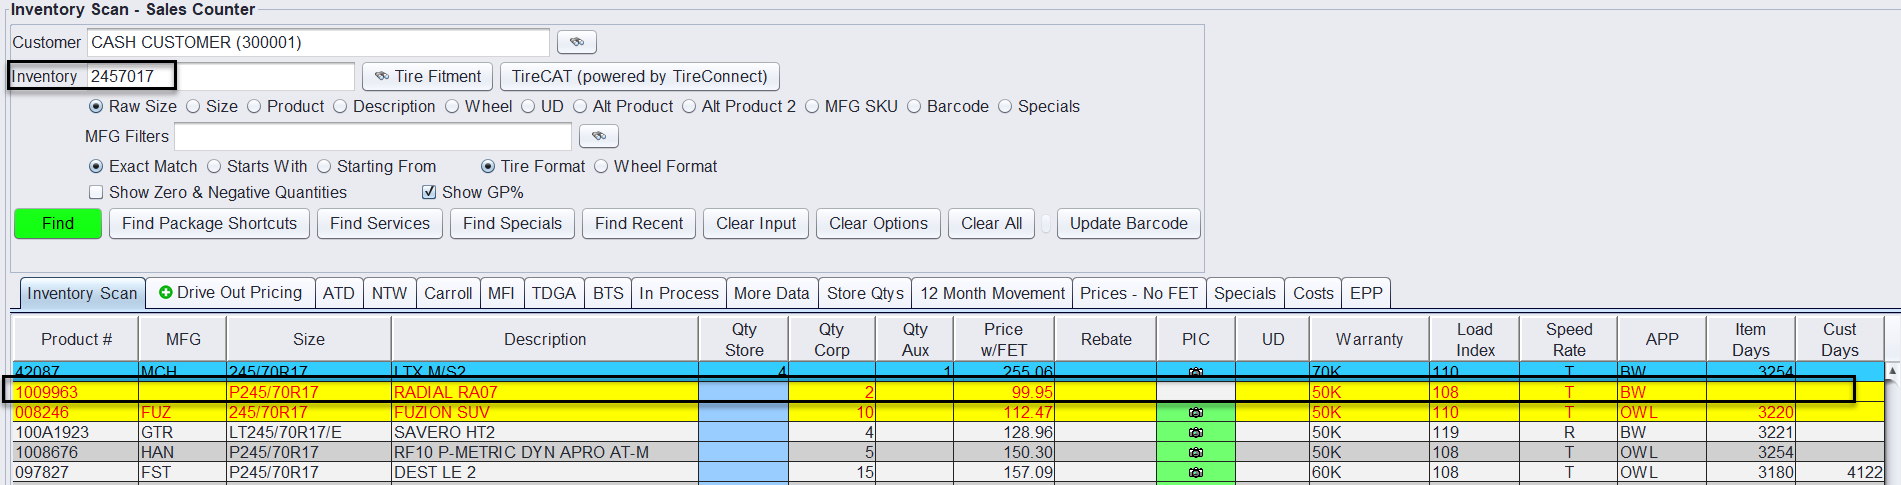
The Force Special option works even if no special pricing is entered for the item. This means you can highlight products to draw attention to them without affecting pricing or margins.
NOTE: If you enter the exact product number in the inventory lookup, the highlight will not display.
Common Uses for Force Special
Force Special can be used to:
- Promote spiff or manufacturer-incentivized items – We can replace the Cust Days column with a SPIFF column (using UD field)
- Move aging or excess inventory
- Push seasonal or promotional items
- Flag priority SKUs for sales focus
- Highlight overstocked products that should sell first
Because Force Special only highlights the item visually, it does not modify the selling price or override pricing rules.
How to Enable Force Special
1.) Navigate to: Views → Administration & Utilities → Inventory → Inventory Add/Edit/Delete
2.) Enter the Product Number.
3.) Select the Specials tab.
4.) Check the Force Special checkbox.
5.) Click Save.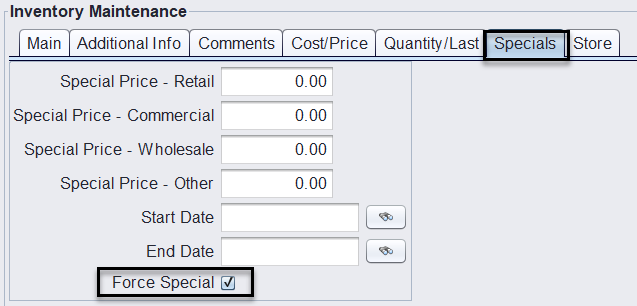
Once enabled, the item will be highlighted in inventory lookup results and when building tickets.
Best Practices
- Use Special Pricing when you want to temporarily change the selling price.
- Use Force Special to visually highlight an item in inventory lookup. This can be used with or without Special Pricing.
- Use Start and End Dates to automatically control promotional periods.
- Use Force Special to draw attention to priority inventory such as spiff items, overstocked products, seasonal items, or SKUs you want sales staff to focus on