
This section explains how to manage inventory transfers in HITS, whether you’re moving inventory between retail locations, warehouses, or centralized distribution hubs.
Submitting a Transfer Request
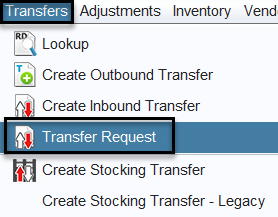
1.) Navigate to Views > Receiving > Transfers > Transfer Request
2.) Enter the required details, including:
-
- Quantity needed
- Product #(Size and Description will populate automatically)
- Location # From (the location you are requesting from)
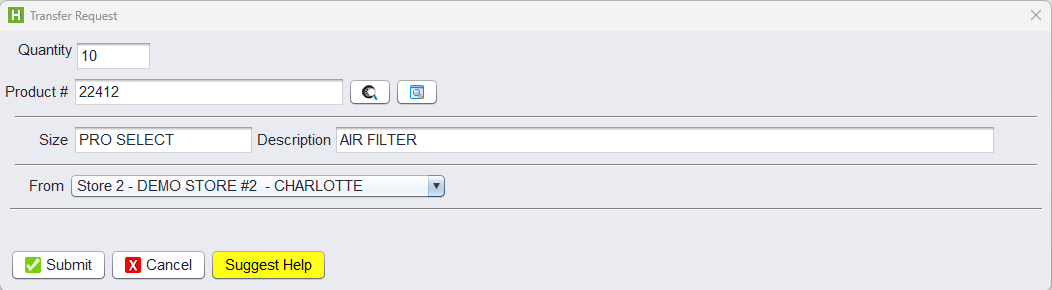
3.) Click Submit to send the request.
What Happens Next?
The location you selected in “Location # From” (i.e., the store you are requesting inventory from) will receive a notification in the upper-right corner of their screen.

They can then press Ctrl+Z to open and review the transfer request notification.

From there, they can choose to proceed by opening a new outbound transfer ticket to fulfill the request.
Creating Manual Transfers
Used for one-off, manual transfers when you know exactly what’s being moved.
1.) Navigate to Views > Receiving
- Use the green +Transfer button (from the top toolbar)
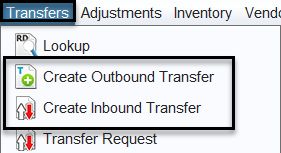
- OR navigate to Transfers > Create Inbound Transfer or Create Outbound Transfer
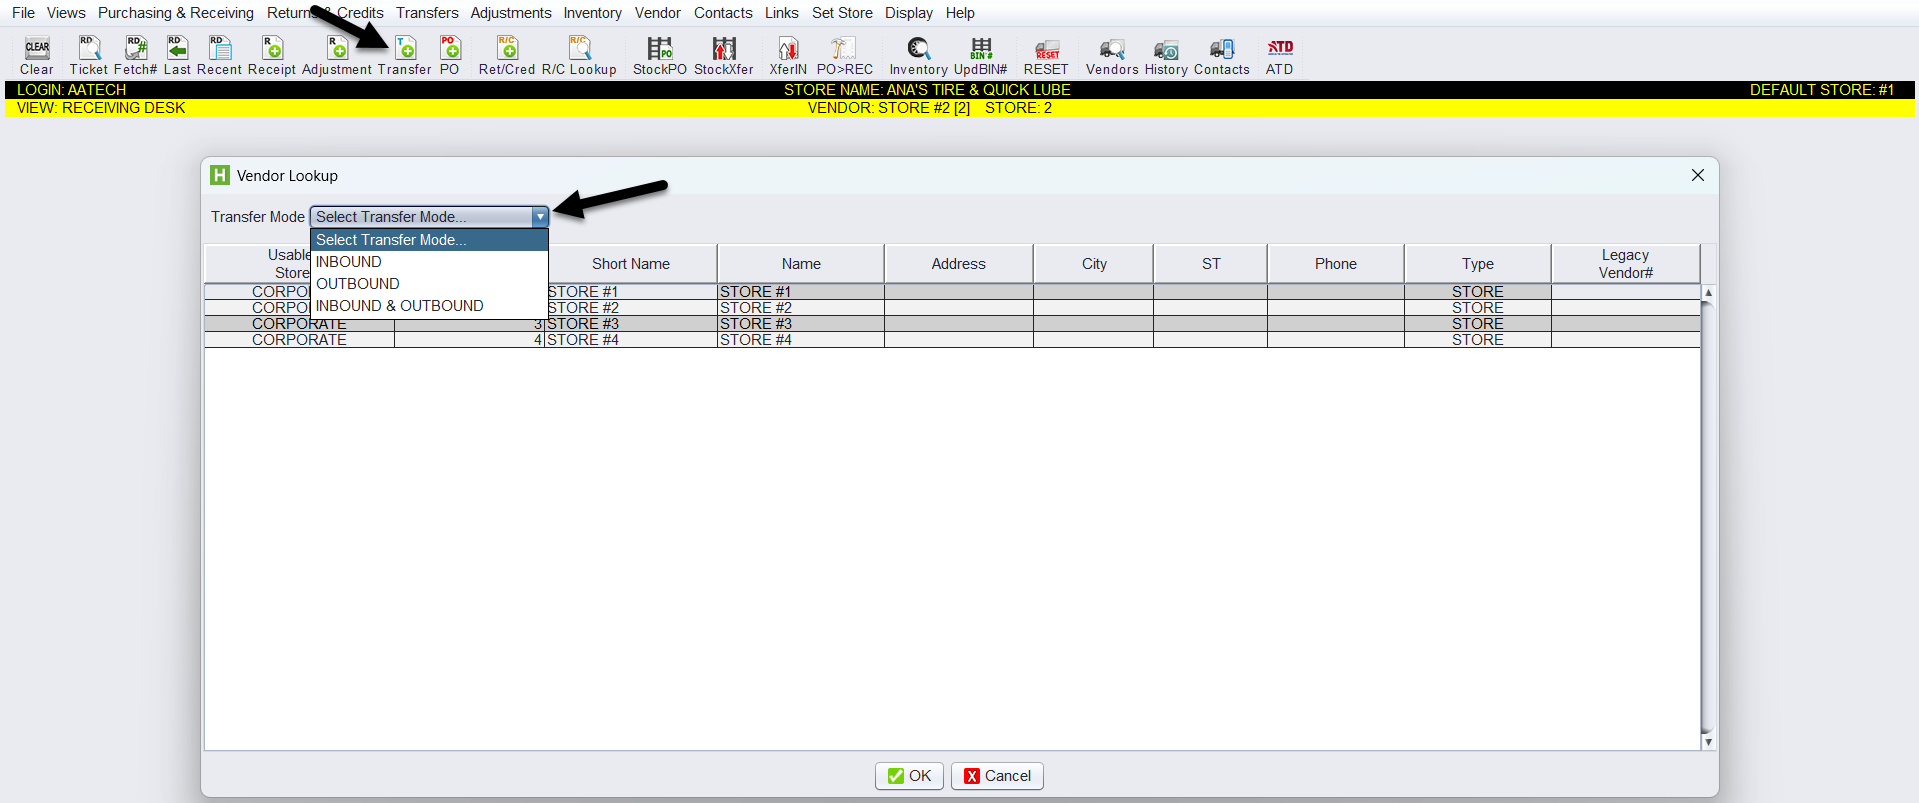
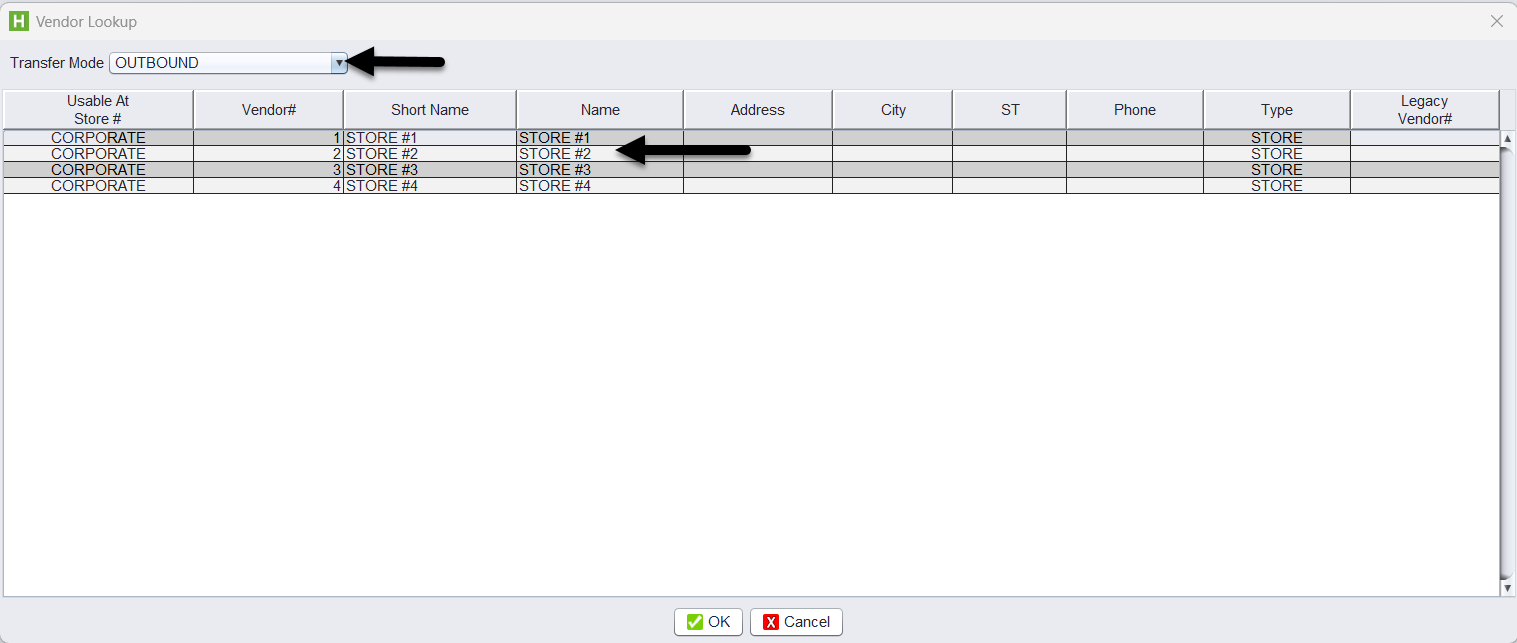
2.) Choose the Transfer Mode and the other store or warehouse involved as the vendor.
3.) On the blank ticket, enter:
-
-
- Product SKU(s)
- Quantities (positive = inbound, negative = outbound)
- Select Save Item for each item entered.
-

4.) Click Save or Save & Exit to save the ticket.
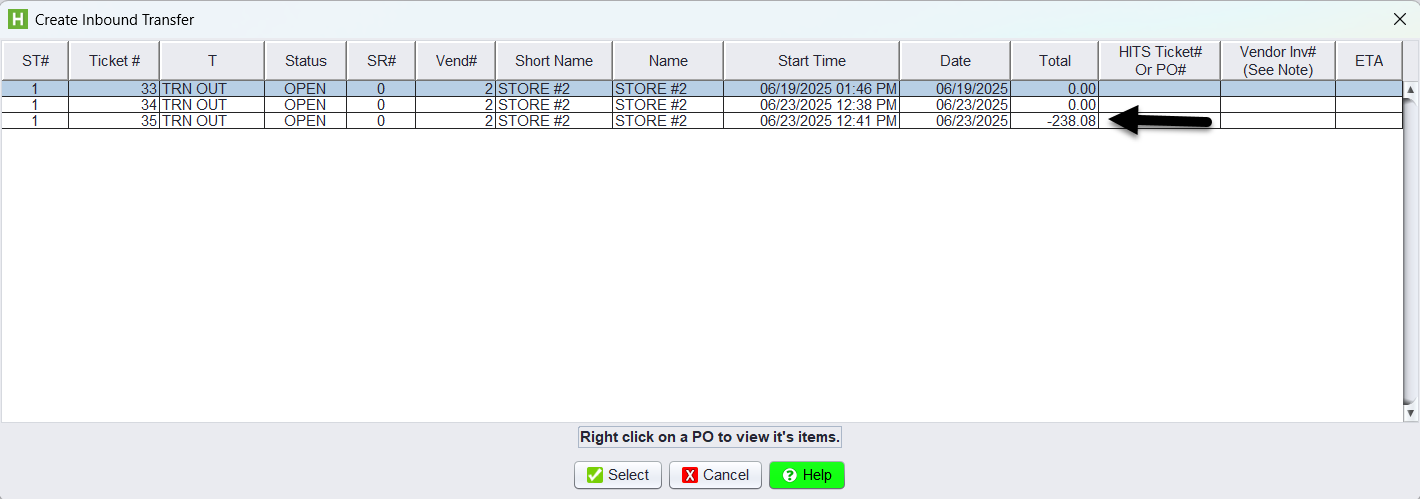
5.) At the receiving location, click the Cross Transfer button in the toolbar to generate the matching inbound/outbound ticket. Select the corresponding open transfer to reconcile and generate the opposite-side ticket.

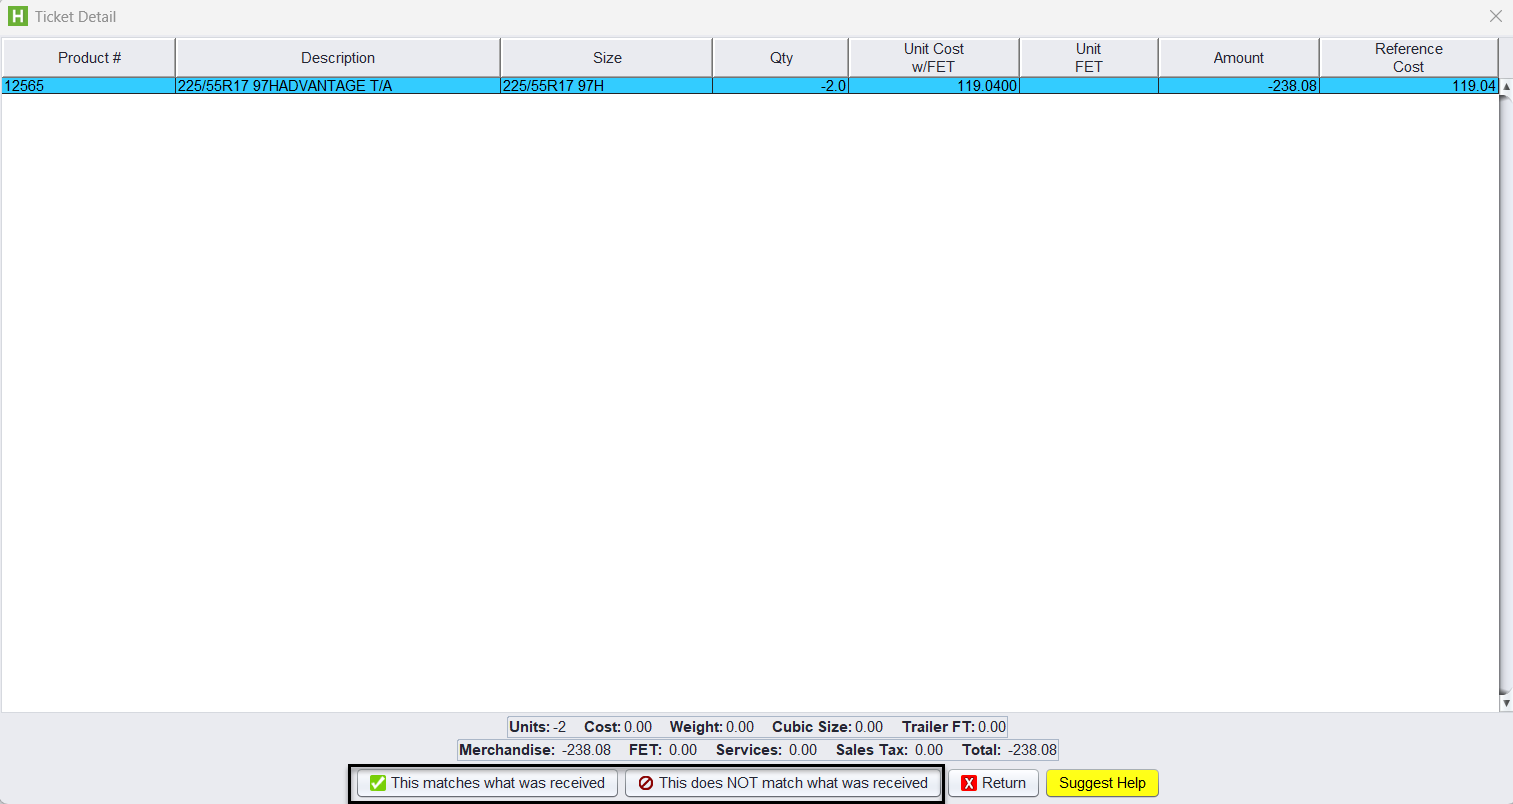
Confirmation Step (on Inbound Ticket):
At the bottom of the screen, you’ll see two options:
-
-
- This matches what was received — click this to confirm the quantities are correct
- This does NOT match what was received — use this if there’s a discrepancy and it needs to be adjusted
-
This step ensures that both sides of the transfer reconcile properly before closing.
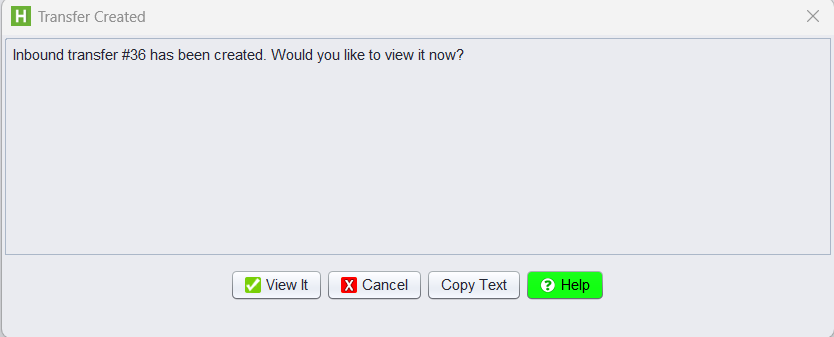
You will receive confirmation of the inbound transfer ticket creation, the ticket will be closed.
Creating Stocking Transfer
Use this tool for replenishment based on inventory levels and recent sales. Either the sending or receiving location can initiate, but both must participate to complete the process.
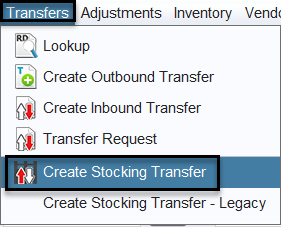
1.) Navigate to Views > Receiving > Transfers > Create Stocking Transfer.
2.) This open the Build Stocking Transfer setup screen:
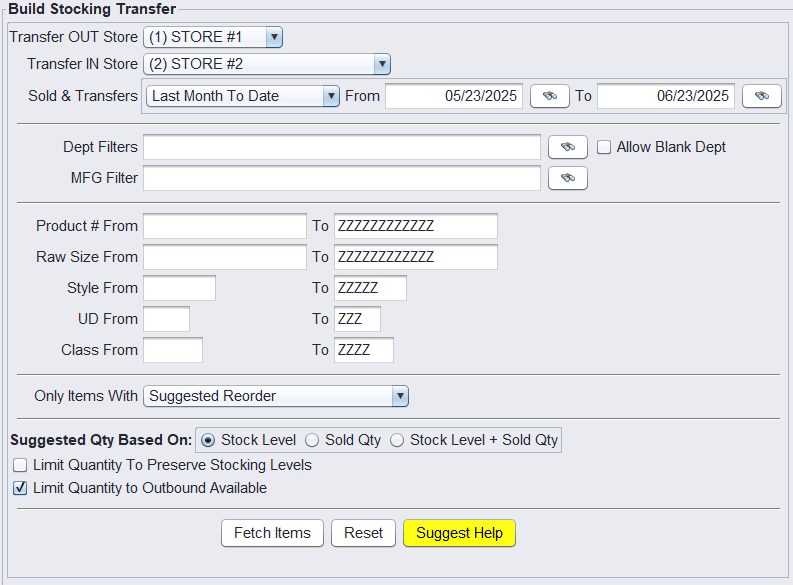
Step 1: Configure the Transfer Criteria
Use the Build Stocking Transfer screen to set up which inventory should be included in the restocking transfer. This screen does not create a ticket, it builds a filtered list of items based on movement, stocking levels, and availability.

Transfer OUT Location / Transfer IN Location
Select the location sending the inventory (OUT) and the location receiving it (IN). You must be logged in as the outbound location to create the transfer.
Sold & Transfers Date Range
Use this to define the time period of sales and transfers you want to base the replenishment on.
Example: “Last Month To Date” or a custom range like 05/23/2025 to 06/23/2025. Why this matters: The date range defines the sales and transfer activity the system uses to suggest restock quantities. Choosing the right window ensures you replenish based on actual demand, avoiding overstock or missed items.
Dept Filters / MFG Filter
Narrow the results to specific departments (e.g., Passenger, Light Truck) or manufacturers. Use the binocular icons to search and select options.
Product Range Filters
Further refine the list using:
-
-
-
- Product #
- Raw Size
- Style
- UD (User Defined)
- Class
-
-
Only Items With
This dropdown lets you narrow down which items are shown when you click Fetch Items, helping you focus only on what’s relevant.
-
-
- All Items – Shows all inventory, regardless of movement or availability. Useful for broad reviews, but not ideal for restocking.
- All Items w/ Available Qty – Only shows items that have available stock at the outbound (sending) location. Helps prevent suggesting items that can’t be transferred.
- Sales – Filters to items that were sold during the selected date range. Ideal for restocking based on recent movement.
- Stocking Levels – Displays only items that have a stocking level defined in the system. Good for replenishing to preset inventory levels.
- Suggested Reorder (Recommended) – Uses system logic to identify what should be reordered based on sales, stocking levels, or both. Best all-purpose option for most transfers.
-
✅ Tip: For most day-to-day replenishment transfers, use Suggested Reorder or Sales with the “Limit Quantity to Outbound Available” box checked to keep transfers clean and practical.
Step 2: Choose Your Replenishment Method

In the Suggested Qty Based On section, select how the system calculates transfer quantities:
- Stock Level – Top off to the location’s stocking level
- Sold Qty – Replenish based only on what was sold
- Stock Level + Sold Qty – Add what was sold to what’s needed to reach stock level
Additional checkboxes:
- Limit Quantity to Preserve Stocking Levels – Prevents pulling more than needed from the outbound location
- Limit Quantity to Outbound Available (Recommended) – Prevents suggesting items that aren’t physically available to transfer
Step 3: Fetch Items
Click Fetch Items to apply your filters. You’ll see a list of items that qualify for restocking based on your criteria, this is a preview and can still be edited before creating the transfer.

Step 4: Review & Adjust
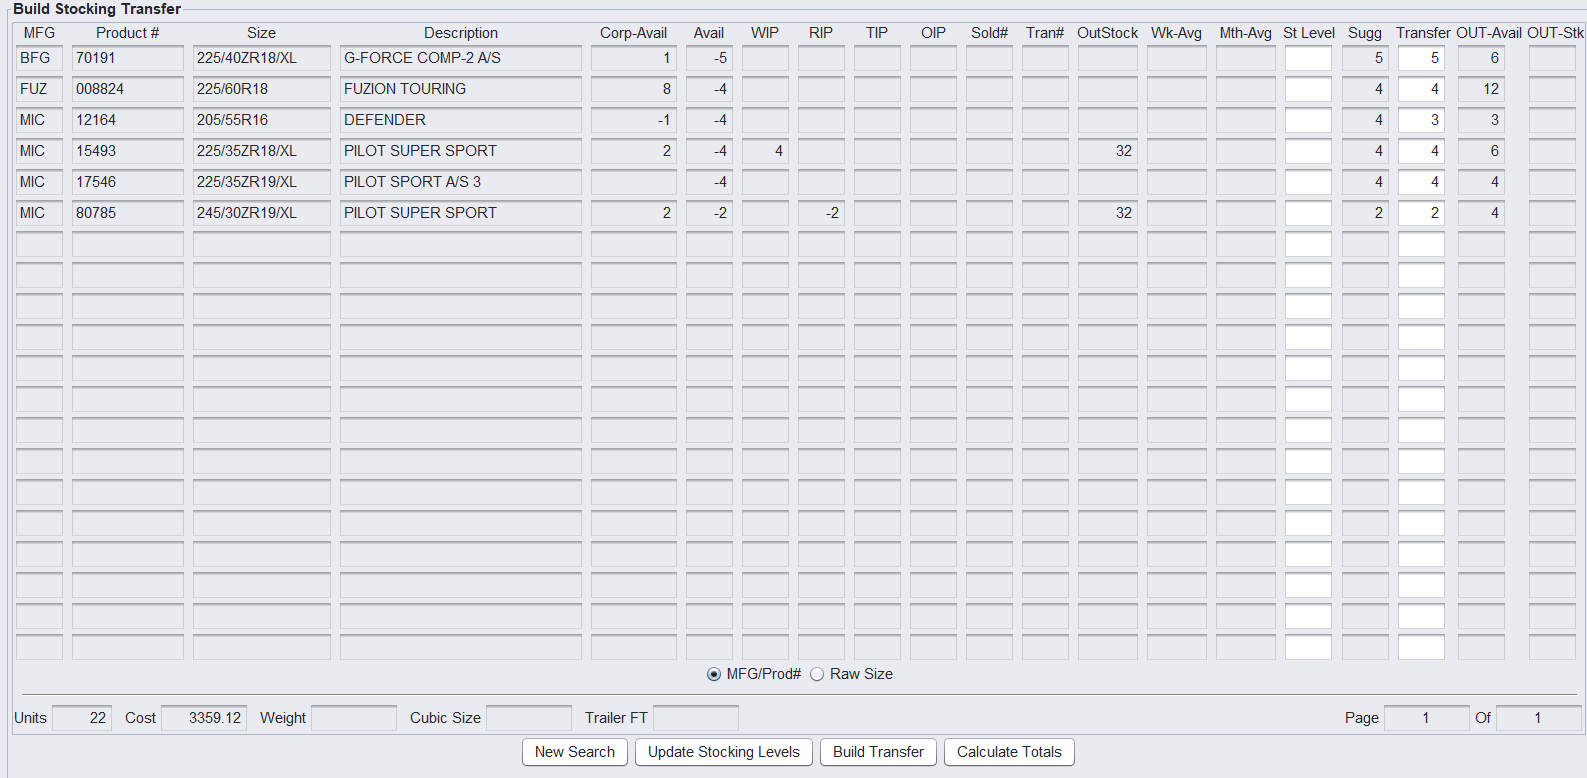
After clicking Fetch Items, you’ll be brought to the Build Stocking Transfer results screen. This screen displays all qualifying items based on the filters and criteria you set. Each row represents one product, with key inventory and movement metrics. You can adjust quantities or proceed to build the transfer.
1.) Review each row showing:
-
-
- MFG / Product # / Size / Description
- Avail / WIP / RIP / TIP / OIP statuses
- Sold# / OutStock / St Level / Sugg / Transfer / OUT-Avail
- Total Units and Estimated Cost at the bottom
-
2.) Edit Transfer quantities as needed
3.) If you adjust Stock Levels, click Update Stocking Levels to apply changes

Step 5: Build the Transfer Ticket

Once you’re satisfied:
1.) Review that OUT-Avail quantities are sufficient for all items.
2.) Click Build Transfer – this opens the Create Stocking Transfer dialog window
3.) In the pop-up window, click Create Transfer to finalize and generate the transfer ticket
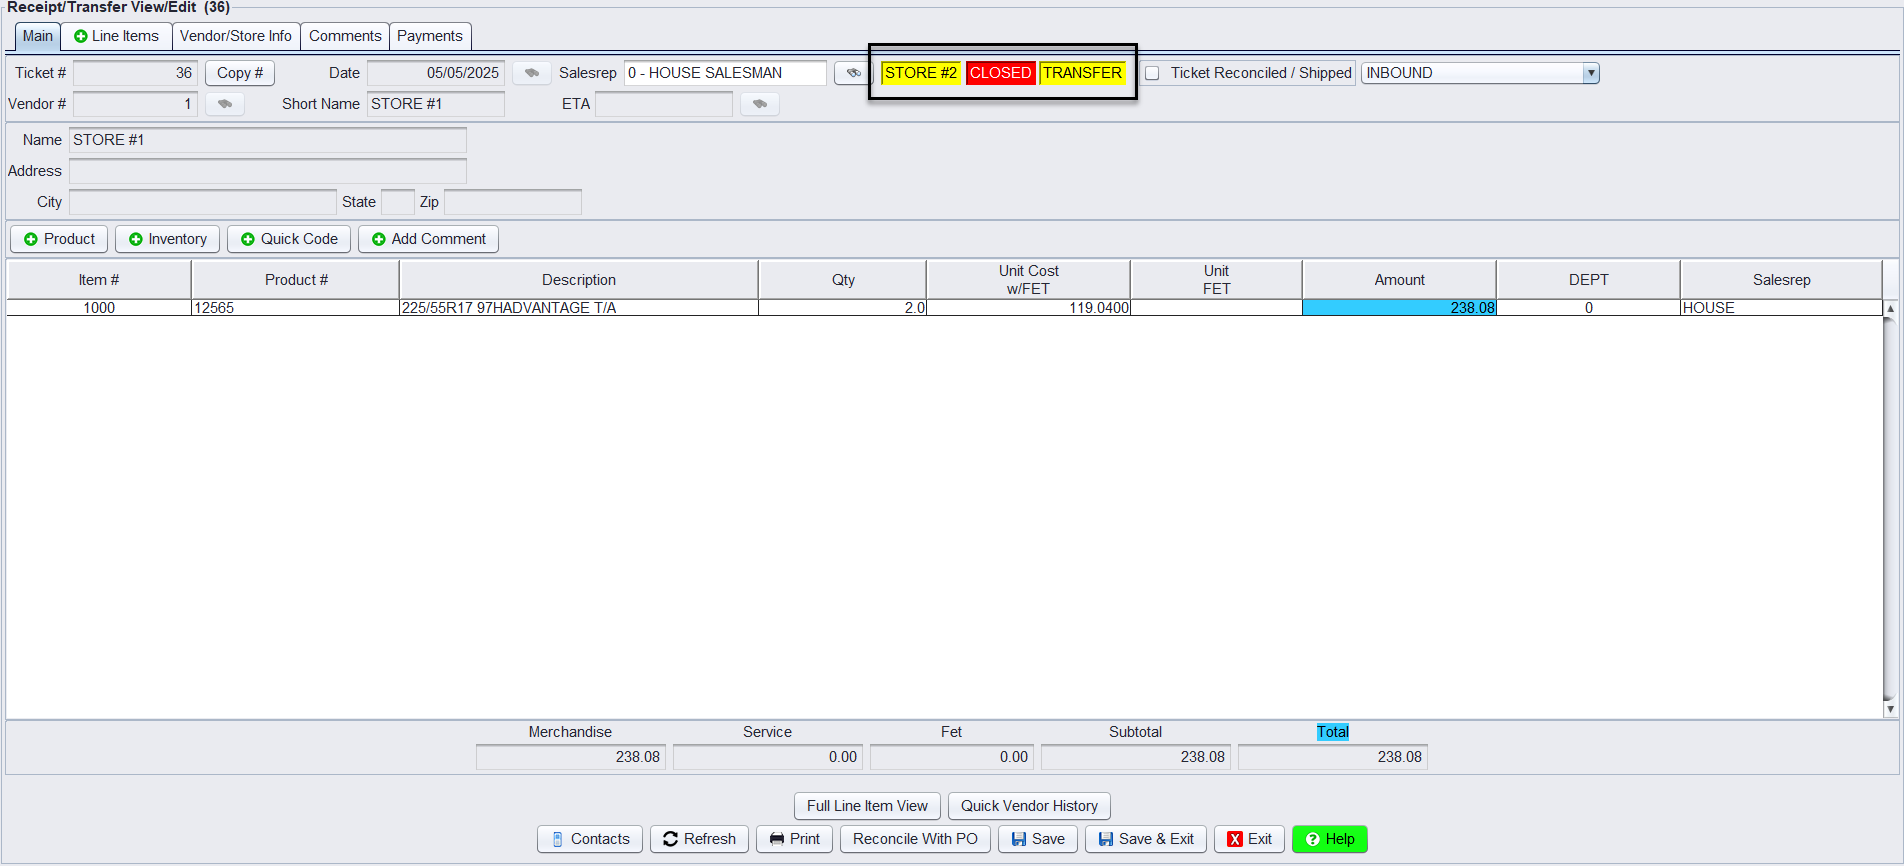
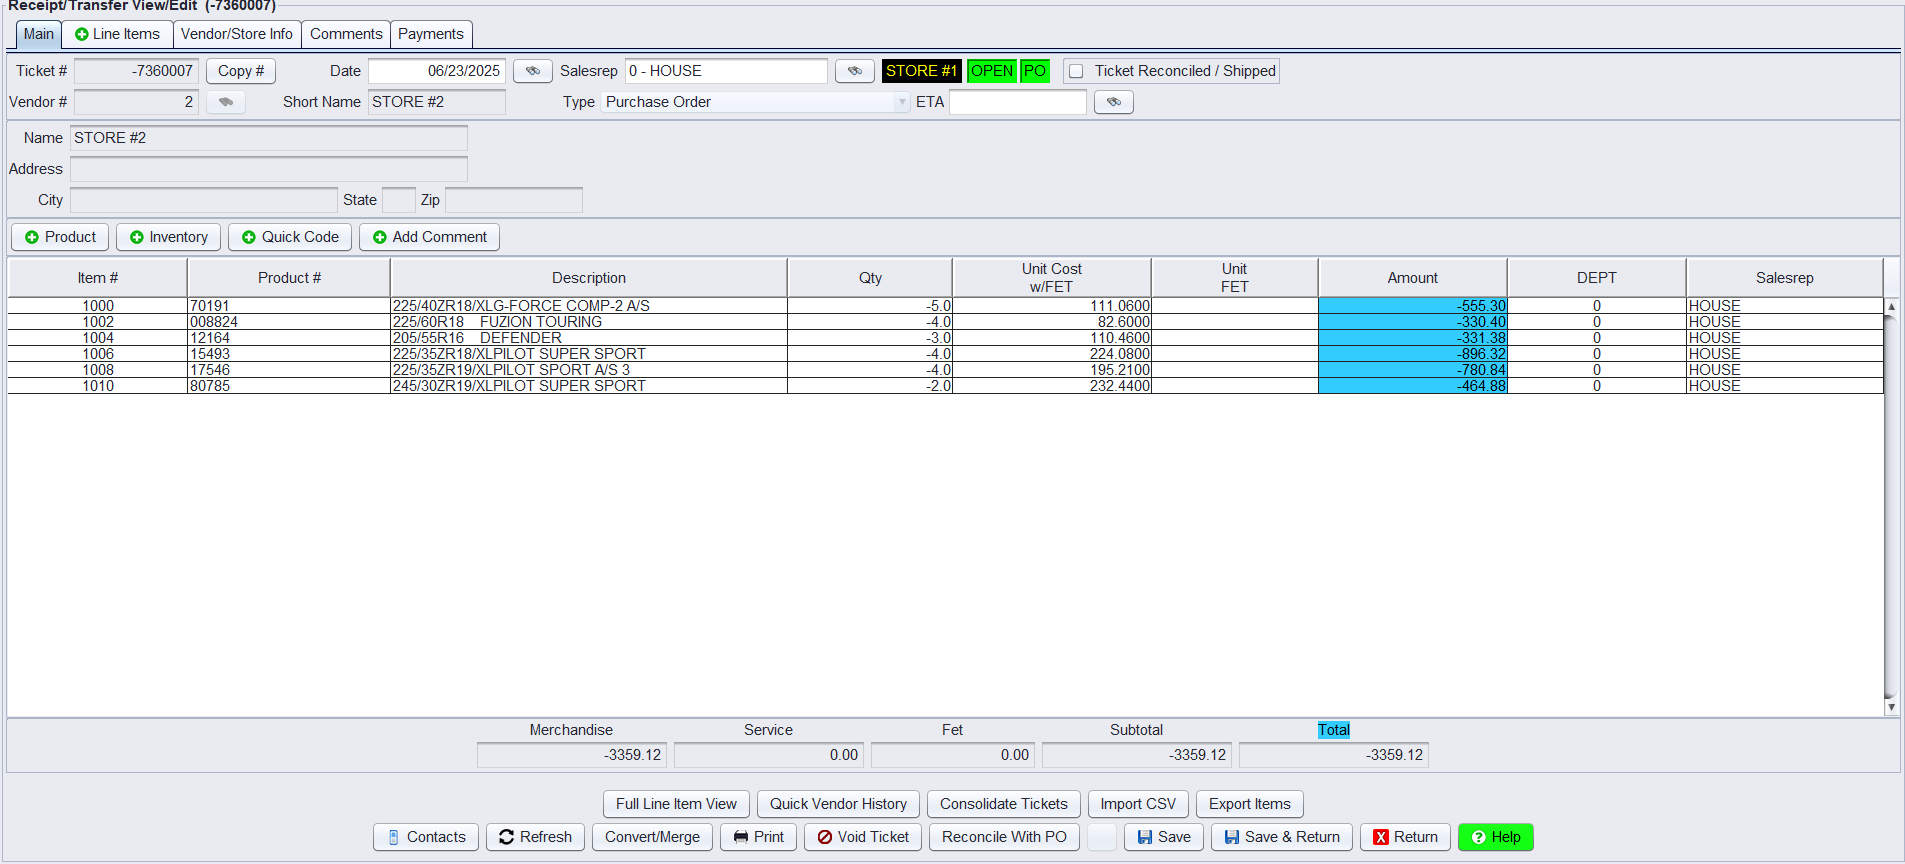
This creates a formal transfer ticket that behaves like any manual transfer going forward. The ticket will open in the Receipt/Transfer screen with negative quantities, indicating it is an outbound transfer from the current store or warehouse.
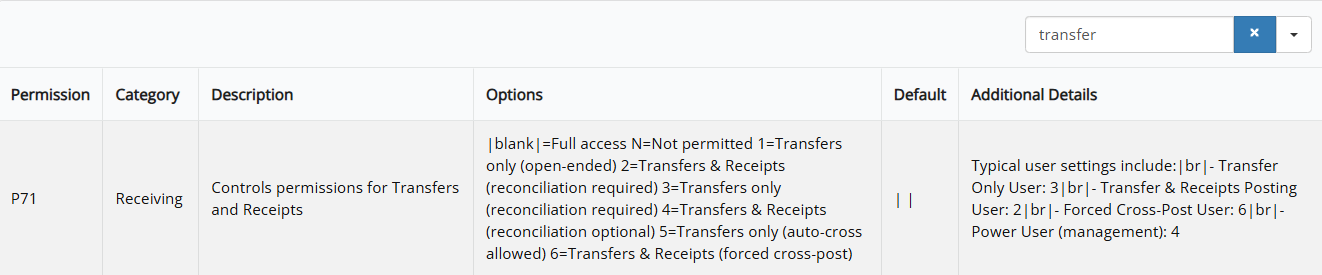
Transfer Permissions
The system supports two user permission types for processing transfers:
1.) Forced Reconciliation (Default Setting)
-
- One side starts the transfer ticket.
- The other side must close it.
- Either location (inbound or outbound) can initiate.
- Common for location-to-location transfers that require dual acknowledgment.
2.) Auto Cross-Posting
-
- A single user starts and completes the transfer.
- Automatically updates inventory at both locations.
- Used mainly by management for warehouse-to-location transfers.
- Faster, but with less built-in accountability.
If your location needs inventory from another location, you can submit a request that alerts the other location to initiate and send a transfer. Please note that the outbound (sending) location is still responsible for generating the actual transfer process in HITS.
⚠️ Important Operational Note: For central/mixing warehouses, management users often have auto cross-posting rights to push inventory without needing confirmation from the receiving location.