
When you need to update an inventory item’s quantities and costs in your inventory, creating a receipt is one way to do that. While receipts can be generated through tools like the Purchase Order builder or by uploading a spreadsheet, the method outlined below focuses on entering them manually.
The process is similar to creating a workorder. You’ll open a ticket, add the items, and close the ticket once you’re finished.
Steps to create a manual receipt
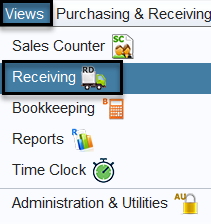
1.) Click on Views>Receiving
2.) Click on the +Create button in your toolbar (both icons will bring you to the same place).

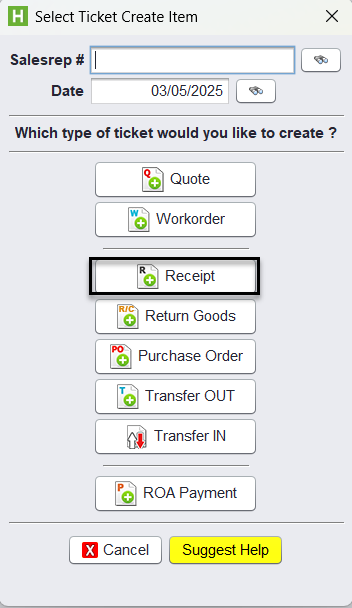
3.) Click on Receipt button to create a new receipt.
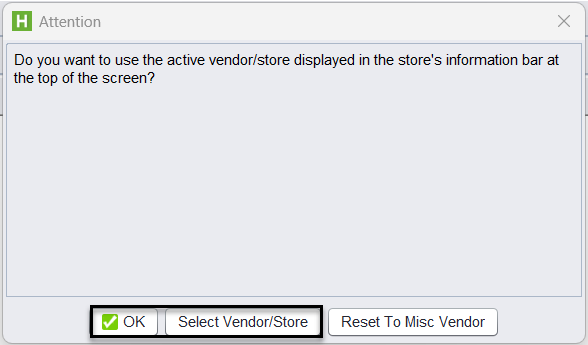
You will be prompted to confirm whether you want to use the active vendor/store shown in the information bar at the top of the screen. Select OK to proceed with the active vendor/store or choose Select Vendor/Store to make a different selection.
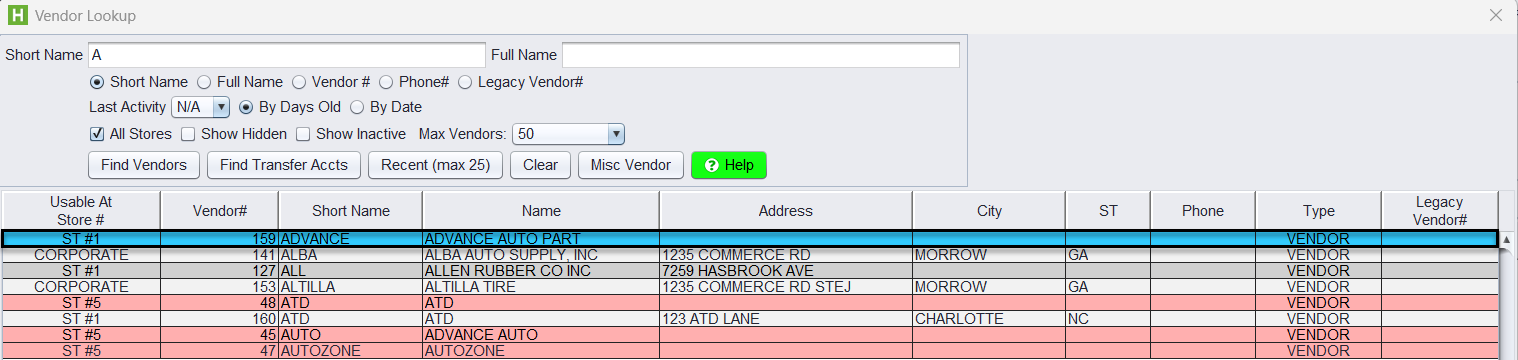
4.) Find the correct vendor and double-click to make this vendor the “active” vendor for this receipt.
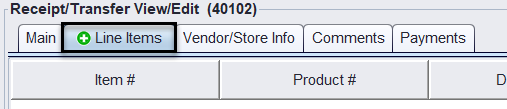
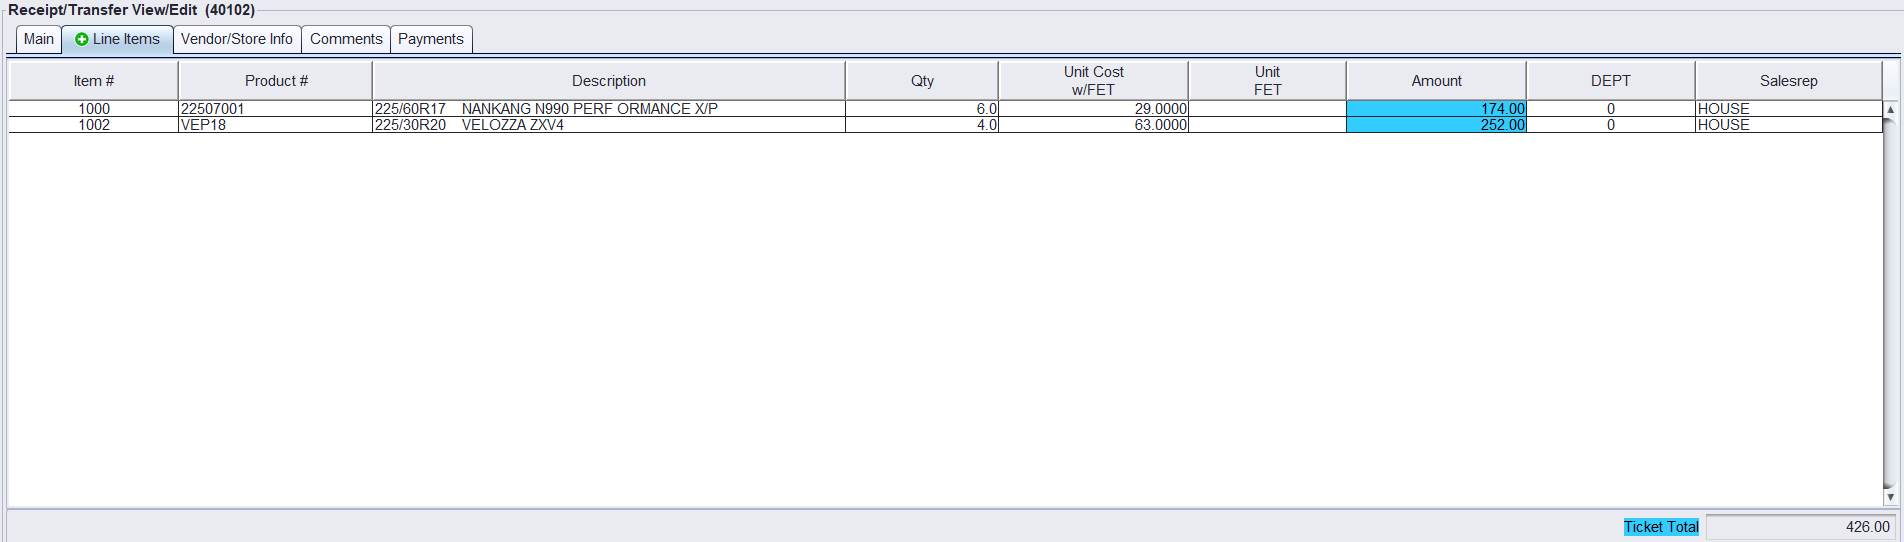
5.) Click on the Line Items tab to add the product #.
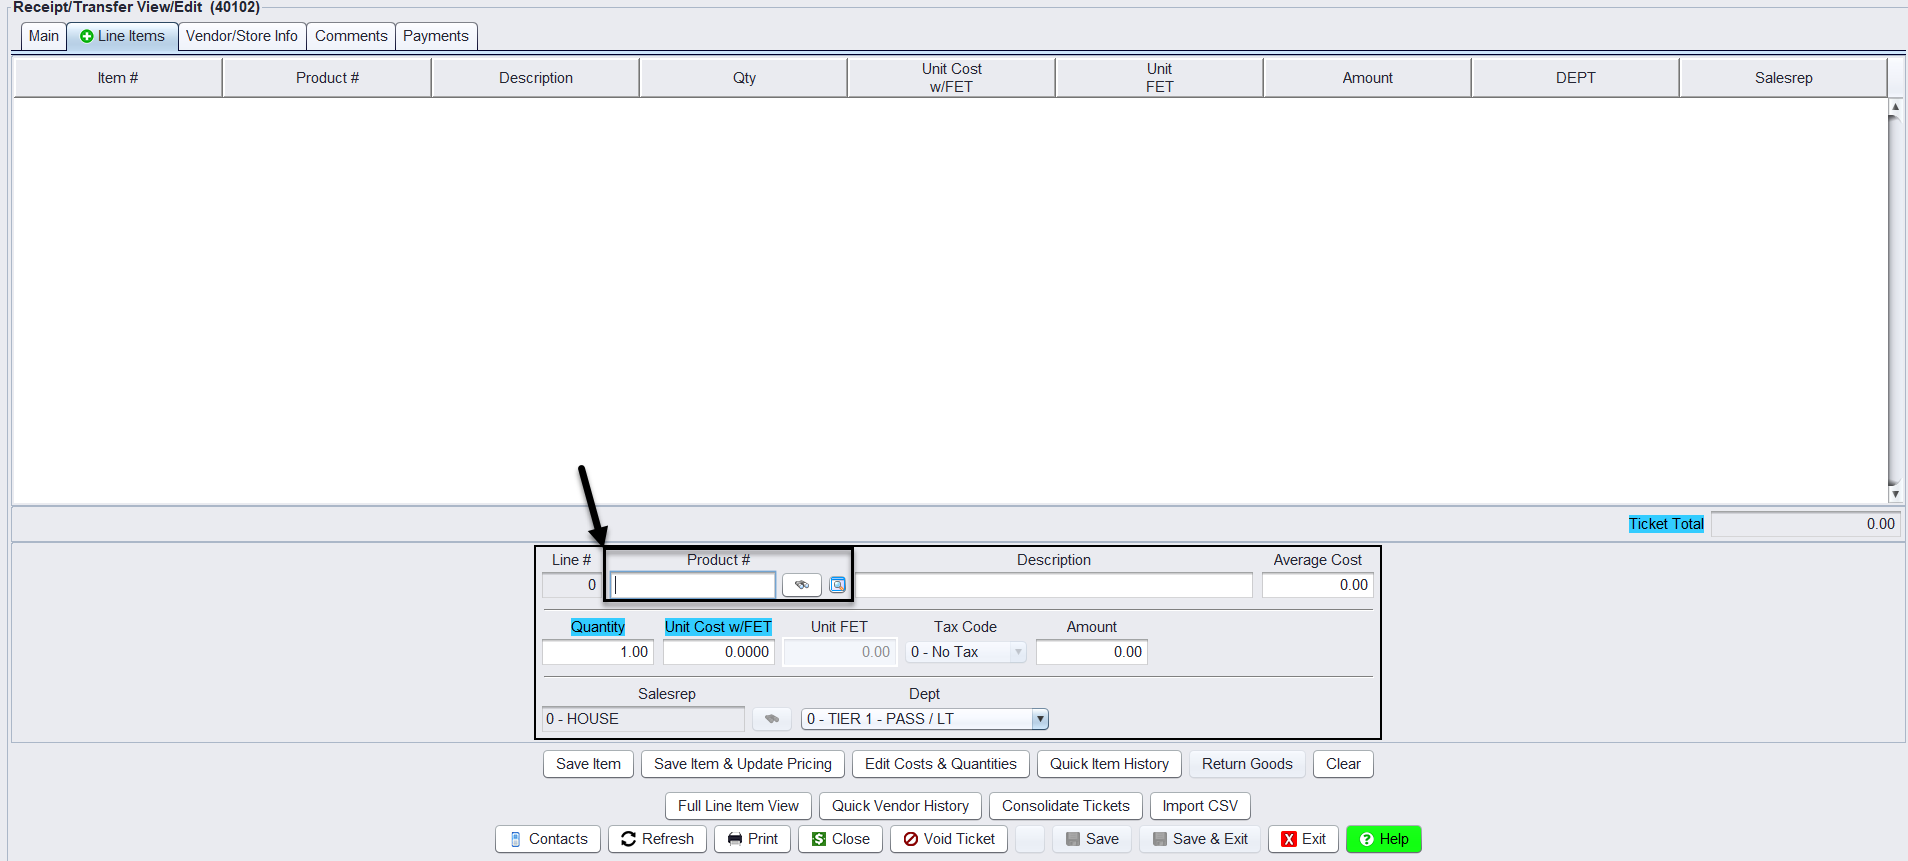
6.) If you already know your product #, key in the product # of the item received and then click Enter. If you don’t know the product # of the item received, click on the binoculars beside the Product # field and find your item on the inventory lookup screen. Double-click on the item to make it active on the receipt.
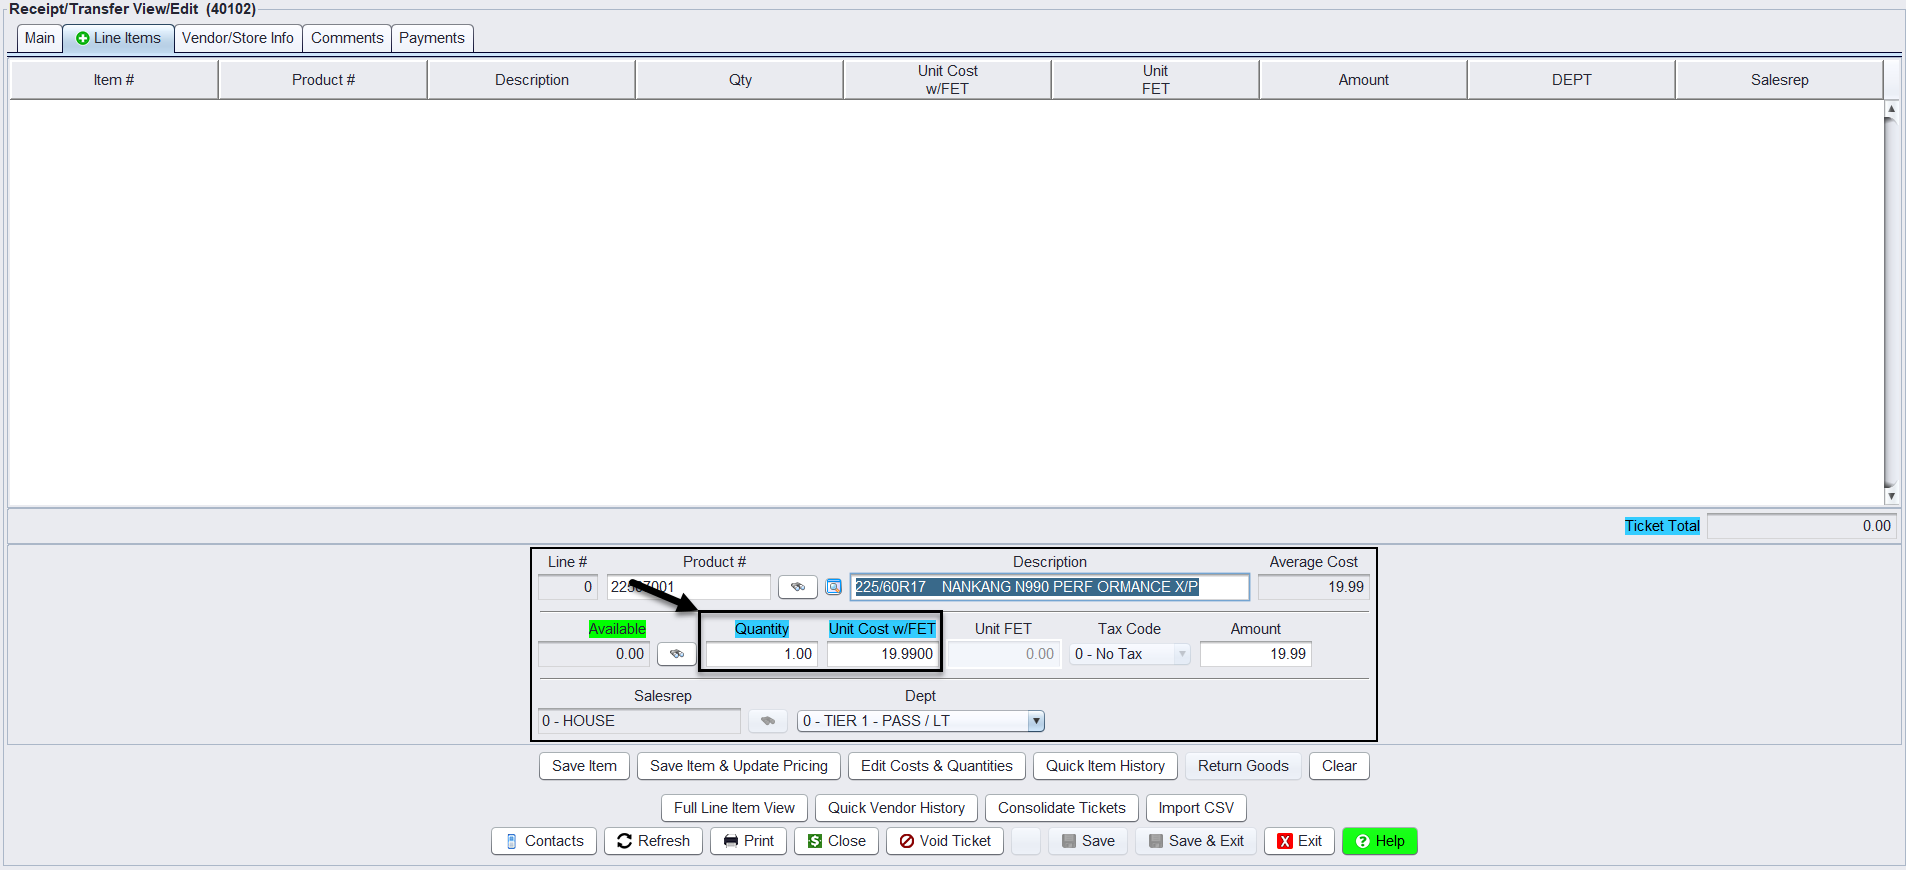
7.) Key in the quantity you are receiving and the new cost of the item in the Quantity and Unit Cost w/FET. Include any FET amount in with the cost you are entering. FET will be automatically broken out for you in the Unit FET box.
8.) To update cost and quantity ONLY, click on the Save Item button. This will update the cost and quantity for the specified line item.
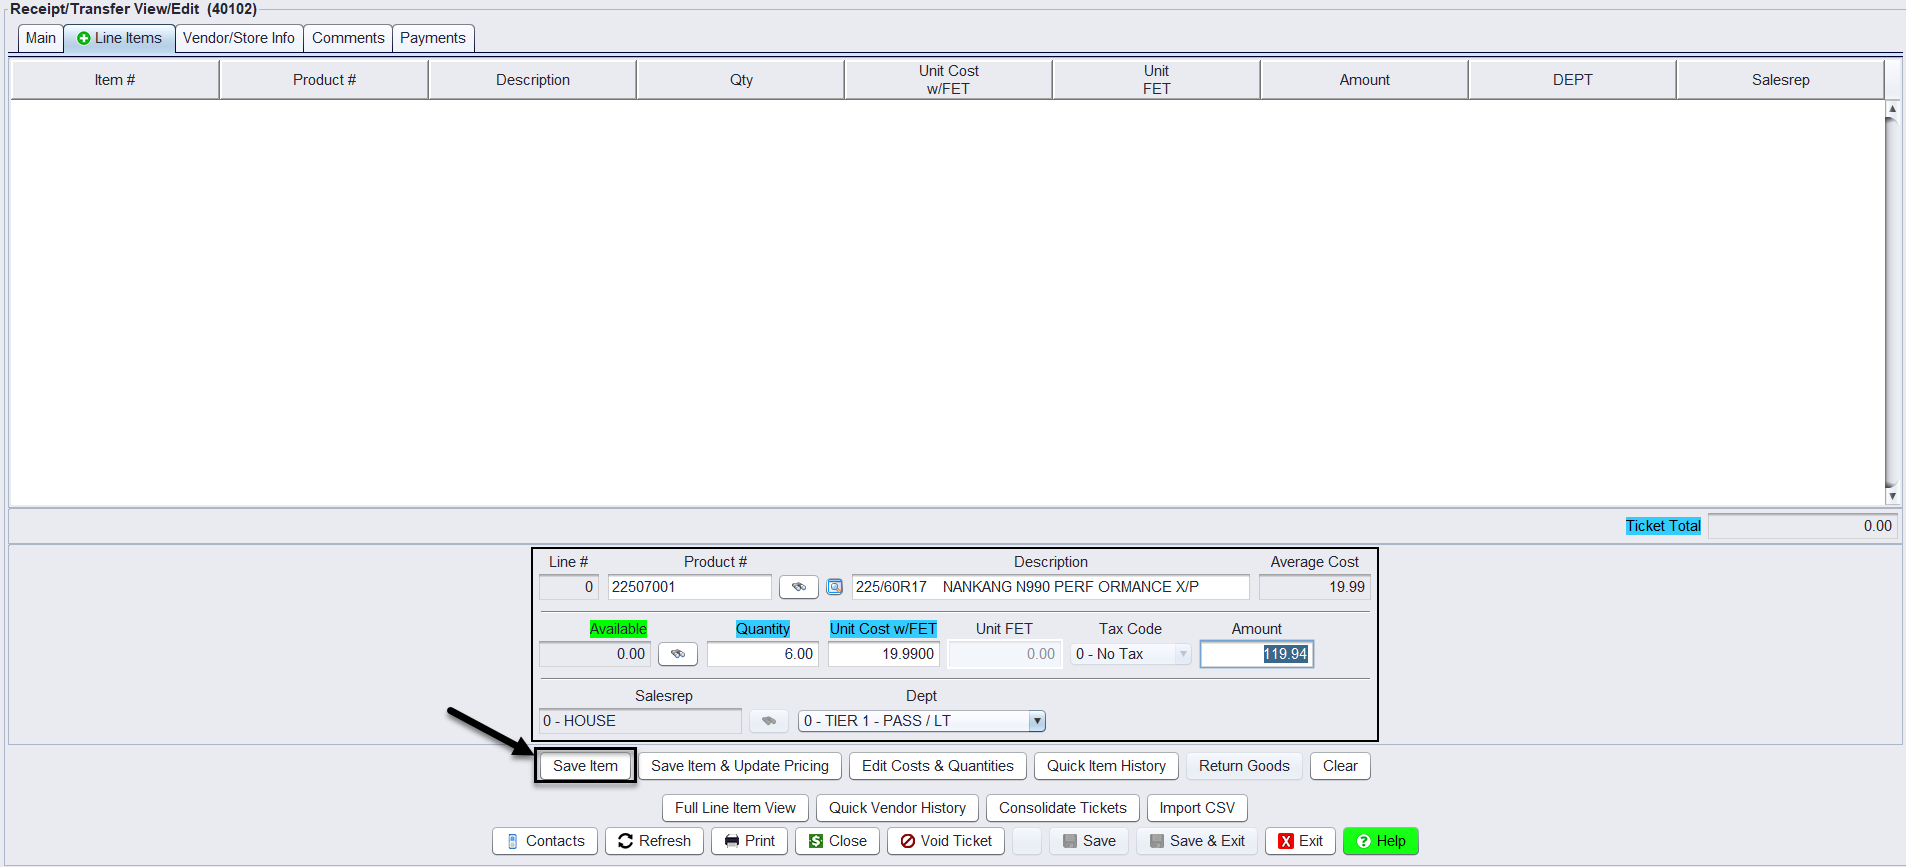
9.) To update selling price, along with cost and quantity, click on Save Item & Update Pricing. (see Update Inventory Prices for additional information)
10.) Repeat these steps for each additional item you are adding to the receipt until finished.
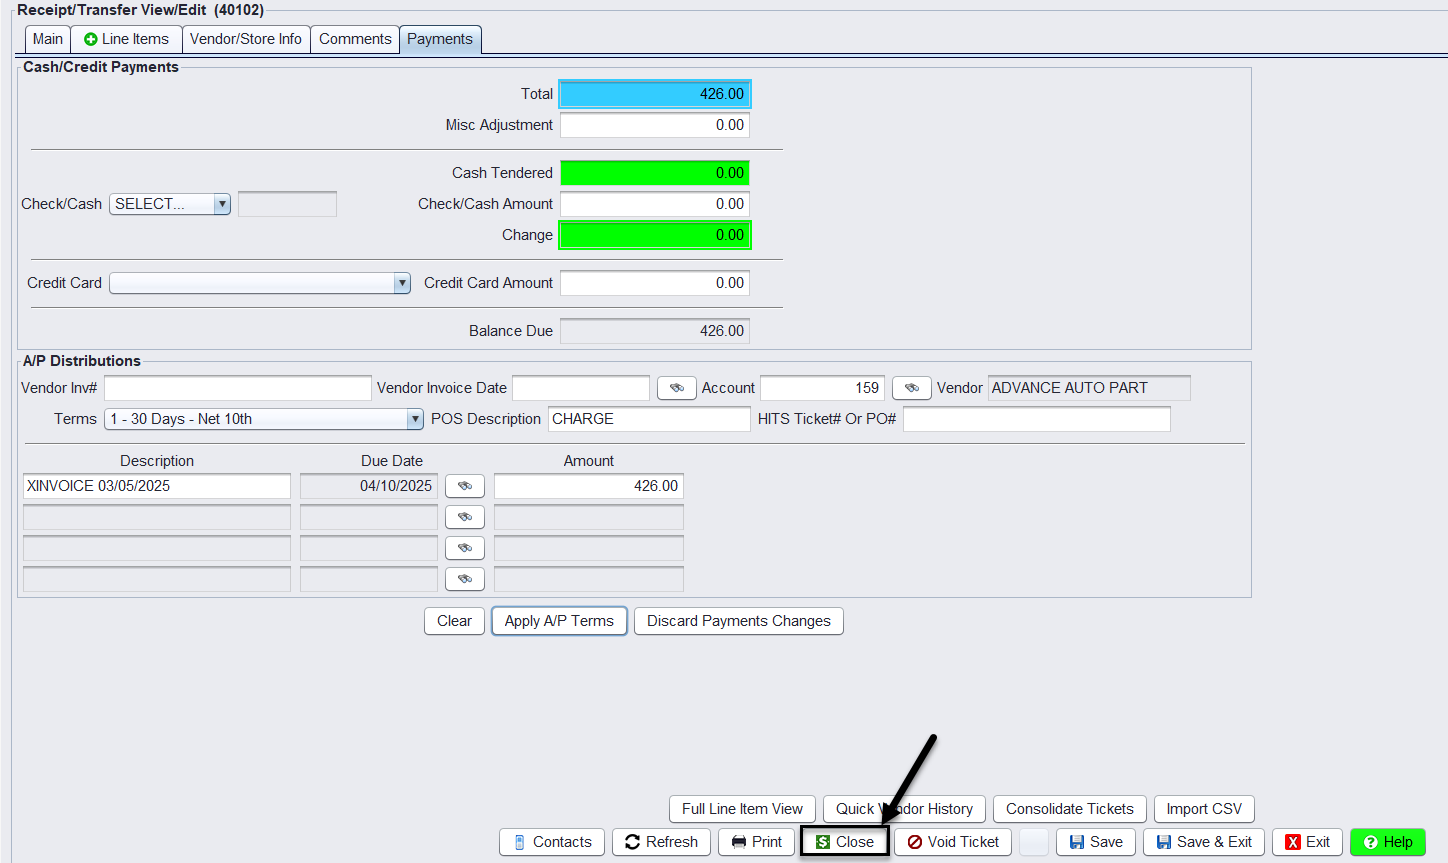
11.) Next, click on the Payments tab.

12.) Click on the button to Apply A/P Terms.

13.) Click on the Close button to close the receipt.
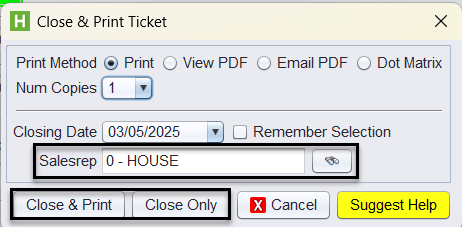
14.) You can choose a Salesrep, Close & Print or Close Only to finalize the receipt.
Note: Users must have password permission to create and close receipts (P71). If you need to give a user password permission to perform this function or take away permission, please contact your system administrator.