
HITS BPOS supports the printing of a true (4” X 6”) tire label, where the label contains a
special adhesive that sticks to the tire tread. The information printed includes…
• Product# (or SKU#)
• Size
• Description
• Barcode (of the Product# or SKU#)
The tire information prints both horizontally and vertically so that regardless of how you
stack your HITS BPOS tire labeled tires, you can easily read the tire information. Below
is a sample of a printed HITS BPOS tire label.

Hardware Requirements
Printer: The Zebra ZT200 Series is the printer model needed to print tire labels.
ZT230 or ZT231 TT are two options within this series.
Print Type: Printers can be ordered for either Direct Thermal or Thermal Transfer printing.
Direct Thermal printers are easier to maintain and likely suitable if tires are to be stored
indoors. If tires are to be stored outdoors, Thermal Transfer is likely preferred as these
labels are more durable. Thermal Transfer does require ribbon, which adds cost and
maintenance. More information here.
Labels: 4″ x 6″ labels are recommended for the tire label to print.
Loading labels and ribbon (for Thermal Transfer printers)
Ribbon and label installation: The link below is to a YouTube video that covers loading
the labels and the printer ribbon to a typical Zebra printer. This printer is very unique in
that the ribbon is a “raw” roll of ribbon, not a cartridge. Here is a link to the ZT231 TT recommended labels along with the recommended ribbon.
How-To Video For Loading Labels
How to print labels
Labels are accessible from 2 different places. You can print labels directly
from the Inventory Lookup screen (shown below).
1. Click on Views > Receiving.
2. Click on the Inventory Lookup icon on your toolbar.
3. Find your item in question.
4. Right-click on the item and select Print Label from your menu

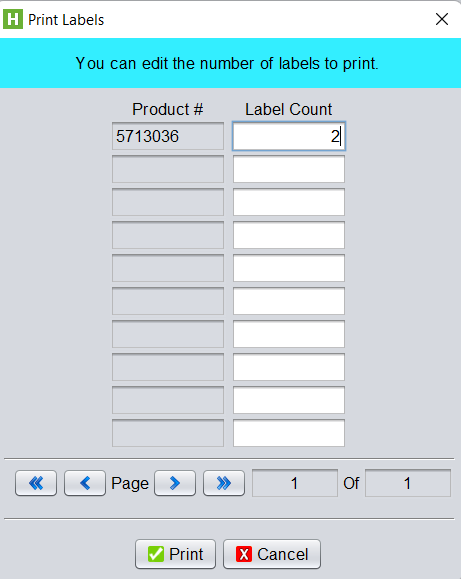
5. You can then edit the number of labels you want to print (it defaults to 1) and click on print
The second method is to print directly from an Inventory Receipt or Purchase Order
when receiving in your tires. This method is the more efficient of the two as it allows you
to print all your labels at once for the items on your ticket.
1. From the Line Items tab in the body of your receipt or purchase order (shown
below), highlight all of your line items. (If you only want to print a few of the line
items, you can hold down your control key and click on each item you wish to
print.)
2. Right-click and click on Print Labels from the menu.
3. Label quantities will default to the number of tires you are receiving in on your
ticket. You can edit label quantities if necessary and then click on Print:
