
About:
The TireBrands library comes with the function to add lines of tires to your master inventory file all at once (by Mfg and Style), various sizes from a line of tires or just a single tire.
How:
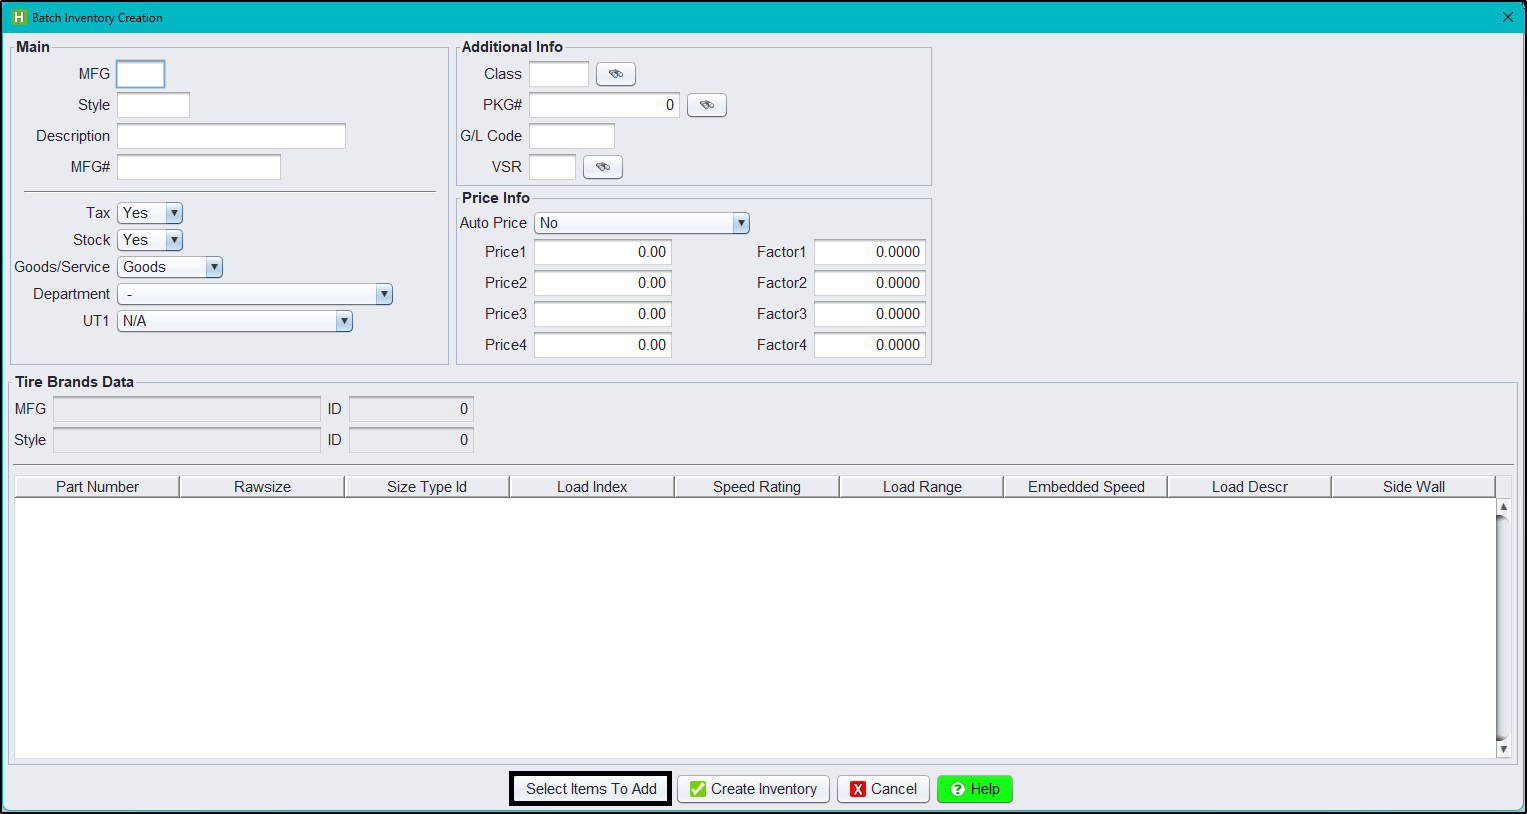
1.) Click on Views > Administration & Utilities.
2.) Click on Inventory > TireBrands Inventory Builder.
3.) On the Batch Inventory Creation screen (shown below), click on the Select Items To Add button at the bottom of the screen:
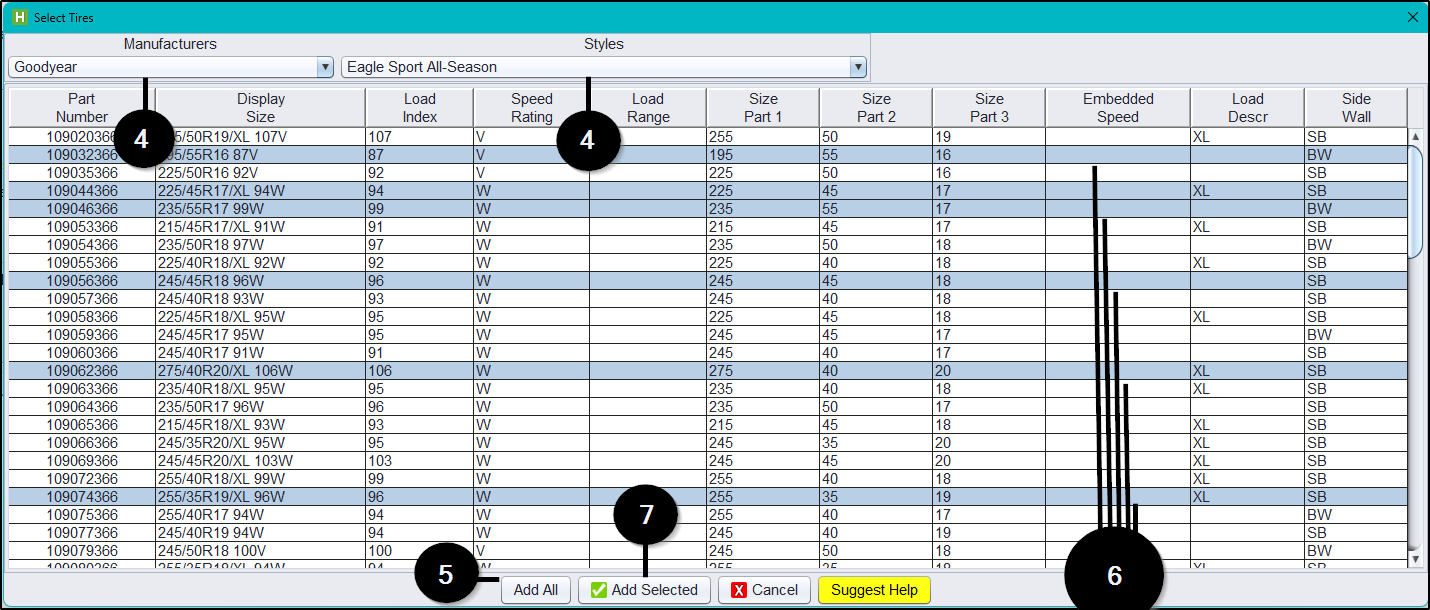
4.) On the Select Tires screen (shown below), find your Manufacturer, then Style.
5.) To add all tires of a certain line, click the Add All button at the bottom.
6.) To add only one, click on the tire you want. If you want to several, hold down your CTRL key while click on each tire you want to add.
7.) Once finished, click on the Add Selected button at the bottom of the screen:
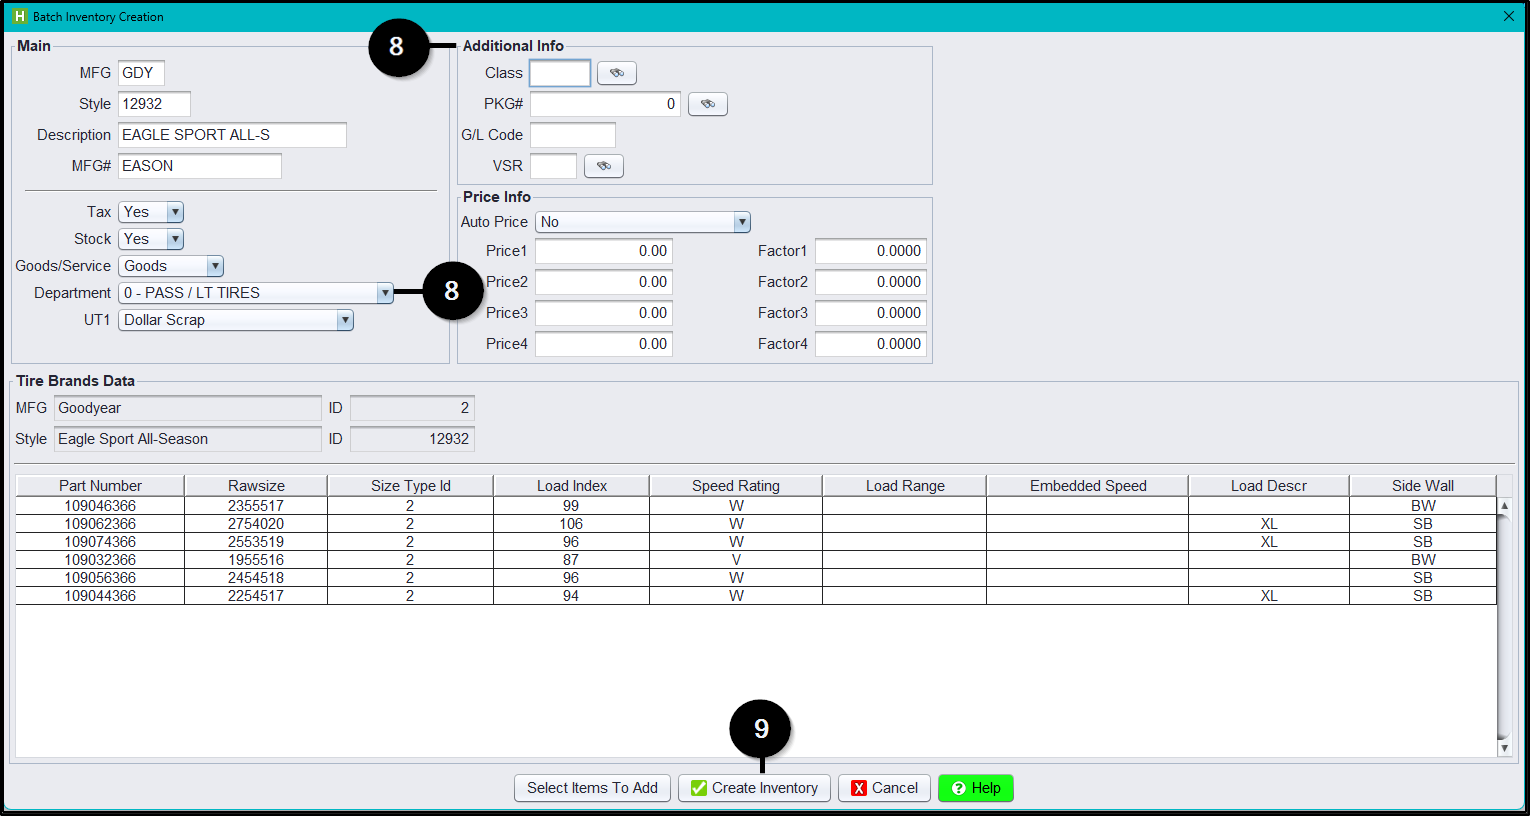
8.) Back on the Batch Inventory Creation screen (shown below), be sure to select the correct Department for these tires and add any additional information to the other fields as necessary (like default Tire Package, for example).
9.) Click on the Create Inventory button to add these items to your master inventory file:
Inventory Builder Not Loading? Here’s What to Check
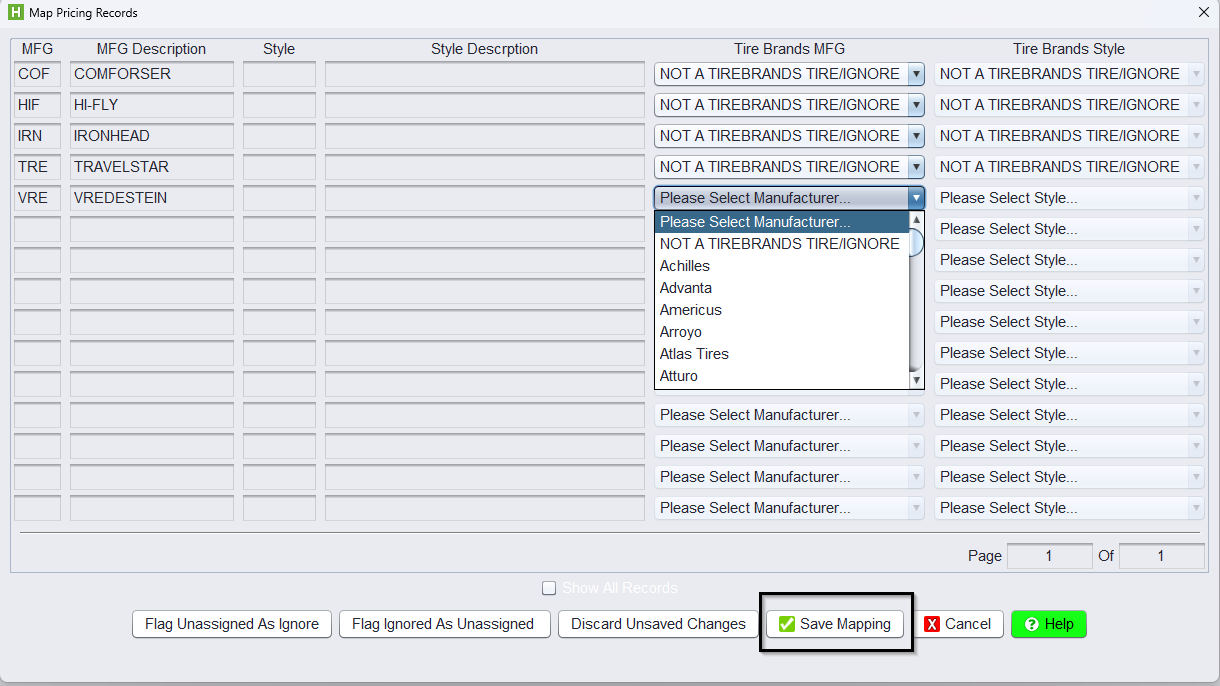
If you’re seeing the mapping screen instead of the Inventory Builder when using the TireBrands integration, it likely means there are tire manufacturers in your system that haven’t been mapped yet with TireBrands.
Why This Happens:
The Inventory Builder relies on properly mapped manufacturer data. If there are manufacturers in your system that don’t exist in TireBrands, the builder can’t proceed until those are addressed.
What You Can Do:
1.) When prompted with the mapping screen, review the list of unmapped manufacturers.
2.) If any manufacturers are not part of Tire Brands, set them to:
“NOT A TIREBRANDS TIRE / IGNORE”.
3.) Click Save Mapping once finished.
After completing these steps, the Inventory Builder should display as expected.
**Note – Users must have permission settings in the system to have the ability to add Inventory (P40, P80). If you need to give a user permission to have the permission setting, please contact your system administrator.