
This guide explains how to set up a Customer Account Request Form on your Tirelink WordPress site using the WPForms plugin. WPForms is a third-party tool and is not supported by HITS Technical Support. Any plugin-specific issues should be directed to WPForms Support.
Note: You must have admin access on Tirelink to complete this.
✅ Step 1: Create the Account Form
1.) Go to WPForms > Add New in your WordPress dashboard. (Right Click and select the ‘Open Link in New Tab’ as you will need to return to the admin page during this process)
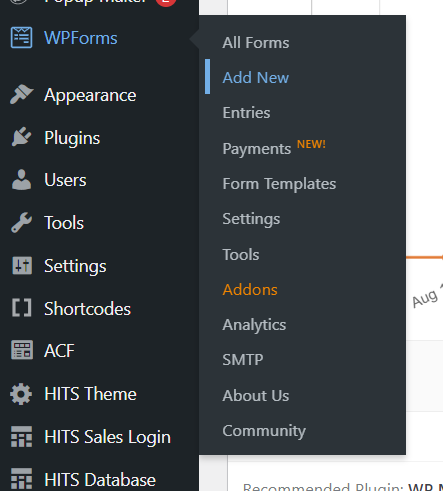
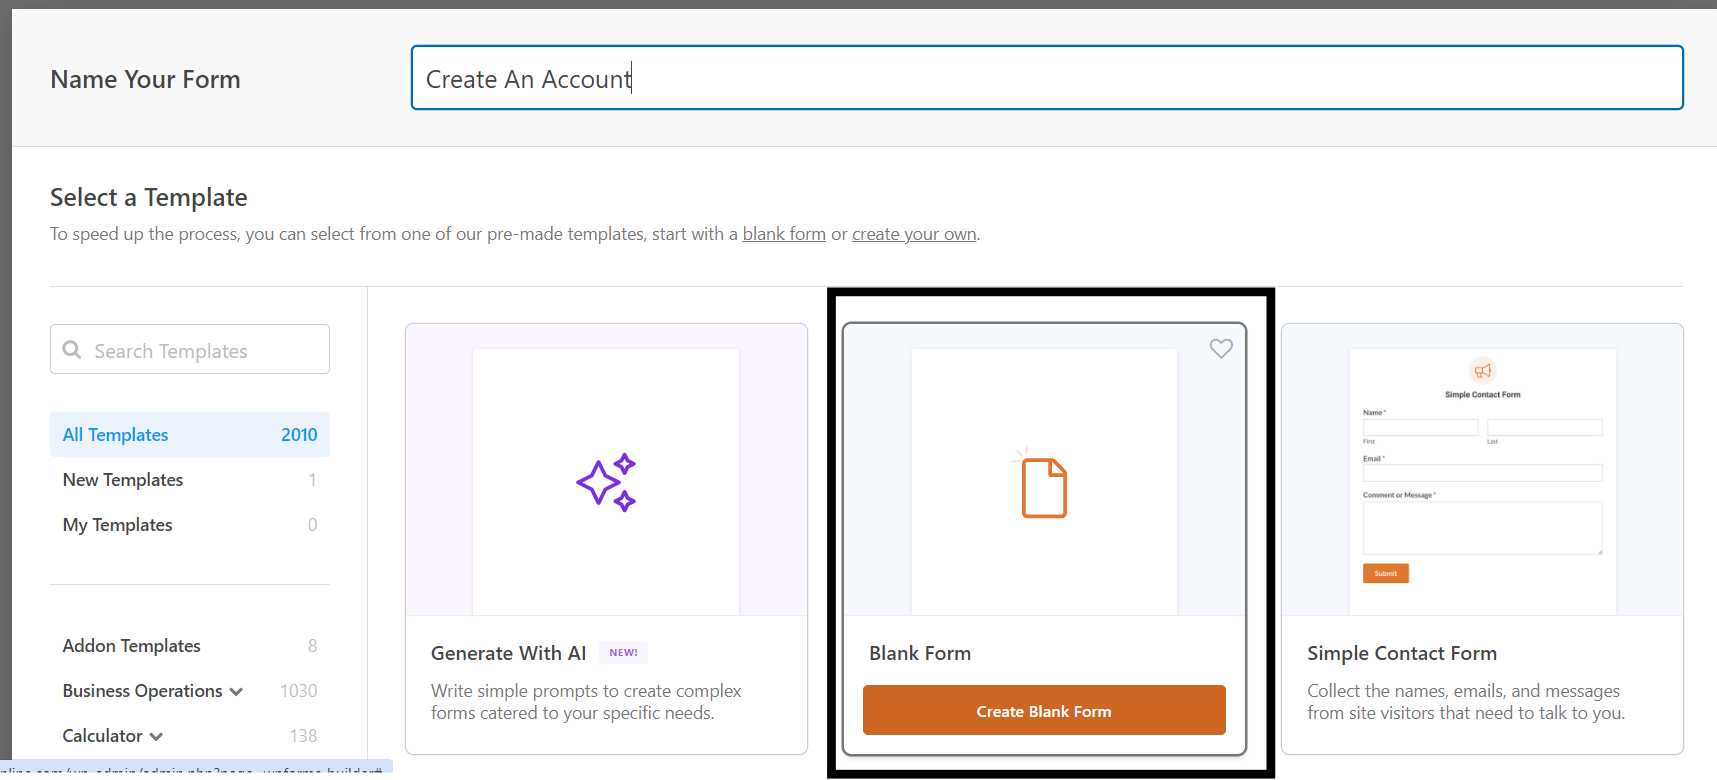
2.) Choose a template: Use Blank Form to start from scratch.
3.) Give your form a name (e.g., “Create An Account”).
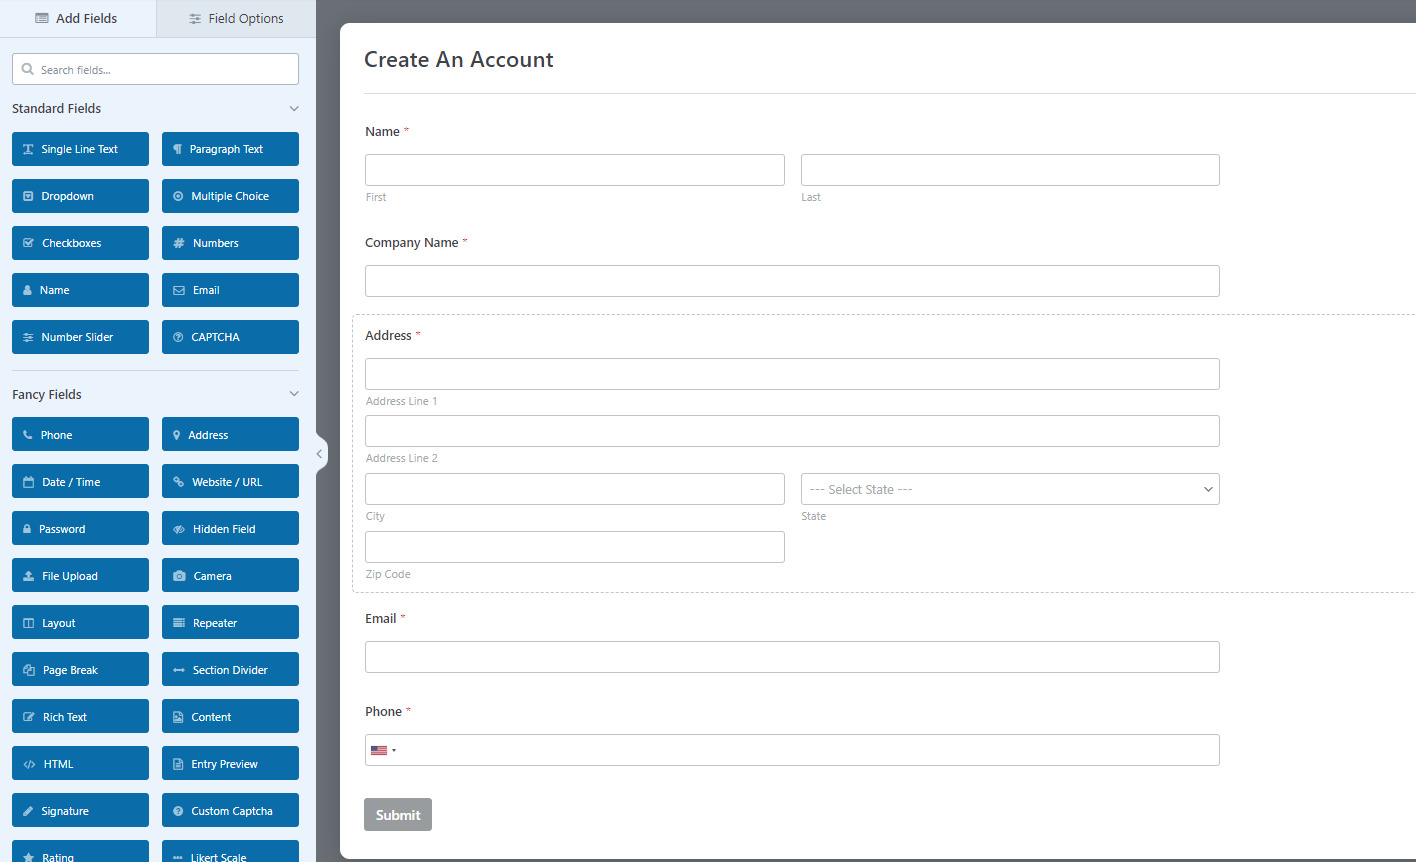
✅ Step 2: Add and Customize Fields
Use drag-and-drop to add fields such as:
-
- Name
- Company Name
- Address
- Phone Number
Click any field to customize its label, description, or make it required.
✅ Step 3: Set Up Notifications (Who Gets the Form Results)
1.) Go to Settings > Notifications.
2.) By default, the form sends an email to the site admin.
3.) You can customize:
-
- Send To Email Address: who should receive the form entries
- Email Subject: e.g., “New Tirelink Account Request”
- From Name: For example – “Maverick Tire”
- From Email: For examamle “noreply@mavericktire.com”
- Reply-To: usually the user’s email
- Email Message: A new customer has submitted an account request on twoguystire.com. Please reach out to the customer:{all_fields}Be sure to leave the all fields tag as this will import the customers information that was submitted. Note: You can also add a second notification to send an automatic confirmation to the person who filled out the form. (Optional)

✅ Step 4: Configure a Confirmation Message
1.) Go to Settings > Confirmations.
2.) Choose what the user sees after they submit the form:
-
- Show a thank-you message
- Redirect them to a different page
- Take them to another URL

✅ Step 5: Publish the Form
Once your form is ready, you can publish it as a dedicated page using the Form Pages addon (included in WPForms Pro).
📄 How to Set It Up:
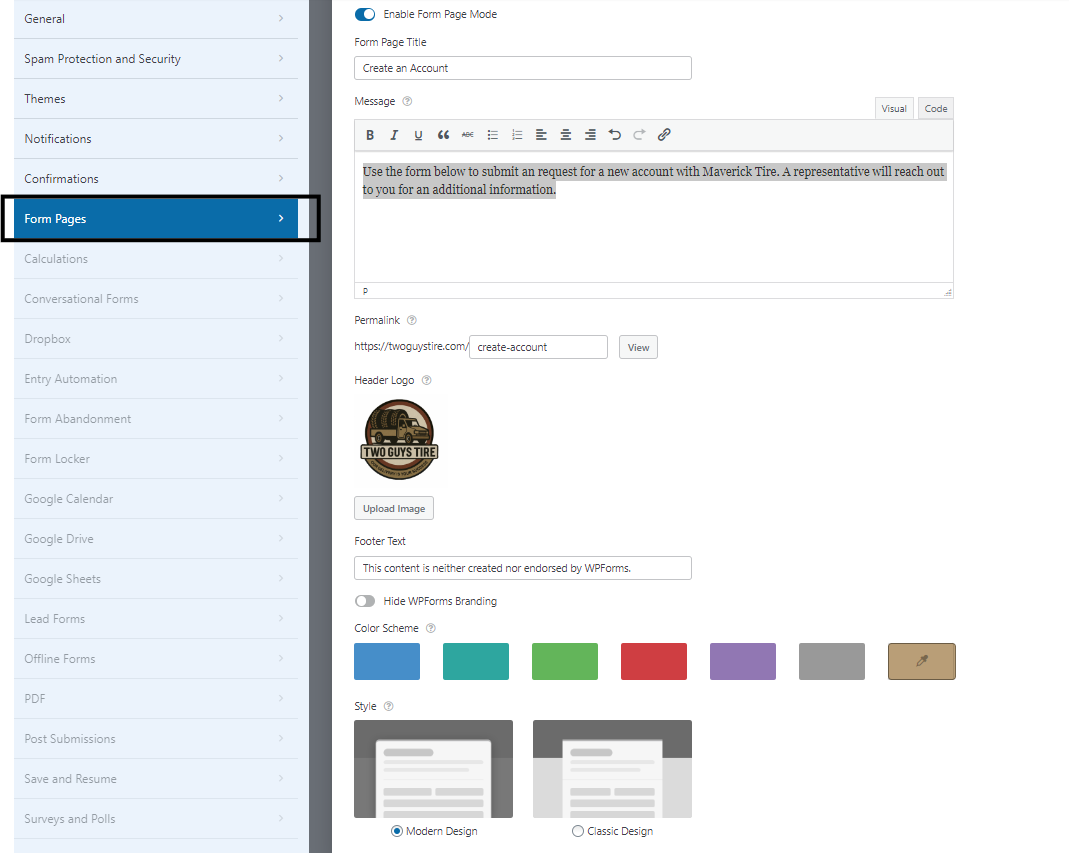
1.) Go to WPForms> Settings > Form Pages
2.) If prompted, click Yes, Install and Activate to add the Form Pages Addon.
-
-
If an update is required, go to Plugins > Installed Plugins, locate WPForms and the Form Pages Addon, and click Update Now.
-
3.) Enable Form Page Mode.
4.) Customize options such as:
-
-
Title: Create an Account
-
Intro Text: e.g., Use the form below to request a new account with Maverick Tire. A representative will contact you with next steps.
-
Permalink: e.g.,
/create-account -
Logo, background, and style (optional)
-
5.) Click Save.
✅ Step 6: Install and Activate the Form Pages Add On
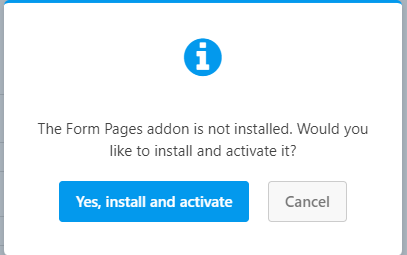
1.) When Prompted by the Popup
-
- If a message appears stating that the Form Pages addon is not installed, click “Yes, Install and Activate”.
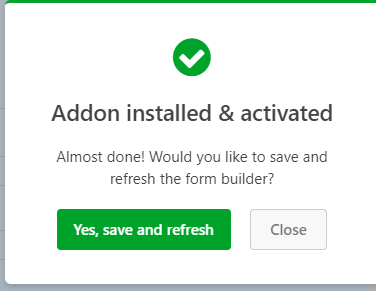
2.) After Installation is Complete
-
- A message will appear asking you to save and refresh, click “Yes, Save and Refresh”.
3.) Return to the Form Pages Section
-
- Once the page reloads, click on the Form Pages section again. When prompted, click “Yes, Activate”.
4.) Check for Addon Update Requirement
-
- You might see a message that says the addon requires an update.
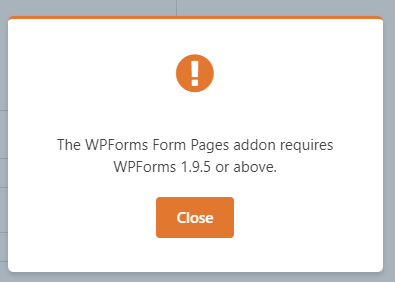
5.) Update the Addon (if needed)
-
- If you receive this message:
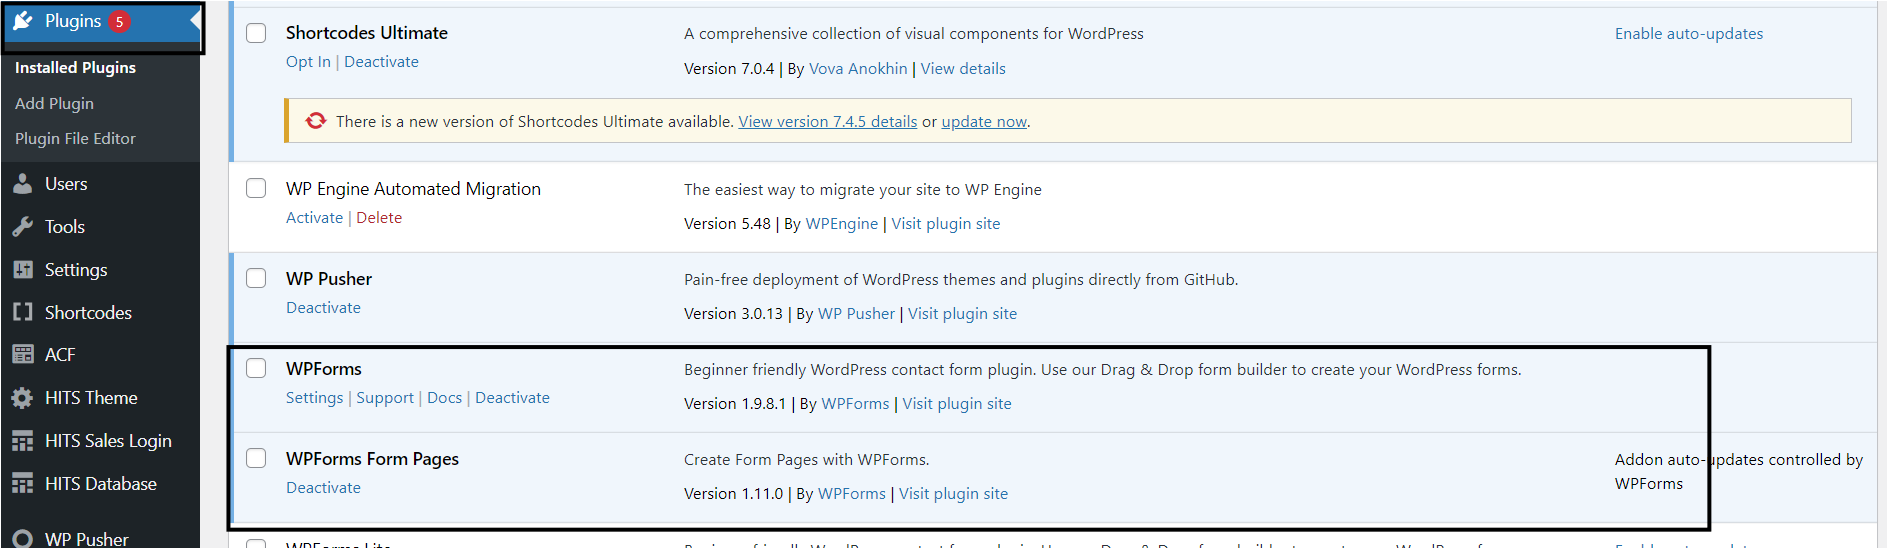
- Go to the WordPress Admin Dashboard.
- Click on Plugins in the left sidebar.
- Locate both WPForms & WPForms Form Pages Addon in the plugin list.
- If an update is available, click “Update Now” under the plugin name.
- If you receive this message:
6.) Return to WPForms and Continue
-
- After the update finishes, go back to WPForms.
- You can now access and use the Form Pages feature as intended. (Make sure to revisit step 5 and complete any remaining task)
✅ Step 7: Adding the webform link to the login page
1.) Select the HITS Theme option on the WP admin page, then select the Login Tab
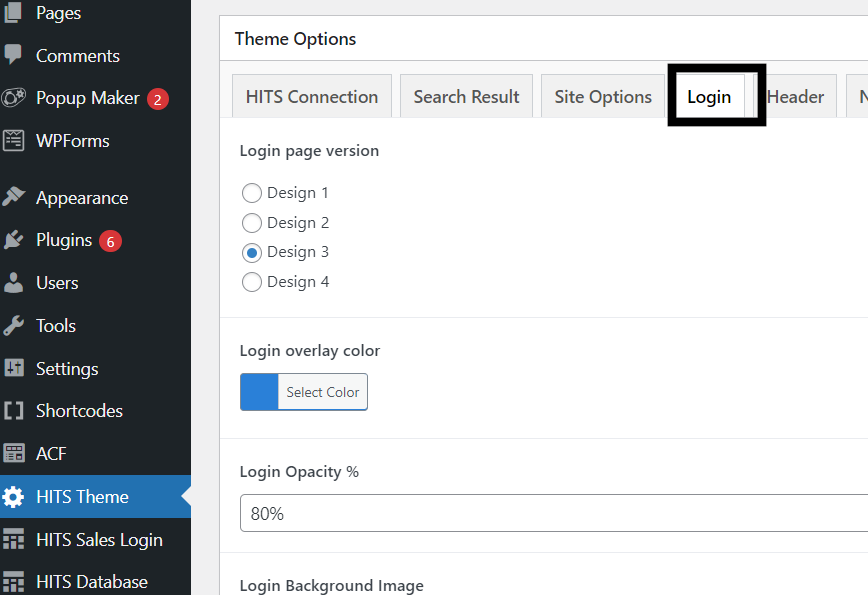
2.) Scroll down to the Login text and include the html code for the wp form. It should look something like:
</span><br><br> <p> <a href=”https://enterwpformURLhere.com/” target=”_blank” style=”font-weight: bold; font-size: 24px; color: #604e30;”> Click To Create An Account! </a> </p>
Go to your log in page to login page and confirm that the button for the sign up form has been added.

🎉 You’re Done!
You now have a fully functional form on your site. Test the form to ensure it works properly and that notifications are being received.