The Advance Payment feature in HITS allows customers to make an incremental or partial payment on Open Workorders directly from the tickets Payments>Advance Payments tab. This functionality improves workflow efficiency, enhances payment accuracy, and replaces the need for traditional layaway programs.
⚠️ Important: Advance Payments are supported on Cash Accounts only. Customers on Open Items accounts cannot use this feature.
When to Use Advance Payment
Advance Payments are intended for deposits and incremental (partial) payments on open workorders only.
Use this feature in the following scenarios:
- To collect a deposit before parts are ordered or work begins
- When a customer wants to prepay for a portion of the goods or services
- To secure commitment for future work and reduce no-shows
- As an alternative to a layaway process
Do not use Advance Payments for:
- Final payment on completed tickets
- Open Items (A/R charge) customers
- General account credits not tied to a workorder
How it works
1.) Navigate to the Open Workorder > Click on the Payments tab > select the Advance Payments tab.
2.) Apply the Payment:
– Click on Make Payment
– Enter the payment amount (partial or full).
– Select the payment method.
– Click Create PAYMENT.
The Make Payment button opens a dialog box similar to the standard Post ROA Payment screen. This familiar layout helps streamline the payment entry process. If your store uses the FirstMile credit card integration, selecting Process Credit Card will launch the FirstMile authorization prompt. Once authorized, click Create Payment to apply it to the Workorder.
Example: A customer leaves a $100 deposit on a $624.42 Workorder. After applying the advance payment, the remaining balance shown on the Cash/Check tab becomes $549.50.
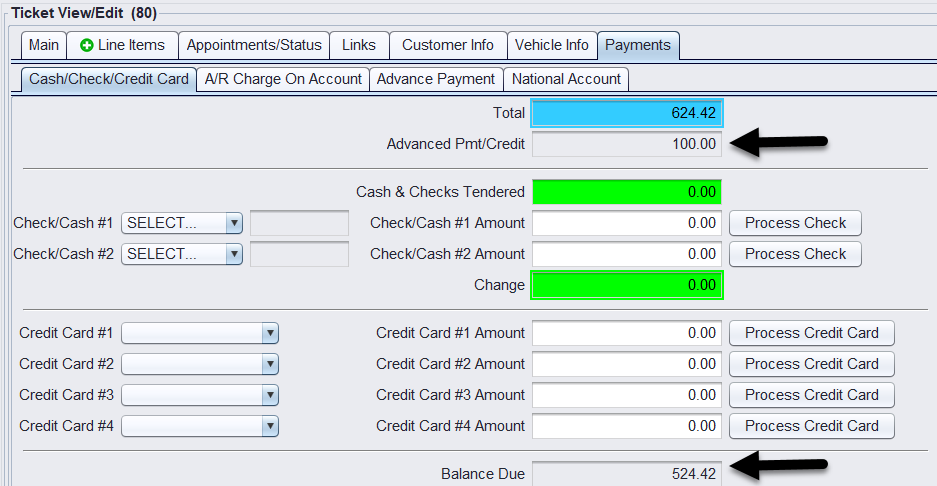
After posting an advance payment, a payment receipt can be printed for the customer indicating the amount and method of payment. Or you can print the open workorder with the miscellaneous adjustment (advance payment) applied to the total adjusting the ticket balance.

You can apply multiple advance payments to a single Workorder. All payments will be reflected in the ticket balance and reconciled when the ticket is finalized.
3.) Behind the Scenes (System Behavior):
-
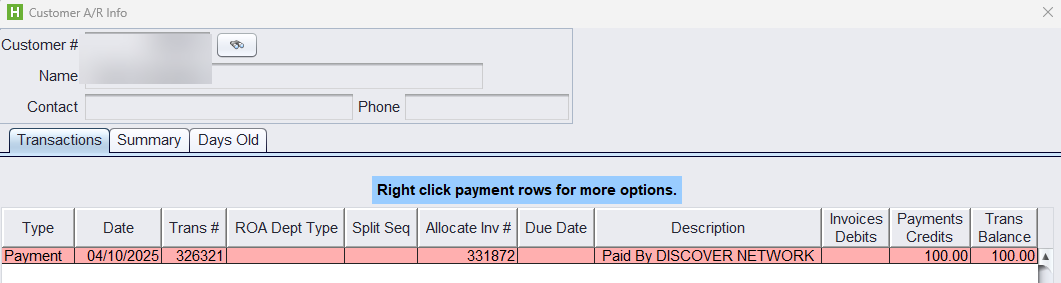
- The payment is posted as an ROA (Received on Account) for the customer.
- The advance payment is recorded on the date the payment was made.
- The payment is allocated to the specific Workorder and reduces the ticket total.
-
- The customer’s A/R Account will show a PAYMENT until the Workorder is closed and the customer is temporarily changed to an Open Items customer which will only accept Advance Payment transactions.
-
- Close the workorder once all payments have been made to the total amount of the workorder. Upon closing the Workorder, the ROA is automatically applied and allocated to the final invoice and the Account Type is returned to Cash. The Workorder must have a $0 balance before it can be finalized. HITS will not allow the ticket to be closed unless all payments, including advance payments, have been properly applied.
Reversing an Advance Payment
You may want (or need) to reverse an advance payment in several situations:
- Customer cancels the order or service before work is performed, requiring funds to be reallocated or refunded.
- Incorrect amount collected at the time of payment (overpayment, underpayment, or wrong customer).
- Payment method declined/failed after being entered (e.g., credit card reversal, bounced check).
- Business policy requiring funds to move from an “Advance Payment” status to an “Open Item” charge once the work order is finalized.
Steps to Reverse an Advance Payment
1.) Access the Ticket
- Navigate to the relevant ticket for which the advance payment needs to be reversed.
- Click on the Payment tab.
2.) Reverse the Advance Payment
- Within the Payment tab, click on the Advance Payment sub-tab.
- Select the appropriate advance payment.
- Click Reverse Payment.
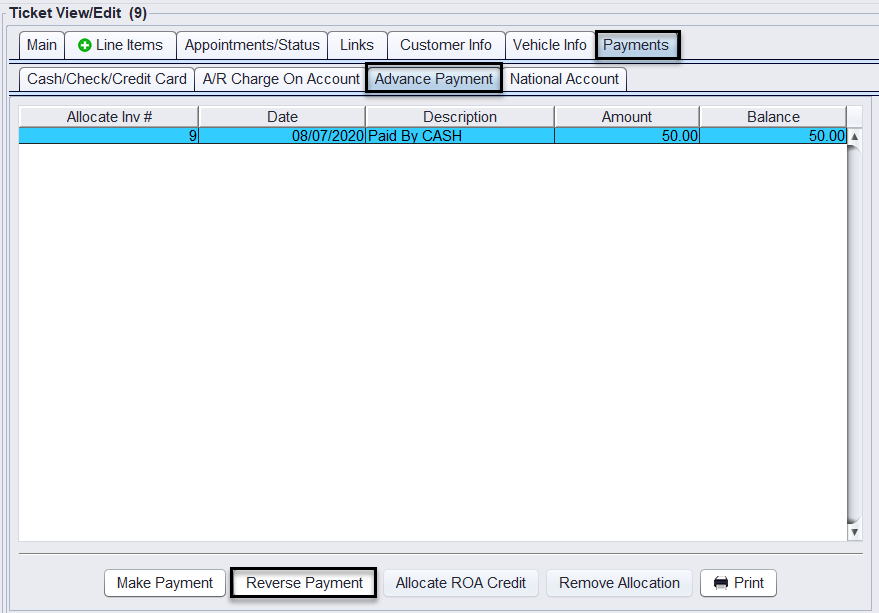
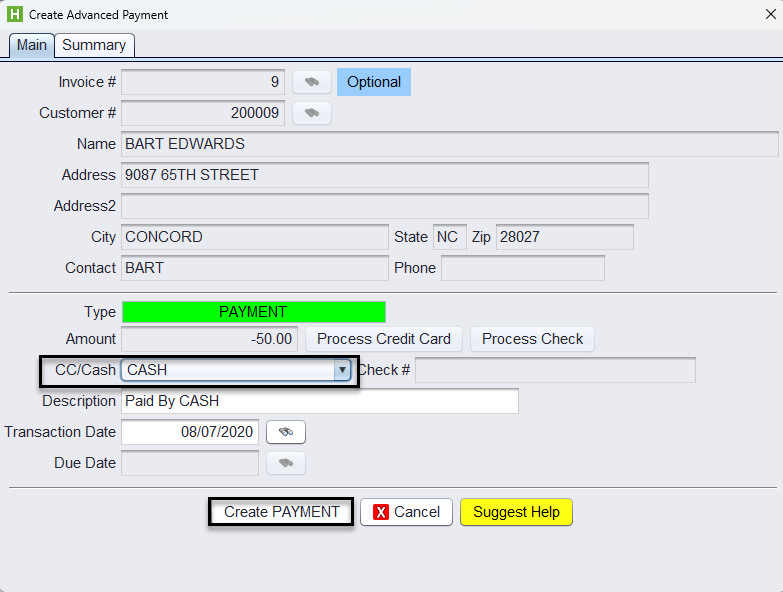
- Finalize the Reverse Payment by selecting the exact same payment method as the advance payment and click Create PAYMENT.
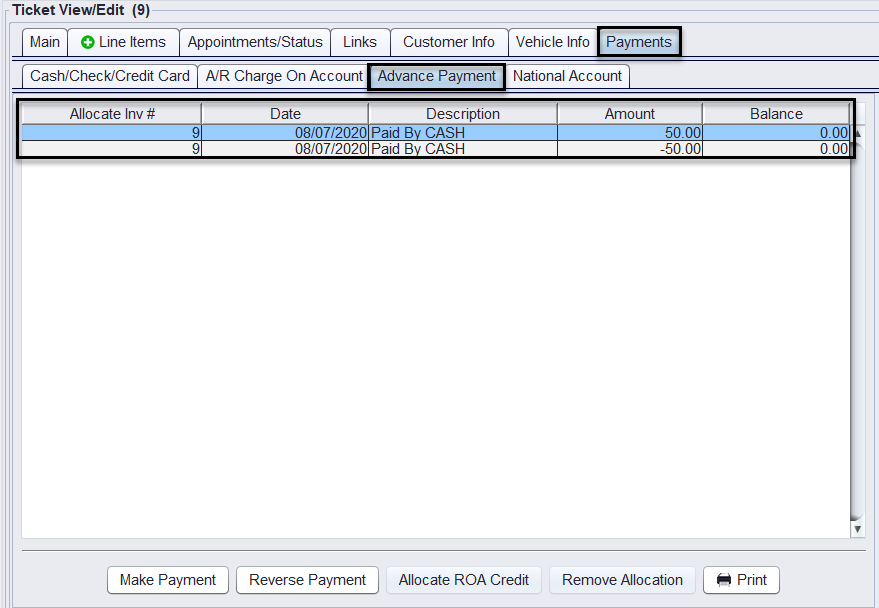
- Now there will be the payment and the reversed payment recorded under Advance Payment tab on the ticket.
Note for 1st Mile Users:
If the payment was by credit card through the 1st Mile integration, ensure the refund has already been processed in 1st Mile and reported successfully. The reversal in HITS does not issue a refund—it only creates the offsetting entry.
Best Practices for Advance Payments
1. Always Confirm Account Type Before Taking Payment
- Advance Payments only work on Cash Accounts.
- If the customer is on Open Items, do not proceed — convert or use the correct workflow.
Why this matters: A lot of reconciliation issues start because the wrong account type was used at the beginning.
2. Train Staff on When NOT to Use Advance Payments
Avoid using Advance Payments for:
-
- Open Items customers
- Completed workorders
- General account credits (use A/R instead)
Why this matters: Misuse leads to:
-
- accounting confusion
- incorrect reporting
- unnecessary reversals
3. Avoid Overpayments on Advance Payments
- Train staff to:
- Verify ticket total before collecting deposits
- Avoid collecting more than necessary
Why this matters: Overpayments create:
-
- unnecessary reversals
- extra A/R cleanup
- customer confusion
4. Always Print or Provide Payment Confirmation
-
- Provide a receipt immediately after payment.
Why this matters: Reduces disputes like:
-
- “I already paid”
- “That’s not the amount I gave”
5. Match Payment Method When Reversing
- Always reverse using the exact same payment method.
- For credit cards (1st Mile):
- Refund must be processed in 1st Mile first.
Why this matters: HITS does not process refunds — it only records them. Mismatch = accounting discrepancies.
6. Close Tickets Promptly After Final Payment
- Once balance reaches $0:
- Finalize the ticket immediately
Why this matters: Leaving tickets open:
-
- delays proper allocation
- keeps account in temporary state
- increases risk of errors
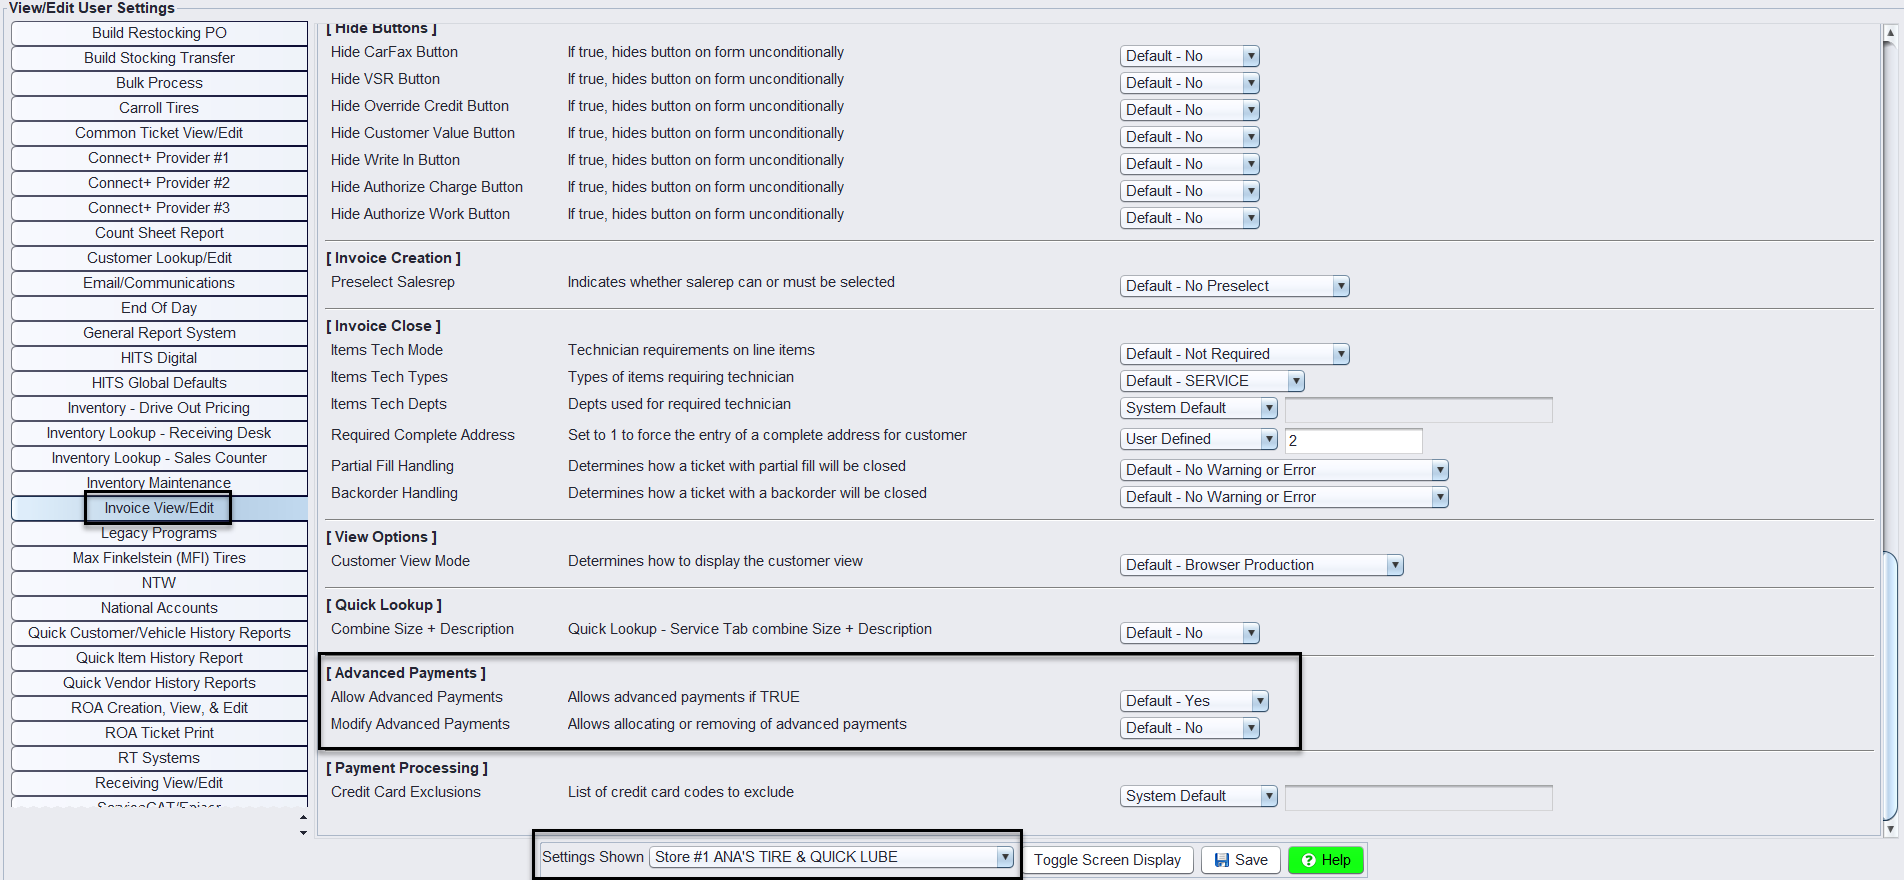
Note: This feature is enabled by default at the store level. To edit or remove permissions, please go to Views>Administration & Utilities>Store>View/Edit Default Settings and select Invoice View/Edit from the left panel and scroll down until you see Advance Payments options for each store individually under Settings Shown. Users must have P17=Y or P17=1, check Permission Switches for the appropriate setting.
- Allow Advance Payments turns this feature off/on.
- Modify Advance Payments allows allocating or removing of advance payments.