
How to set or update the Sales Rep and Technician on ticket line items in HITS, and why it’s important for tracking performance, payroll, and reporting.
🧾 Why This Matters
-
-
- Tracks who sold or performed each job.
- Used in payroll, commissions, and store productivity.
- Drives results in Salesrep Journal and Technician Journal reports under the Journals menu.
-
Where to Set the Sales Rep
1. During Ticket Creation
When starting a new ticket by clicking Tickets>+Create Ticket, you’ll be prompted to select a Salesrep # in the Select Ticket Create Item screen:
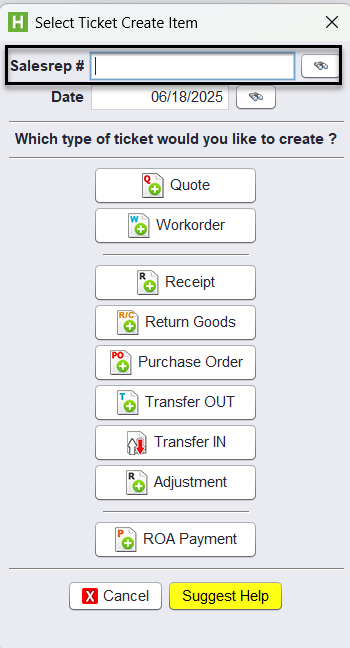
This sales rep will be set as the default for the ticket and any new line items added, unless changed later.
2. On the Main Tab of the Ticket
You can also set or update the sales rep on the Main tab of any open ticket:
-
-
- The salesrep selected here will default all line items on the ticket to that Sales Rep.
- This is especially helpful when a single salesrep is responsible for the entire job.
- You can still override the salesrep per line item using the Set Sales button if needed.
-

📝 Note: If you change the Sales Rep on the Main tab after items have already been added, it will not retroactively update existing lines. You’ll need to manually reassign them using the Set Sales tool.
Assigning Sales Reps to Line Items
To apply or change the sales rep for specific lines:
1.) Go to the Line Items tab.
2.) Highlight one or more lines (Ctrl+Click or Shift+Click).
3.) Click Set Sales.
4.) Choose the sales rep from the dropdown and click OK.
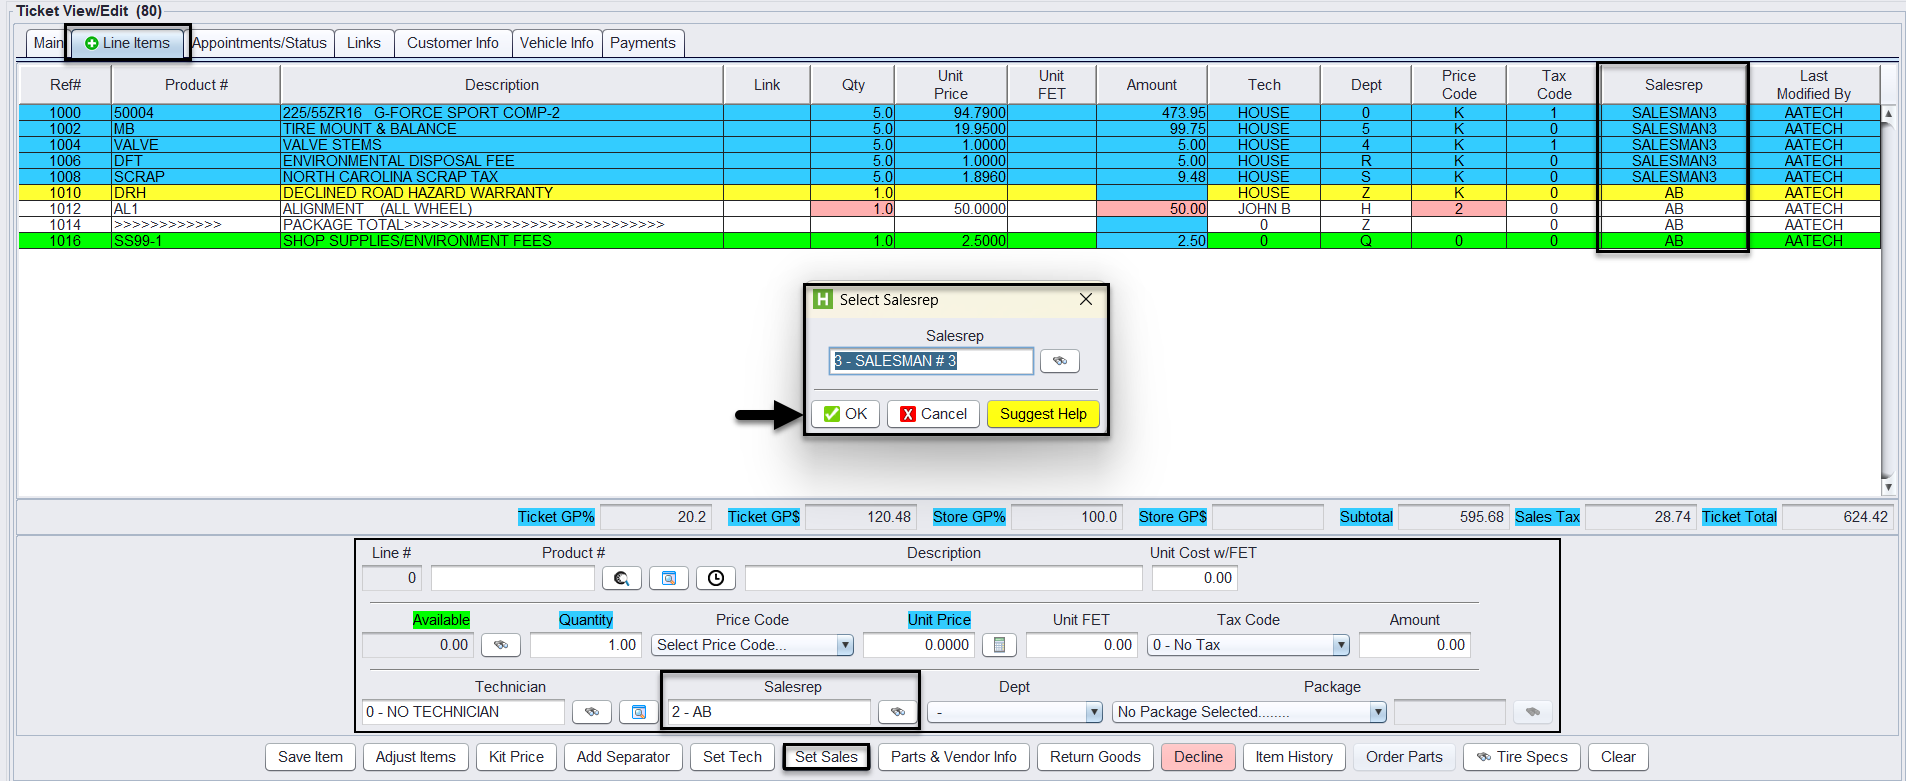
The rep will appear in the Salesrep column for those lines.
Assigning Technicians to Line Items
1.) Highlight the labor line(s).
2.) Click Set Tech.
3.) Choose the technician and click OK.
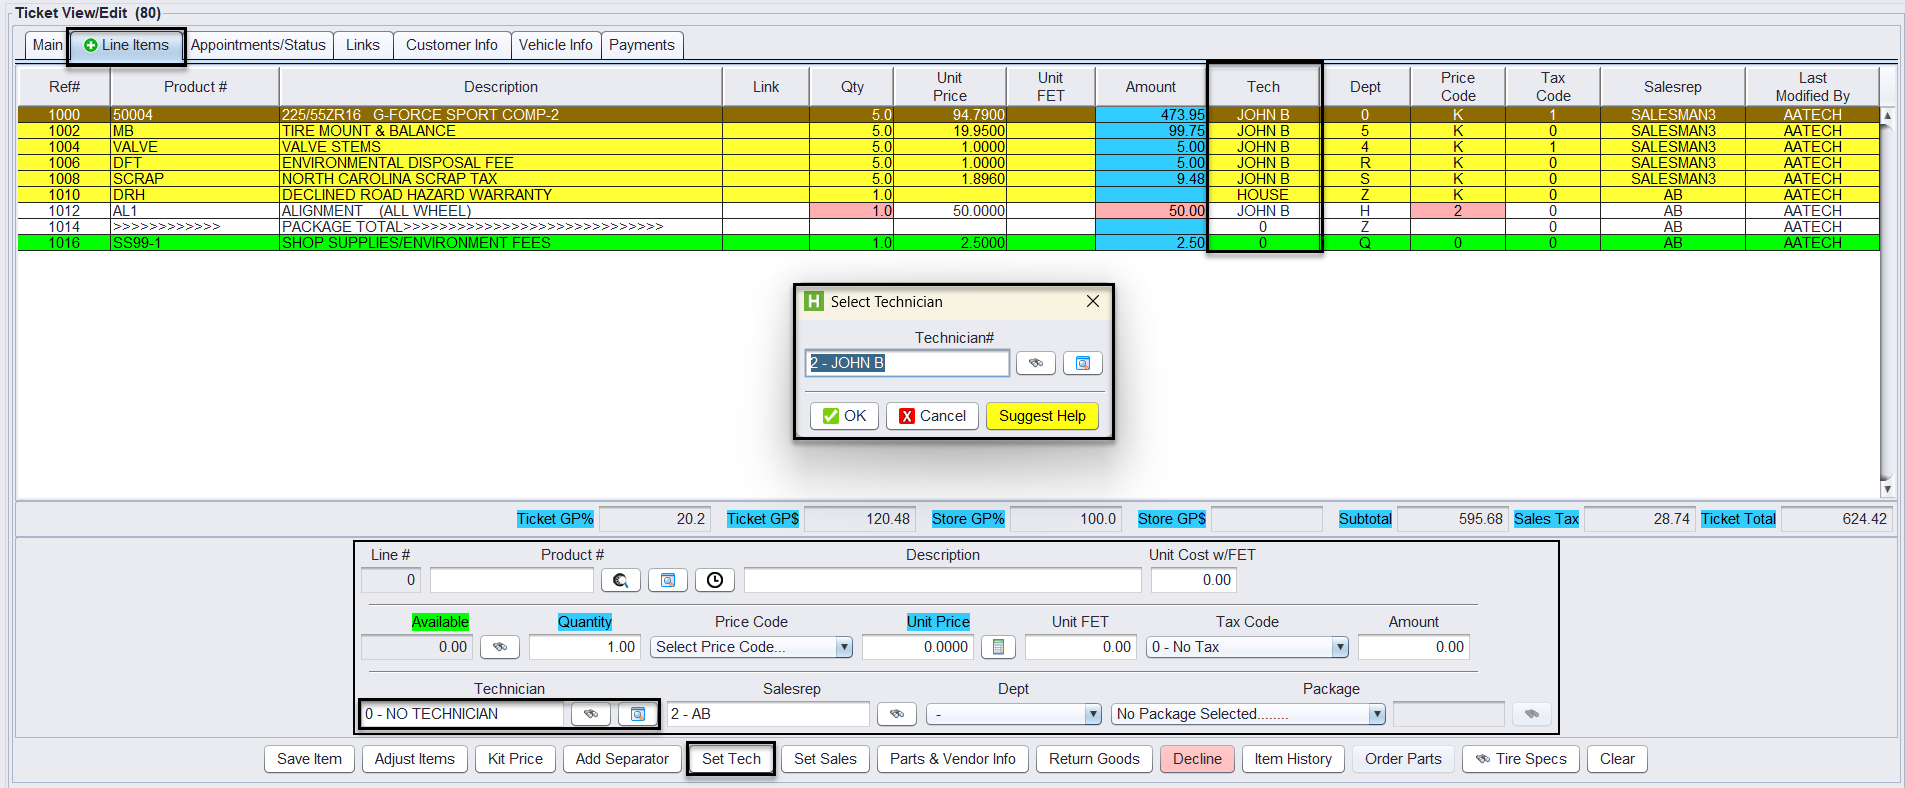
Assigning Multiple Technicians to a Line Item
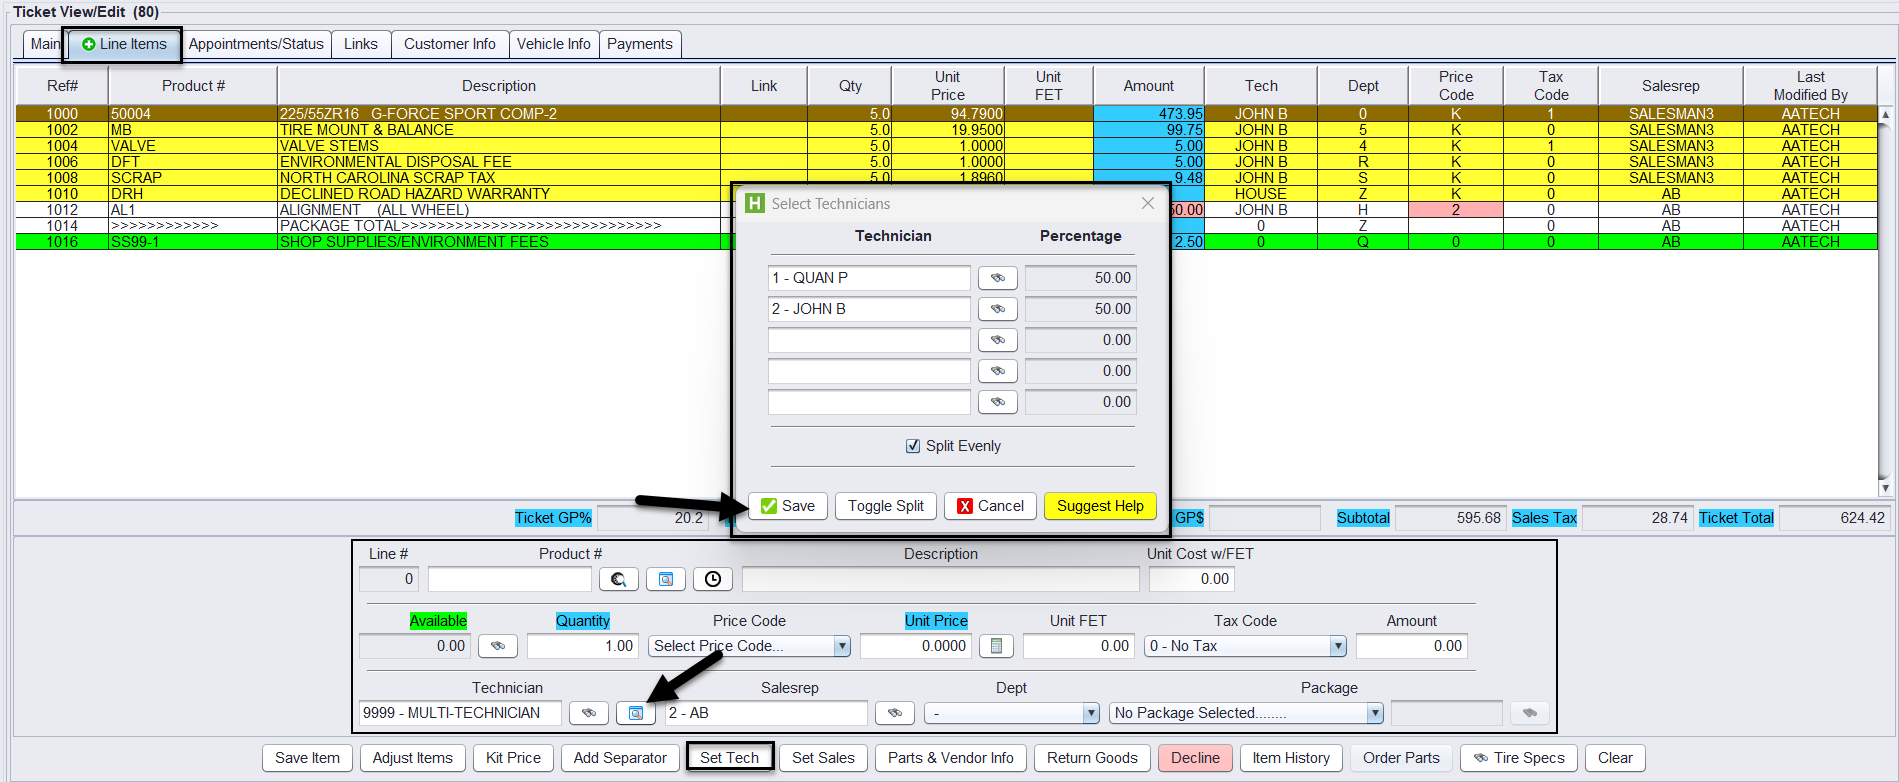
If more than one technician worked on a service, you can assign multiple techs to a single labor line using the Multi-Technician option. This is ideal for shared work and payroll distribution.
1.) Go to the Line Items tab and highlight the labor line.
2.) Click the Set Tech button beneath the edit fields.
3.) In the technician popup, select MULTI-TECHNICIAN from the list.
4.) Click OK. A new screen titled Select Technicians will appear.
5.) Choose up to four technicians and enter their percentages in the Percentage fields.
-
- Use the Split Evenly checkbox to divide work automatically (e.g., 50/50).
- Leave unused rows at 0%.
6.) Click Save to apply the technician split.
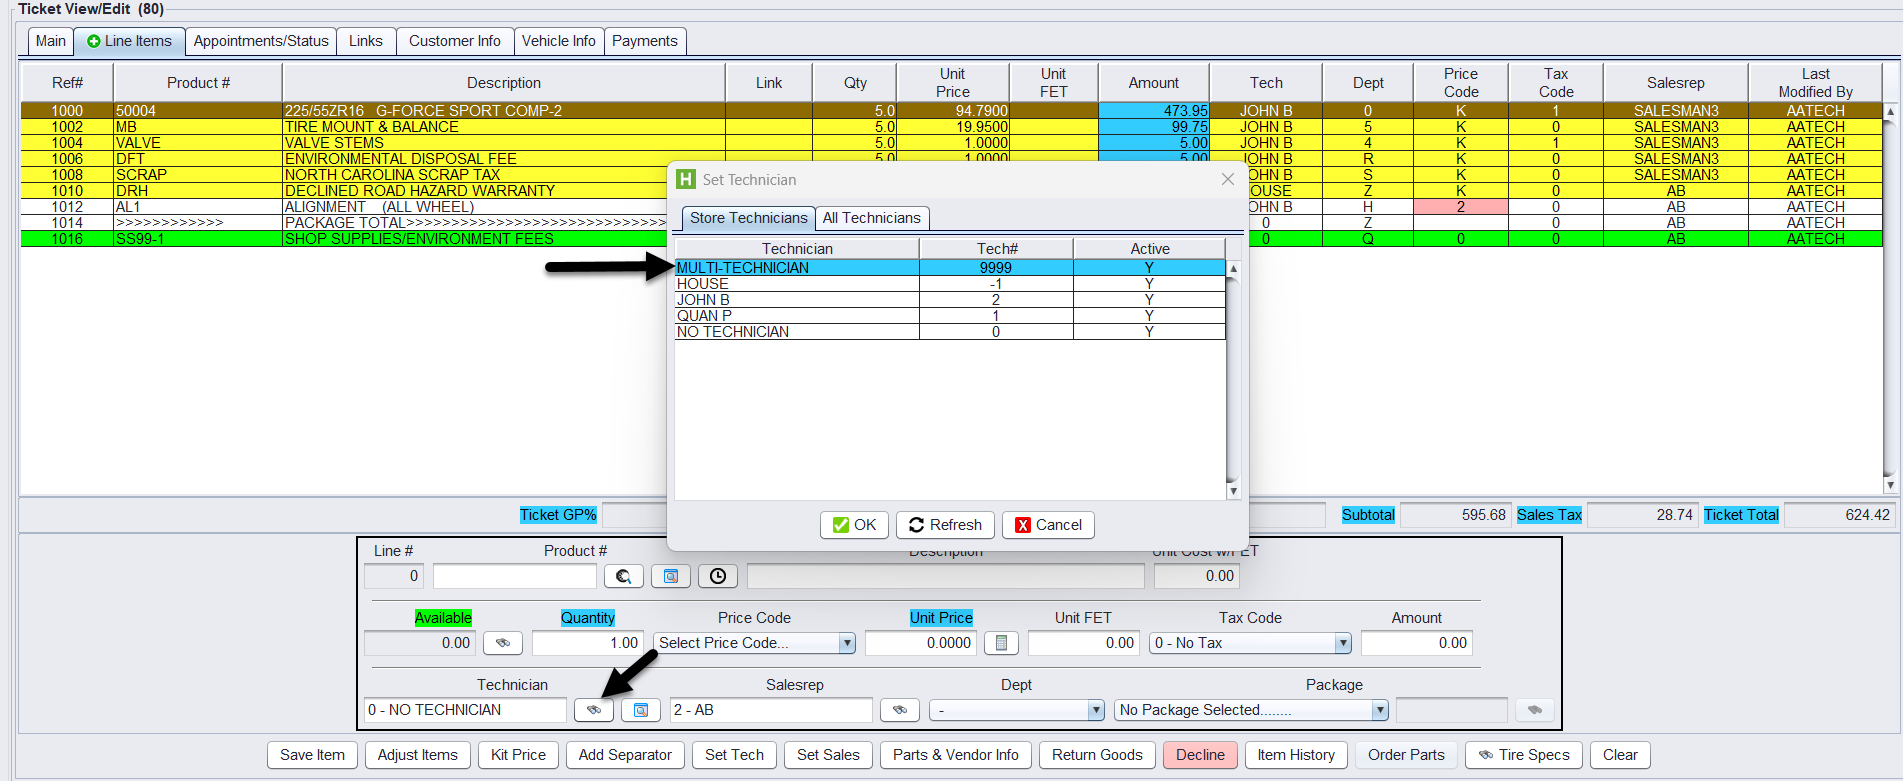
You’ll now see 9999 – MULTI-TECHNICIAN listed in the Tech field for the line. This tells the system to apply the defined split on backend reports (e.g., Technician Journal).
📝 Notes
- You must click Save on both the split technician window and the line item editor to fully save the update.
- The Multi-Technician split affects technician productivity, payroll exports, and tech-based reporting.
- You can re-edit or view the current split by clicking Set Tech again on that line before the ticket is closed.
📊 Reporting and Payroll Impact
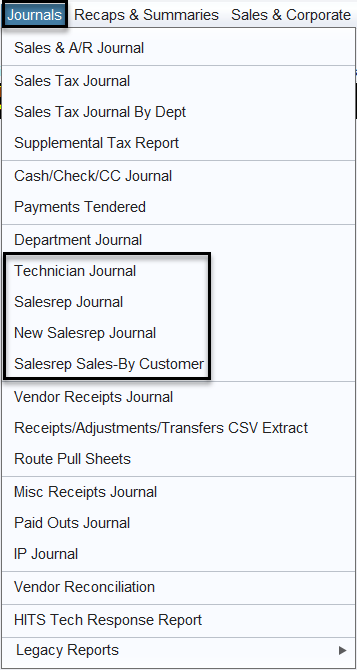
Correct assignment of Sales Reps and Technicians ensures your reports are accurate and staff are paid correctly. These line-level assignments feed directly into the following reports in the Journals menu:
-
- Salesrep Journal – Tracks sales performance by rep, ticket, and date.
- New Salesrep Journal – Alternate format with consolidated rep performance.
- Salesrep Sales-By Customer – Breaks down rep performance by customer.
- Technician Journal – Tracks tech activity and productivity for payroll and hours.
📎 Tip: Run these reports regularly to verify commissions, technician hours, and team performance.
✅ Best Practices
- Set the correct Sales Rep and Technician before closing the ticket.
- Use Set Sales/Set Tech buttons for multiple line overrides.
- Use Multi-Technician for any shared labor jobs or training cases.
- Avoid relying only on the Main tab rep if multiple people contributed.