
About:
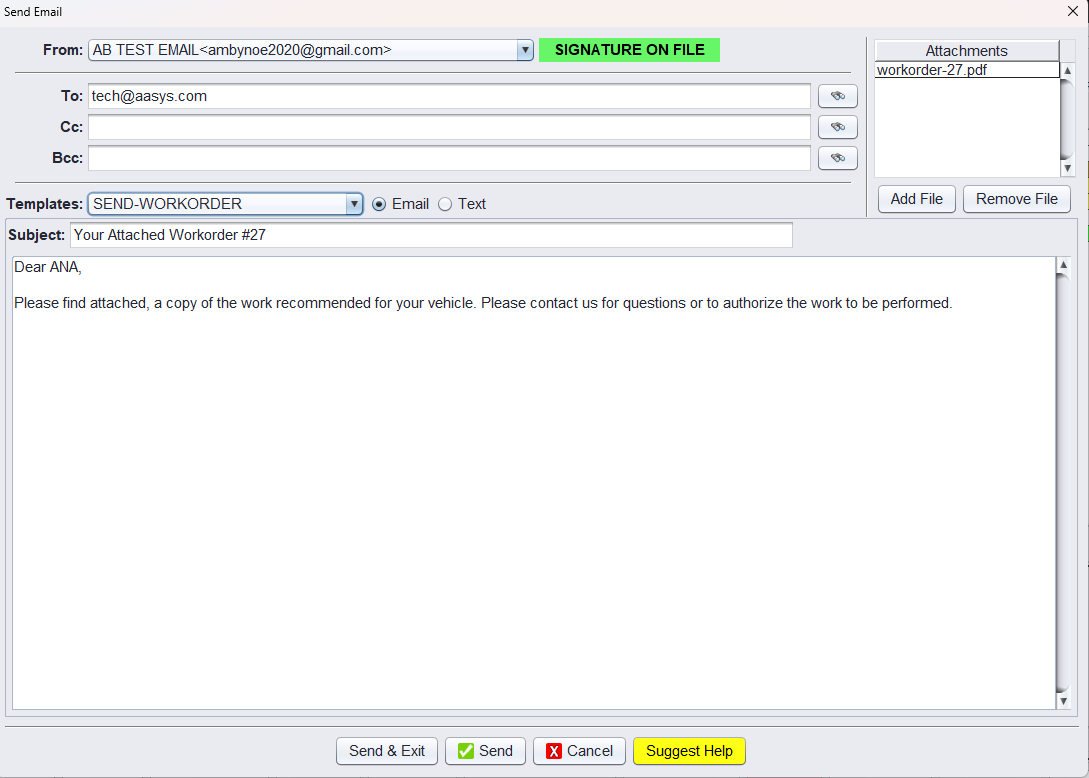
HITS includes a built-in email client for sending outbound messages only (e.g., invoices, statements, and workorder updates). Before sending emails, ensure each customer is properly configured to receive them. See: Setting Up Customers for Email Statements / Invoice Closing
Email Setup Levels in HITS
Email sending can be configured at the following levels:
1.) Corporate-level email (set in Admin>Store>View/Edit Default Settings)
2.) Store-level email (set in Admin>Store>View/Edit Default Settings)
3.) User-level email (set in Admin>Store>Password switches)
Please note: Either Corporate or Store-level settings must be configured for email to function. User-level settings are optional overrides.
Steps to Configure HITS Email Service
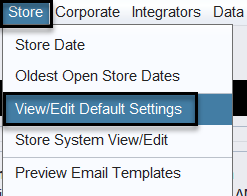
1.) Navigate to Admin & Utilities>Store>View/Edit Default Settings
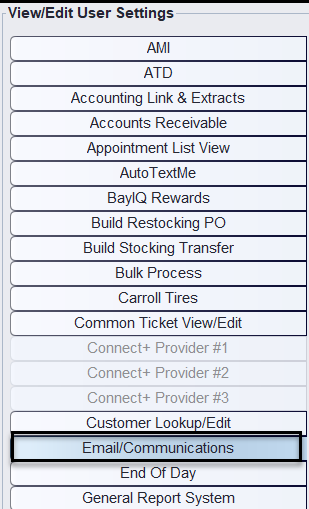
2.) Select Email/Communications from the View/Edit User Settings tabs
3.) At the bottom of the screen, use the Settings Shown field to choose whether you’re configuring for:
-
- Corporate (applies to all stores), or
- a specific Store
![]()
4.) Under SendGrid Email Service Provider, select Yes
5.) Enter the email address you want to use in the From Email field
6.) Add your Shop Name in the User Name field, this name will appear as the sender in outgoing emails. Please note: If you are currently using SMTP Only, this must be disabled in order to use SendGrid Email Service Provider.
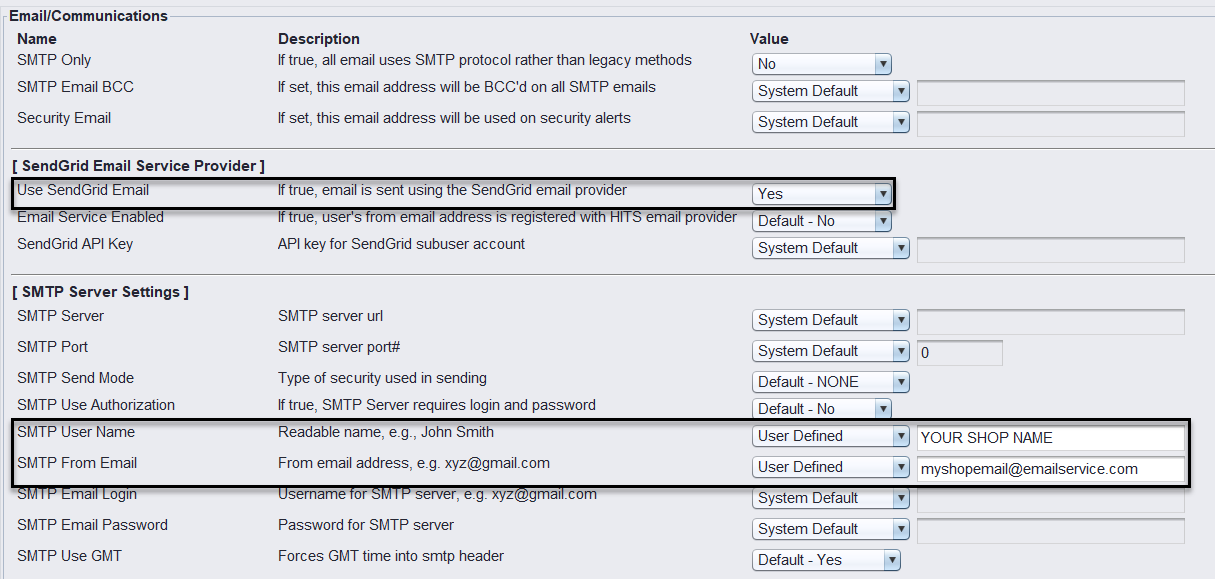
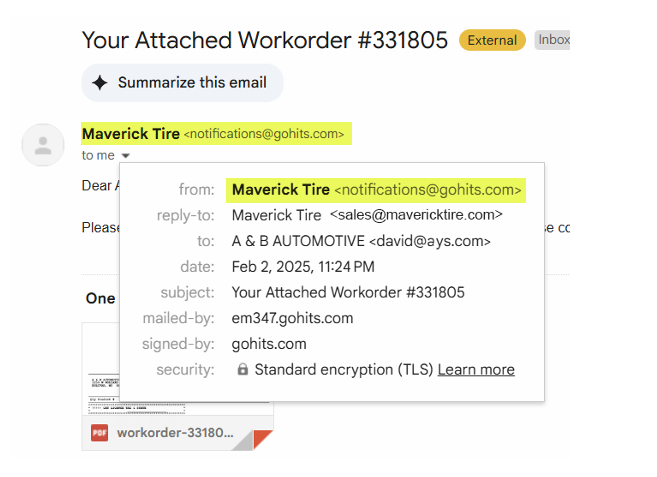
*Please note: No password is required with our service, only the email address. These emails are going out from HITS Email Service and appear with your User Name and are from notifications@gohits.com.
How to View Sent Emails
Emails using HITS email service can be found under Views>Administration & Utilities>Communications>Sent Emails

This opens the Email Queue, where you can filter and view emails by:
- Customer #
- Date Range
- From E-mail
- Subject
- Email Type
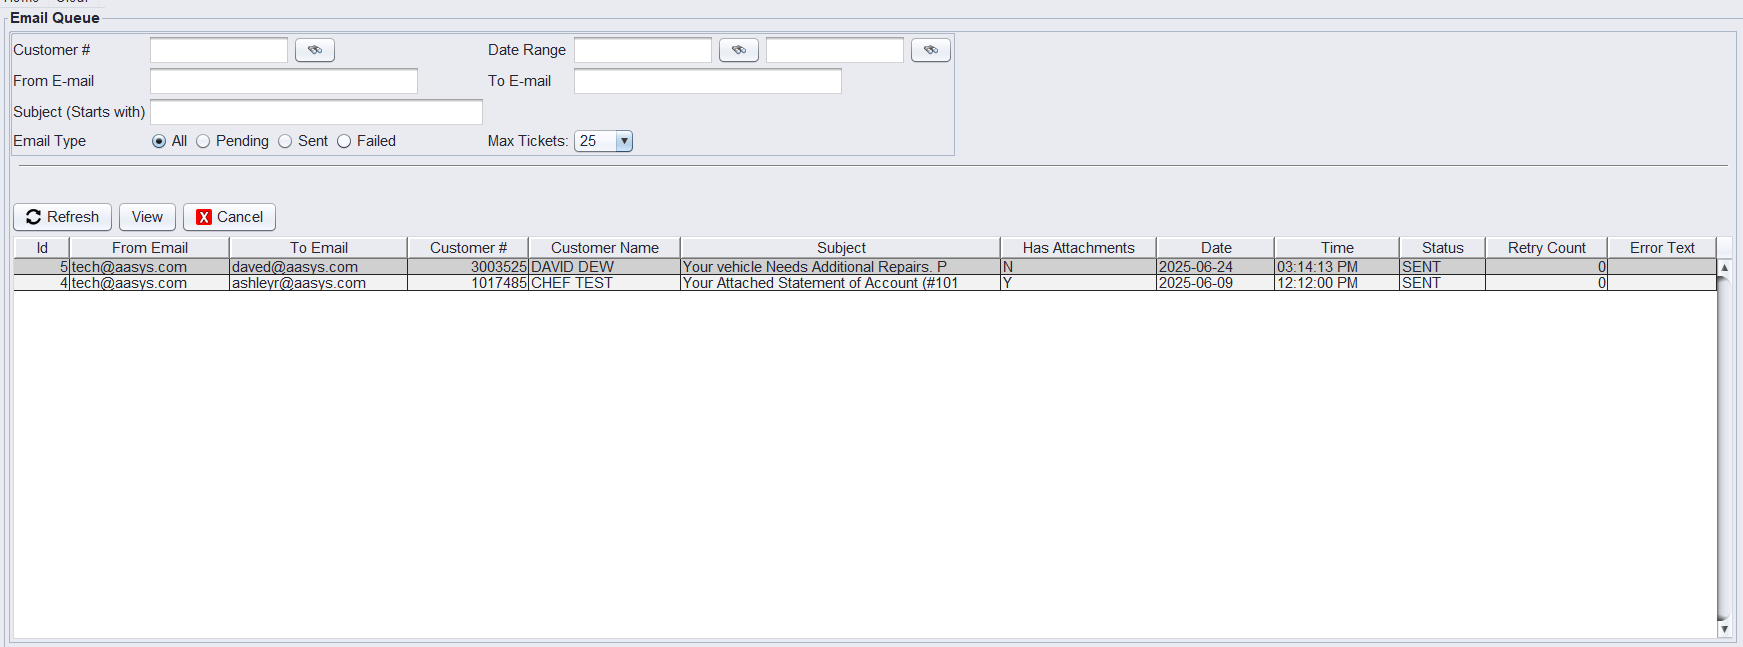
Right-click on the results to export a PDF or CSV version for reporting.
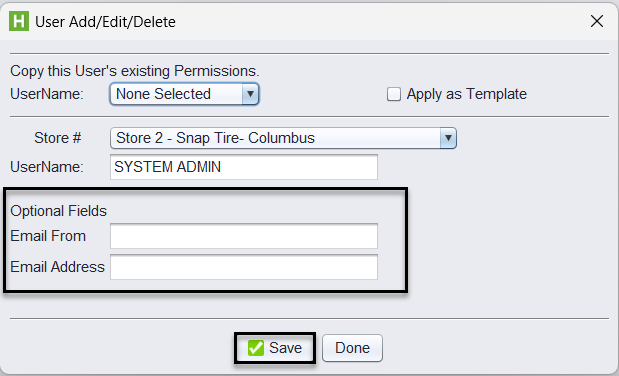
Optional: Set “From” Email Per User
You can configure a unique “From” name and email address for individual users. This is useful when you want specific employees (e.g., service writers or managers) to send emails that display their own name and contact address.
How to Set a User’s “From” Email:
1.) Navigate to Views > Administration & Utilities > Users
2.) Select the user you want to update
3.) Click Edit
4.) In the user profile window:
-
- Enter the Email From field (e.g., Service Advisor)
- Enter the Email Address field (e.g., serviceadvisor@yourshop.com)
5.) Click Save to apply changes
How to Setup Email Signatures (optional)
1.) Select Views>Administration & Utilities>Store>Edit Email Signatures

2.) From the email drop-down select the Email Address for the signature you are creating.
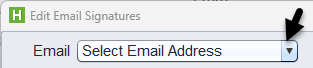
3.) Enter the text of the <html> code of your signature, then select SAVE.
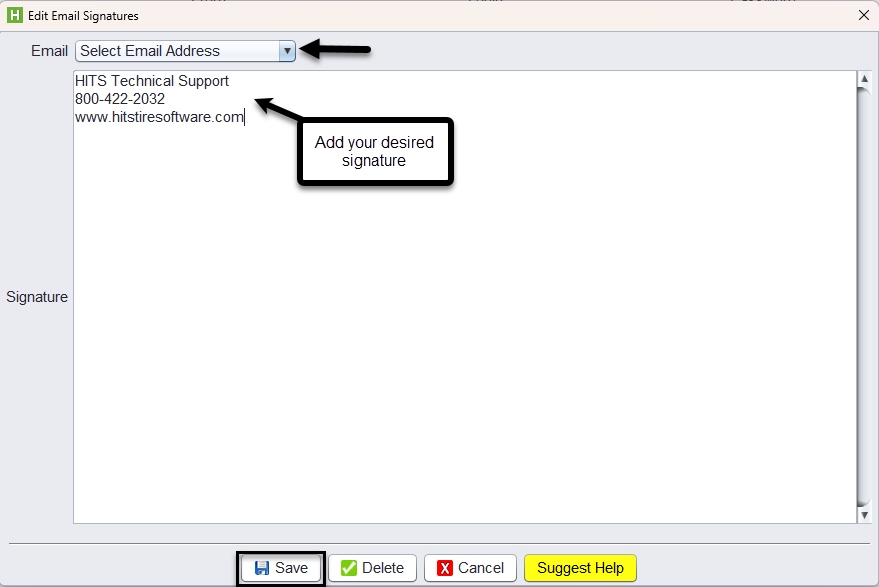
Signatures can be simple text or complex with a logo. If your business already has an email signature, you can copy and past the <html> code in the entry box to ensure it retains the format.
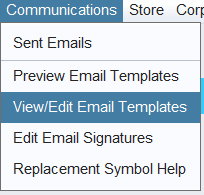
How to View/Edit Email Templates (optional)
Employees can always customize the email message before sending, but creating or editing templates will save time and maintain consistency. Email templates are Corporate-level (the same for all stores).
1.) Navigate to Views>Administration & Utilities>Communication>View/Edit Email Templates.
This opens the table of existing email templates.
2.) Right-click anywhere in the table to Edit, Add, or Delete a template. Right-click on the row of the template to be updated and select Edit Template.

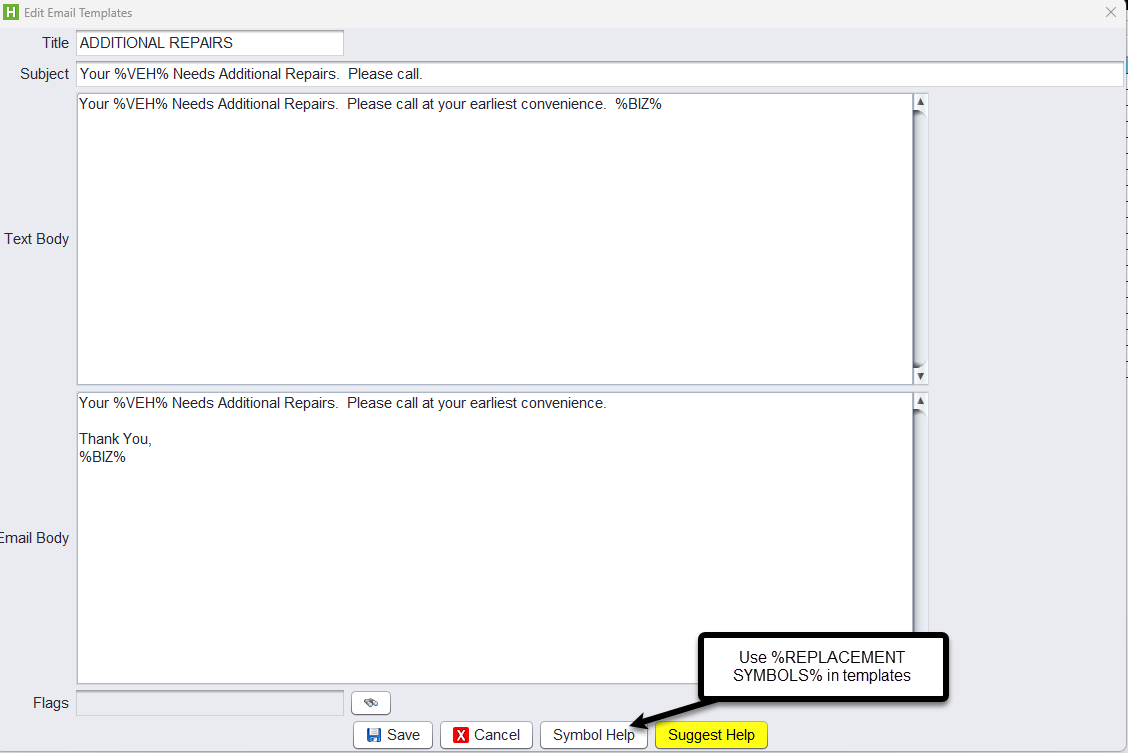
3.) Update the Template Details:
In the edit window, you can update:
-
- Title – Internal name for the template
- Subject – The email subject line customers will see
- Text Body – Plain text version of the email (optional; used in fallback scenarios)
- Email Body – The full HTML message customers receive
- Click SAVE to save your changes
Use %REPLACEMENT SYMBOLS% to insert dynamic system data such as the customer name, workorder number, or vehicle info. Select the Symbol Help button to see available replacement symbols.
Example Use:
Create a template for sending completed workorder summaries, and include symbols like %CUSTOMER_NAME%, %WORKORDER_NUMBER%, and %VEHICLE_YEAR% %VEHICLE_MAKE%.
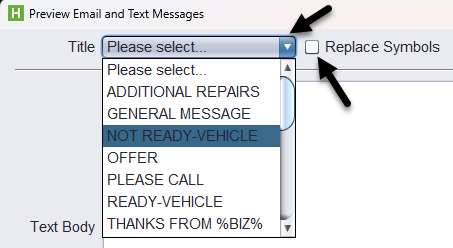
4.) Select the Preview Email Templates to see the updated template.
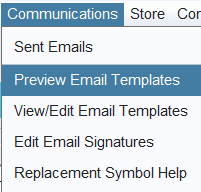
5.) Select the Title of the email template to preview, and select Replace Symbols to see the data populated for that symbol.
Example:

For assistance with Email Setup, please reach out to HITS Tech Support at tech@aasys.com.