
Information on how the Time Clock module functions in HITS, including usage instructions, shared vs. unshared workstation behavior, reporting tools, and data import/export.
⚠️ Important Note: Beta Status
The Time Clock module is currently in beta. While it provides useful functionality for tracking employee time, it is not a full payroll management system. Users should not rely on this module as a substitute for dedicated payroll software. Calculations, reporting, and compliance remain the responsibility of the employer.
Setup & Access
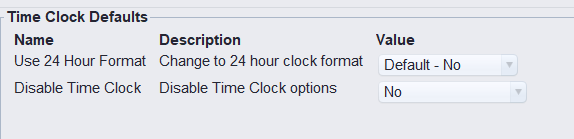
Access to the Time Clock module is controlled by the PN18 permission switch in User Setup and Store View/Edit Default Settings > Time Clock Defaults. If PN18 = 0, the user cannot access the Time Clock.
Users with PN18 = 2, 4, or 5 will have permission to adjust clock-in times while an employee is actively clocked in.
See permissions below: Time Clock Permissions (PN18)
⚠️ Disclaimer: If you choose to use the Time Clock module, each employee must have their own separate login credentials. Shared logins are not supported. Each time entry must be tied to a unique user ID to ensure proper functionality, reporting, and permissions enforcement.
🖥️ Shared vs. Unshared Workstations
HITS supports both Shared and Unshared workstation modes to accommodate different user environments.
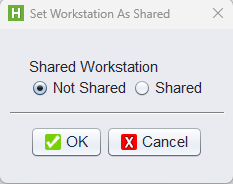
Found under: Views > Admin & Utilities > Workstation > Set Shared Workstation

| Workstation | Behavior |
|---|---|
| Not Shared | Assumes the logged-in user is the active employee. No password is required to clock in/out or edit time records. Best for personal, one-user-per-device setups (e.g., manager’s office). |
| Shared | Requires the employee’s password to perform any clock in/out or manual time change. Prevents unauthorized edits and ensures the correct user is selected on high-traffic or front-counter terminals. |
Time Clock Permissions (PN18)
Access and functionality are controlled by the PN18 switch in User Setup.
| Level | Unshared Workstation | Shared Workstation |
|---|---|---|
| 0 | Cannot access Time Clock | Cannot access Time Clock |
| 1 | Use for own name only; no manual add/edit/delete | Use for own name only; no manual add/edit |
| 2 | Use for own name; can add/edit/delete own entries | Use for own name; can add/edit own entries |
| 3 | View all users; no manual add/edit/delete | Use for own name only; no manual add/edit |
| 4 | View/add/edit/delete records for all users | Use for own name; can add/edit own entries |
| 5 | Same as 4, plus can approve time records | Use for own name; can add/edit own entries Note: Approval must be done in unshared mode |
Clocking In and Out
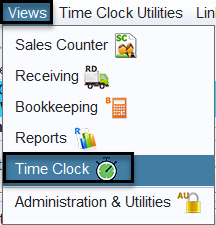
To access the Time Clock Go to Views > Time Clock
On an unshared workstation, the logged-in user appears by default. If level 3 -5 they can access other users login. Simply click the green Clock In or red Clock Out button, and the system records the timestamp. No password is needed, and actions are tied to the active user.
On a shared workstation, the employee must first select their name from the dropdown list. Clicking Clock In or Clock Out prompts for their password to confirm the action. This ensures each entry is securely associated with the correct person.
Clocked time displays in the grid below, showing the date, in/out times, total hours, and whether the entry was edited or approved. Users with appropriate permissions can also manually add, edit, or delete time using the buttons at the bottom.
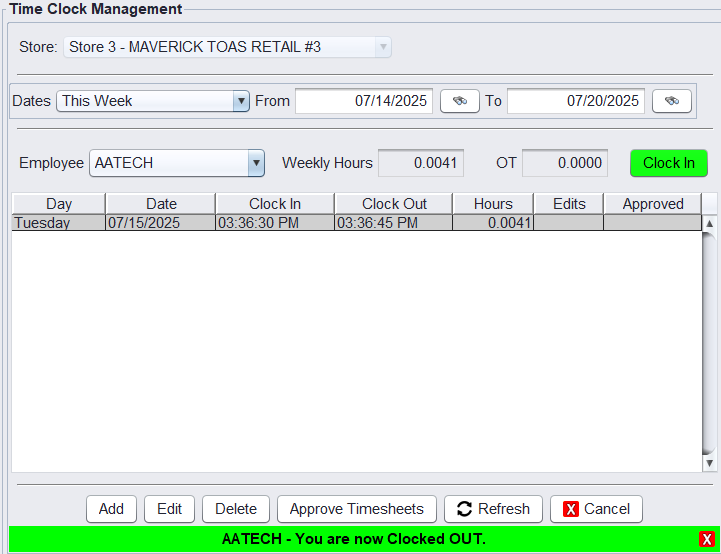
The system blocks overlapping or future-dated entries automatically and calculates total weekly hours and OT as records are added. Users may manually add, edit, or delete entries if their permission level allows it.
Button: Add
Used to manually create a new time entry. When clicked, it opens a window where you can input:
- Employee
- Date
- Clock In time
- Clock Out time
- Reason for manual entry (required)
Available to: Users with PN18 = 2 (own entries) or PN18 = 4/5 (all users). On shared workstations, password confirmation is required.

Button: Edit
Used to adjust the clock-in or clock-out time for an existing record. When clicked, it opens the selected entry in edit mode. You can modify:
- Clock In time
- Clock Out time
- Reason for the change (required)
Once saved, the system logs the edit and shows it in the Edits column with a timestamp and reason.
Available to: Users with PN18 = 2 (own entries) or PN18 = 4/5 (all users). Shared workstations require password entry to proceed.
Button: Delete
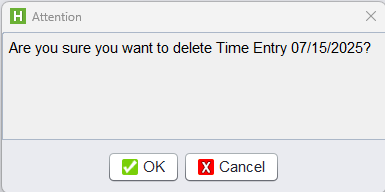
Used to permanently remove an existing time entry from the list. When clicked, the system prompts for confirmation before deleting the selected entry. Once removed, the entry is no longer visible in the time clock grid and cannot be recovered unless manually re-added.
Available to: Users with PN18 = 2 (own entries) or PN18 = 4/5 (all users). If using a shared workstation, the employee’s password must be entered to authorize the deletion.
Approve Timesheets – How It Works
Clicking Approve Timesheets opens the Time Entry Approval window. This view summarizes all employee hours for the selected date range and store.
At the top, you’ll see:
- The store number and name being approved
- The selected date range for the approval session
The table below lists:
- Store number
- Employee name
- Total Week Hours
- Total Overtime (OT) Hours
- A checkbox to mark the employee’s time as Approved
You can select employees individually or use:
- Select All to check all listed names
- Unselect All to clear the checkboxes
After selecting the appropriate records, click the Approve button to save the approval status. Then click Done to exit the approval screen.
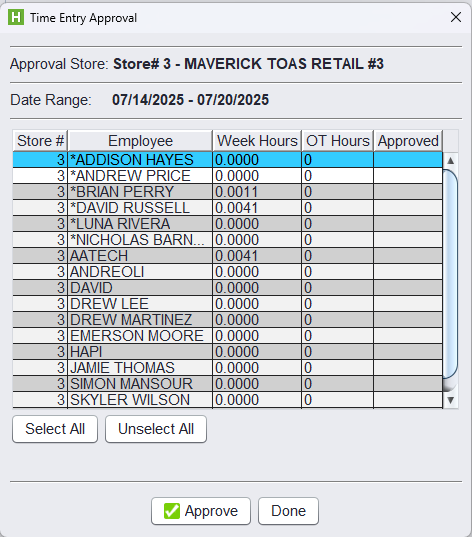
Note: Only users with PN18 = 5 on an unshared workstation can access and use this approval screen. If using a shared terminal, the Approve button will not be functional.
Button: Refresh
The Refresh button reloads the time entry grid based on the selected employee and date range.
Use this after clocking in/out or making manual edits to ensure the view updates with the latest data.
This is especially helpful if:
-
- You’ve added or modified a time entry
- Someone else on the network has made changes
- You’re switching between employees or stores
Button: Cancel
The Cancel button closes the Time Clock screen without saving or applying any new changes.
If you’ve made edits but haven’t clicked Save, those changes will be discarded.
Use this to exit the Time Clock safely if no further action is needed.
Reports and Import features
The Time Clock module provides several reporting and import/export tools to review employee hours, overtime, and technician productivity.
Time Clock Report
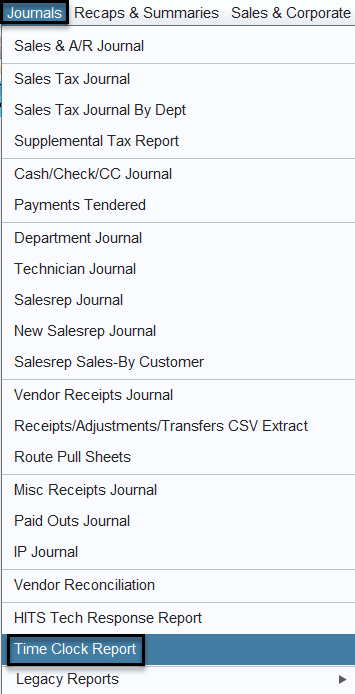
Path: Views > Reports > Journals > Time Clock Report
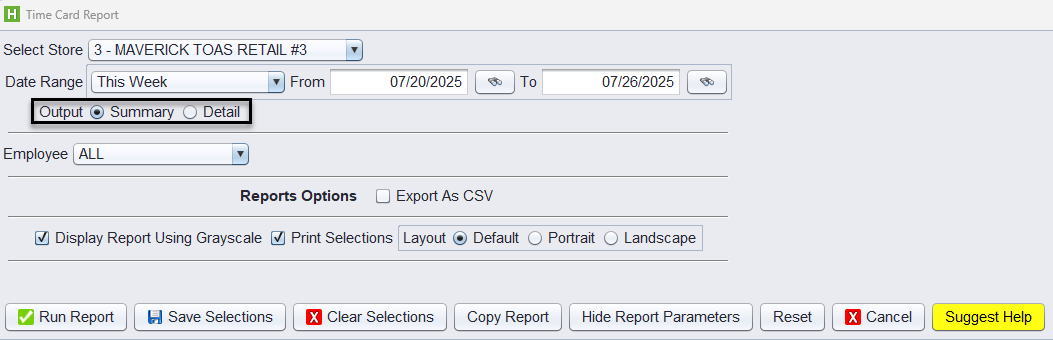
Output:
- Summary View displays total hours and overtime by employee for a selected date range.
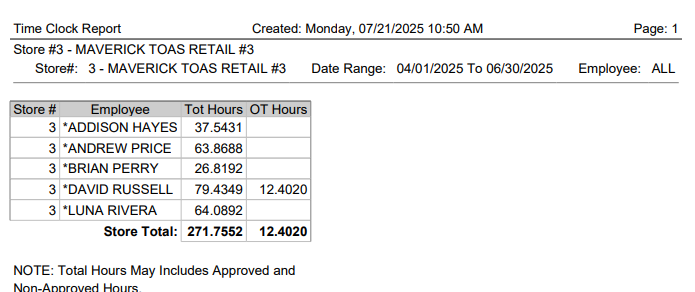
- Detail View provides daily breakdowns, including clock in/out times, number of hours, edits, and approval status.

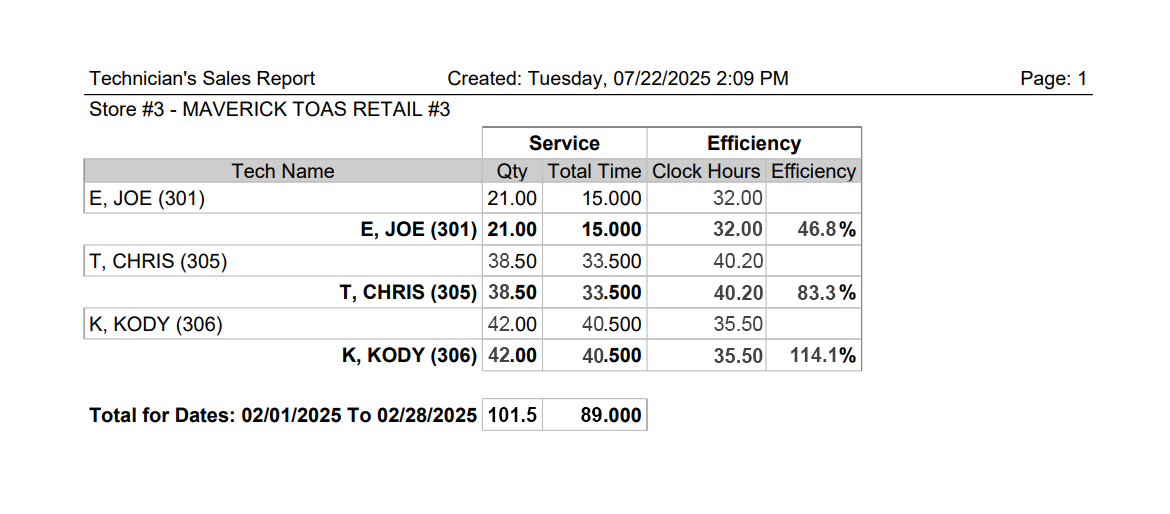
Technician Efficiency Report
To ensure technician efficiency is accurately tracked, each technician must be linked to their corresponding user account. This is done by entering the correct username in the HITS Username field on the Technician Add/Edit screen. See Adding Technicians into the system (setup)
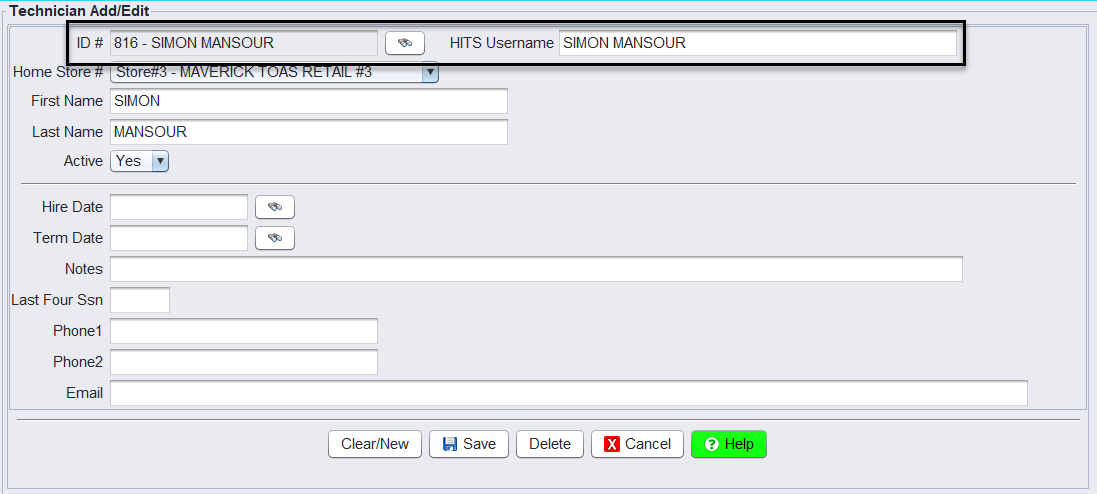
This report calculates technician efficiency automatically: (Quantity × Flag Time) ÷ Hours Worked
Example: 10 jobs × 1.5 hrs = 15 hrs ÷ 12 hrs worked = 125% efficiency
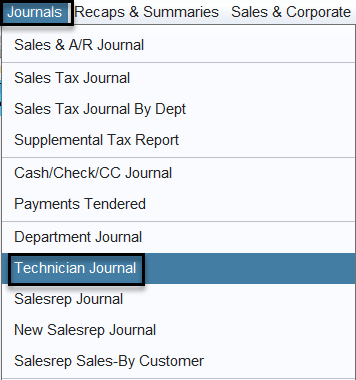
Path: Views > Reports > Journals > Technician Journal
-
Use the Show Efficiency checkbox to compare actual time vs. flagged (billed) time. See Flagging Time
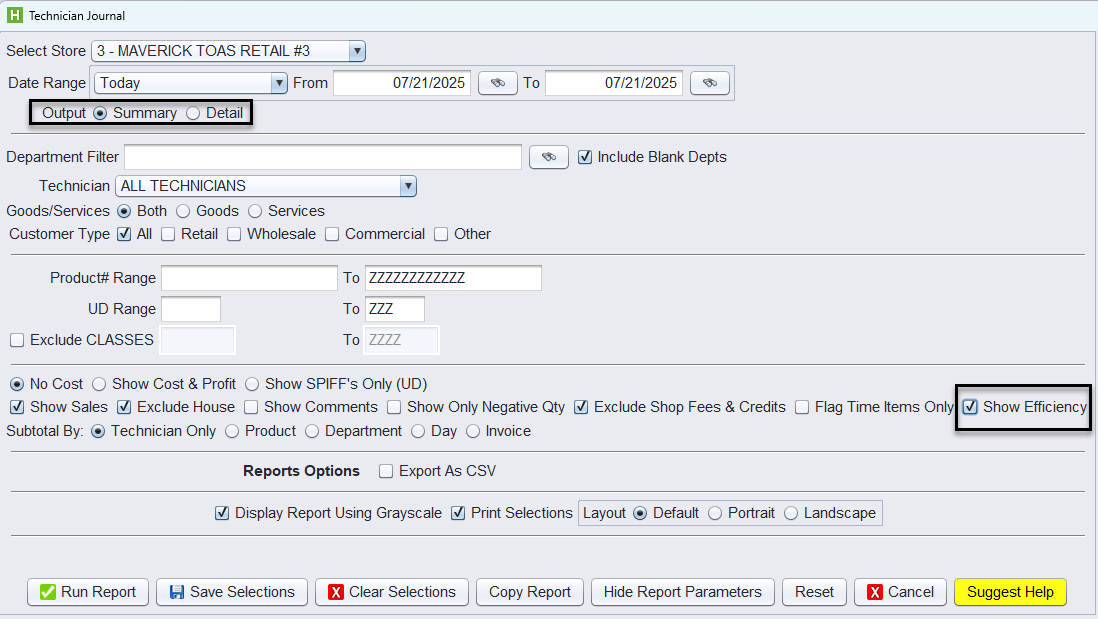
Note: The “Show Efficiency” will only display data when the report display is in Summary View.
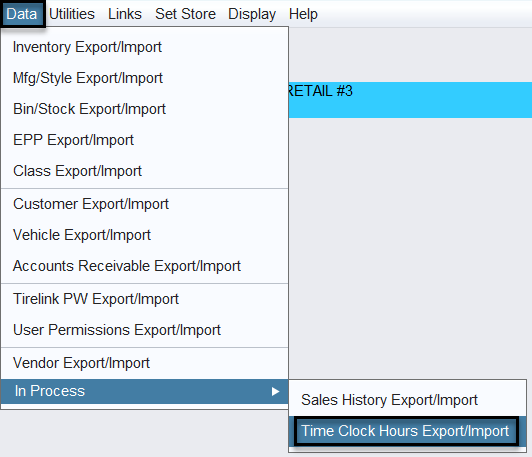
Data > Time Clock Hours Export/Import
Path: Views > Administration & Utilities > Data > Time Clock Hours Export/Import
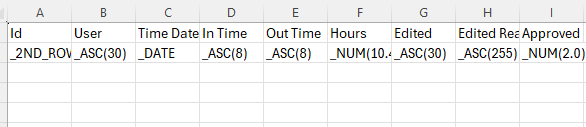
This tool allows bulk import and export of time clock data via CSV.
- Reasons for time edits are display-only and cannot be imported.
- Import is used to add new entries or update existing ones.
- To update an existing record, you must include the record ID (from the export). Use the Download Template Only checkbox to download the headers only.
- To create new records, you must include the employee’s User ID.
- You may enter hours as either a total value or as clock in/out times — the system will calculate accordingly.

For any questions or further assistance, please reach out to HITS Technical Support.