
Users in HITS refers to the username and password that will be used to log in to the system.
Each username can be set with various permissions allowing or restricting access to specific functionality (read more about permission settings).
You can have unlimited usernames in HITS and usernames do not affect subscription cost. Subscription costs are based on how many connections are accessing the system at one time. For example, 20 workstations could connect to the system all using the username “STORE,” which would count for 20 connections.
Users can be specific to an individual person or generic (recommended). Individual usernames are ideal for tracking the actions and responsibilities of each employee. Many businesses will use a generic login (e.g., SHOP) for their front desk or bay workstations, and then provide a separate username for their store manager and/ or owner. Other businesses create a unique username for every employee who will be accessing the system.
Salesrep codes and Technician codes are separate from system usernames and are used to track sales and labor, respectively.
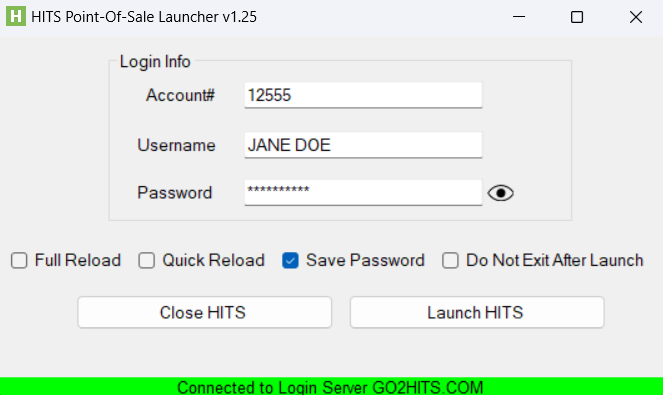
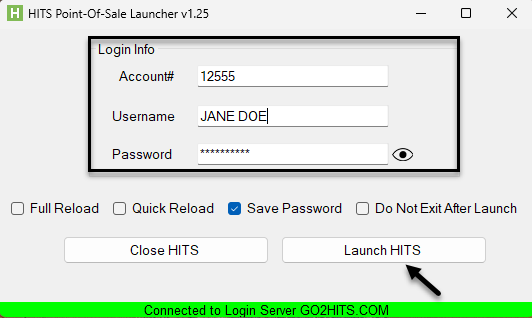
To login to HITS, you will need your Account#, Username, and Password
(The HITS Point-of-Sale launcher icon is installed on your local workstation).
- The Account# is linked to your business and will be the same even if you have multiple locations.
- The Username will determine your permissions in the system. Different users can have different permissions in the system. Usernames can be up to 20 characters. Usernames can be unique to an individual or generic, such as STORE12. Usernames unique to an individual allow for better auditing of actions in the system.
- Create login credentials (password must be 4–5 uppercase letters only). Currently if you forget your password or do not have it saved on your workstation, you will need to contact HITS Support to reset it for you.
Note: These same credentials also provide access to HITS Digital at www.gohitsdigital.com if the user has permission flag HDN1=1.
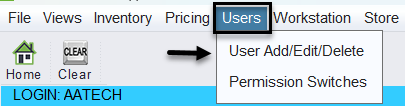
Add/Edit/Delete Users
Go to: Views>Administration & Utilities>User Add/Edit/Delete
From this screen you can:
- Add, Edit, or Delete users
- Reset user passwords
- Copy permissions from existing users
- Assign or apply permission template to a specified user
- Enter optional email details (Email From/Email Address)
Only users with admin permissions can access this screen.
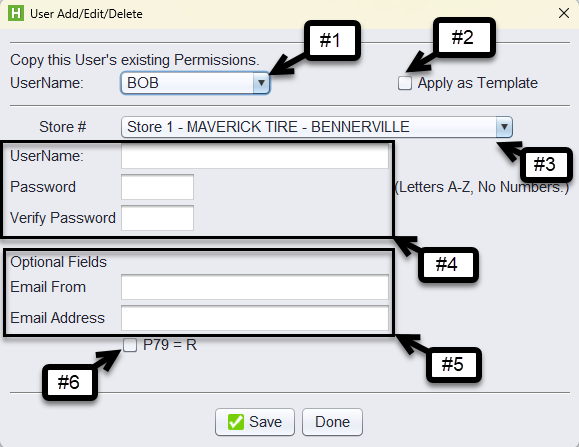
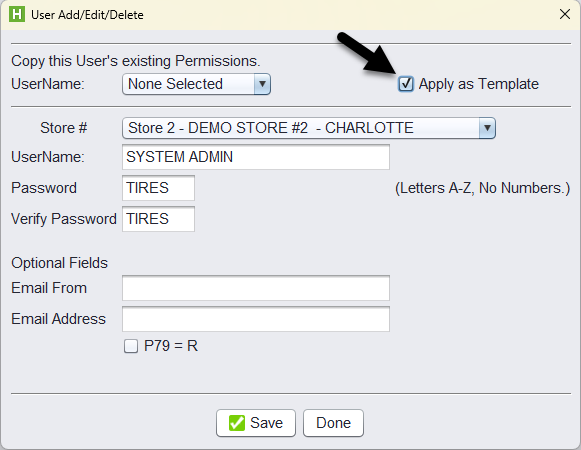
Add/Edit Screen Options Explained
1.) Copy this User’s existing permissions: Select an existing user whose permissions you want to replicate.
2.) Apply as Template: Use this checkbox to assign the new user to a permission template (see more on templates below).
3.) Store #: Assign the user to a store location.
4.) Username/Password/Verify Password: Create the login credentials (password must be 4-5 uppercase letters only).
5.) Email From/Email Address: Optional fields used for outbound communications from the user.
6.) P79 = R: Grants the user permission to register new POS workstations (see Permission Switches for more explanation).
When adding or editing a user, you will be able to copy permissions from an existing user in the system.
Of course, if you need assistance with setting up users or their permissions, HITS Support is always available to help.
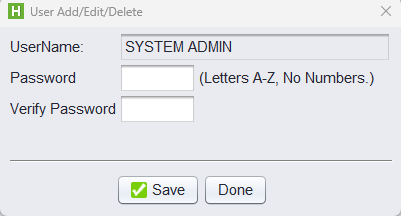
Reset Password:
- Open User Add/Edit/Delete
- Select the user
- Click Reset Password
- Enter the new password (must be 4–5 uppercase letters, no numbers)
- Click Save
Deleting a User
To delete a user, please email HITS Support at tech@aasys.com for assistance.
Using Permission Templates
Templates allow you to manage multiple users’ permissions more efficiently.
-
When adding or editing a user, you can check the Apply as Template box to assign that user to a permission template.
-
Templates are based on the permissions of the user selected in the “Copy this User’s existing Permissions” dropdown.
-
If changes are made to that template user, you can batch update all users tied to the same template.
Create a Template User
A template user in HITS is simply a regular user account that serves as a permission model for other users. Once created, any changes to the template user’s permissions can be pushed out to other users linked to that template.
To create a template user:
1.) Go to: Views > Admin & Utilities > User > User Add/Edit/Delete
2.) Click Add to create a new user.
3.) Enter a Username (e.g., STORE MGR TEMPLATE, ACCOUNTANT TEMPLATE) and Password.
-
-
-
The password can be temporary — this user will not need to log in.
-
-
4.) Select the Store # and complete any other required fields.
5.) Check the box to Apply as Template.
6.) Configure the user’s permissions as needed — these will act as the baseline for users assigned to this template.
7.) Click Save.
You can now assign this user as a template using the Permission Switches > Template screen.
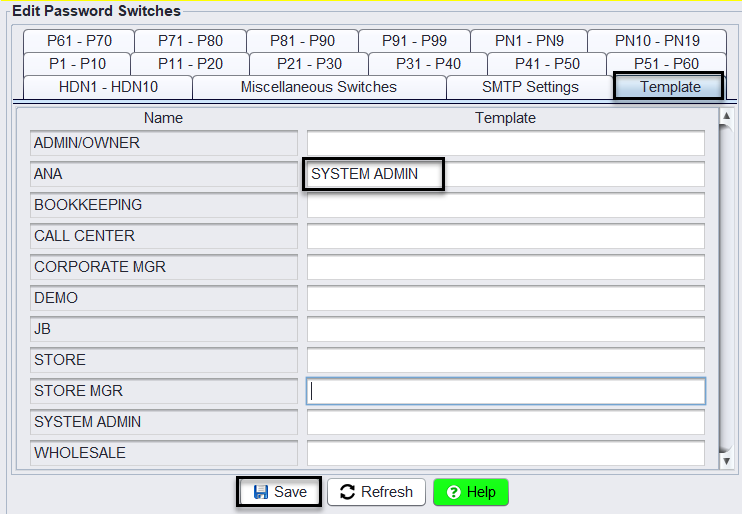
Assign a User to a Template (Permission Switches)
Once you’ve created template users (with desired permissions), you can assign other usernames to follow those templates. This allows for centralized updates across multiple users with similar roles.
To assign a user to a template:
1.) Go to: Views > Admin & Utilities > User > Permission Switches
2.) Navigate to the Template tab.
3.) In the left-hand column (Name), find the username you want to assign to a template.
4.) In the right-hand column (Template), type the name of the user whose permissions will act as the template.
-
-
-
For example, if the user “STORE MGR” should follow the same permissions as “SYSTEM ADMIN,” type
SYSTEM ADMINin the Template field.
-
-
5.) Click Save at the bottom of the screen to apply the changes.
Apply Template Changes
1.) Go to User Add/Edit/Delete
2.) Click Template Update
3.) Choose a specific template or select ALL
4.) Click Template Update again to apply the changes


Best Practice:
Create dedicated “template” users for common roles (e.g., Store Manager, Sales Rep, Accountant) and use these templates to standardize permission settings across your business.